1968 F-100 Ranger
Moderator: FORDification

-
greenbank
- New Member

- Posts: 160
- Joined: Tue Feb 08, 2005 8:42 pm
- Location: Washington, Whidbey Island
-
dcbullet
- Blue Oval Fan

- Posts: 698
- Joined: Fri Apr 01, 2005 6:28 pm
- Location: Oceanside, CA
re: 1968 F-100 Ranger - Picture Heavy (3-25-2006 update)
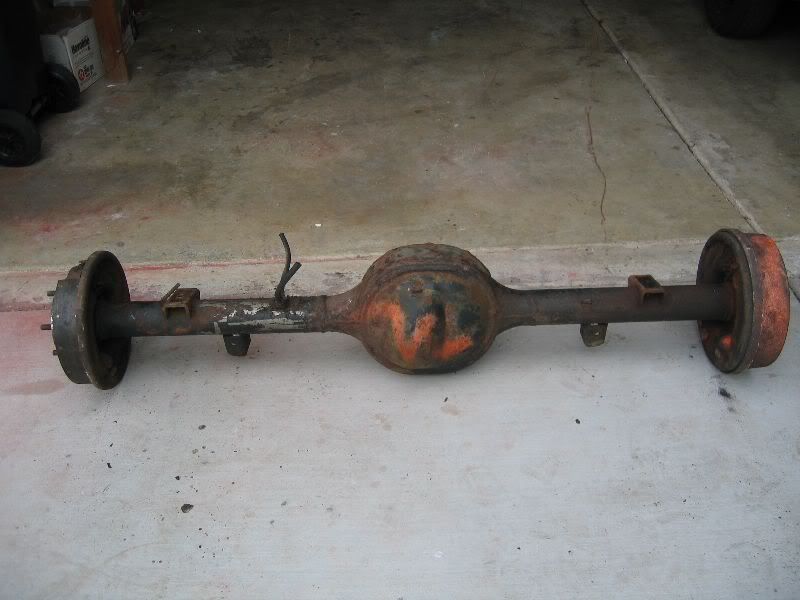
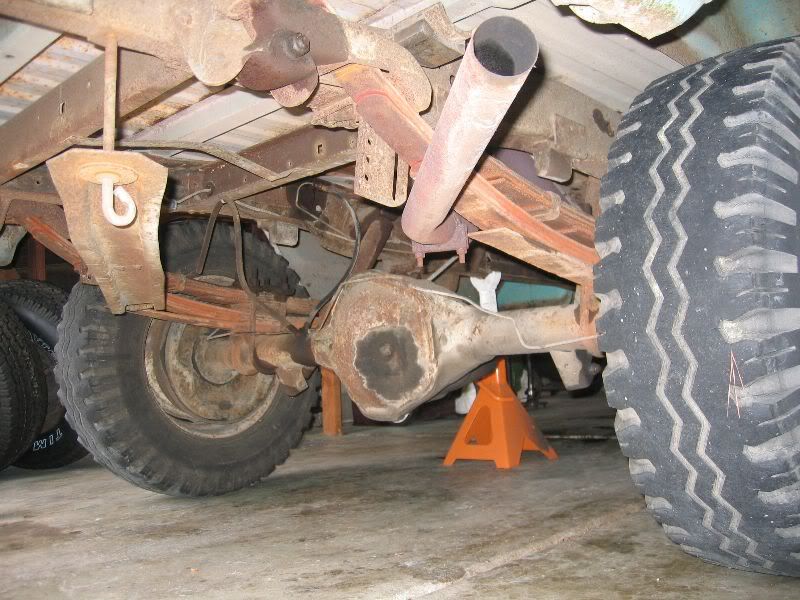
OK, the next project that I tackled was switching out the rear axle. I have an F-100 and the previous owner had switched in a Dana 60 30 years ago because he had a camper on the truck. Now, I realize that the Dana 60 is a super tough rear end, but I just use my truck for bringing home stuff from Home Depot or moving a chest of drawers, that sort of thing. I don't tow anything or carry huge loads. So, for me a least, the D60 was overkill. I didn't like having 8 lug in back and 5 in front. I also didn't like the 16.5 inch wheels. The tire on their gave the truck a "jacked up" look that I didn't want.
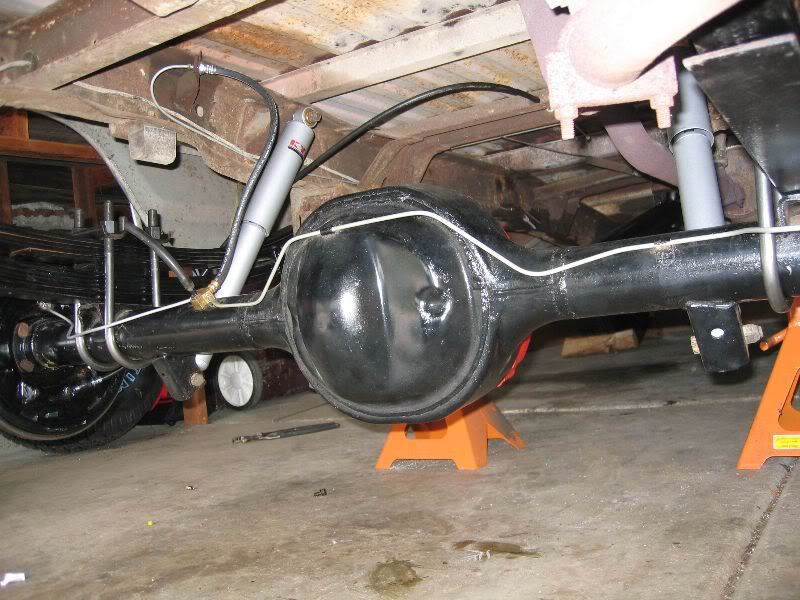
I found a 9 inch rear end at the local pic-n-pull during one of their 1/2 price weekends, so it only cost about $75. I also decided to replace all the bearings and bushings (axle and leaf spring) and rebuild the brakes while I was at it. I don't really have an overall budget for my truck, more a monthly budget. I'll tell you, all those bearing and bushings, brakes parts, new U-bolts and particularly the machine shop time (for pressing off and on the bearings and bushings) really adds up. I don't keep receipts, and I did this project over several months, but I estimate all in I'm up to $650 - $700. That is with new everything except the springs and the axle itself. New shocks, new drums, etc, etc. etc.
As far as the difficulty of the project, I would say it's not too hard. This was the first time I had done this and I ran into the following problems:
1. I couldn't separate the two driveshafts. After years and years of no lubrication, they had fused together at the splined shaft. I ended up taking them to a machine shop and they separated them for $35
2. My parking brake cables that I bought are not long enough. I still haven't resolved this but plan to use extensions that I'll either buy from someone here or get from inlinetube.
Other than that it was just a lot of work. Removing the ubolt nuts took a long time and a lot of strength.
I should add that many people here helped me over the last few months and this website was invaluable.
On to the pictures!
Here is the 9 Inch I got from the junkyard.
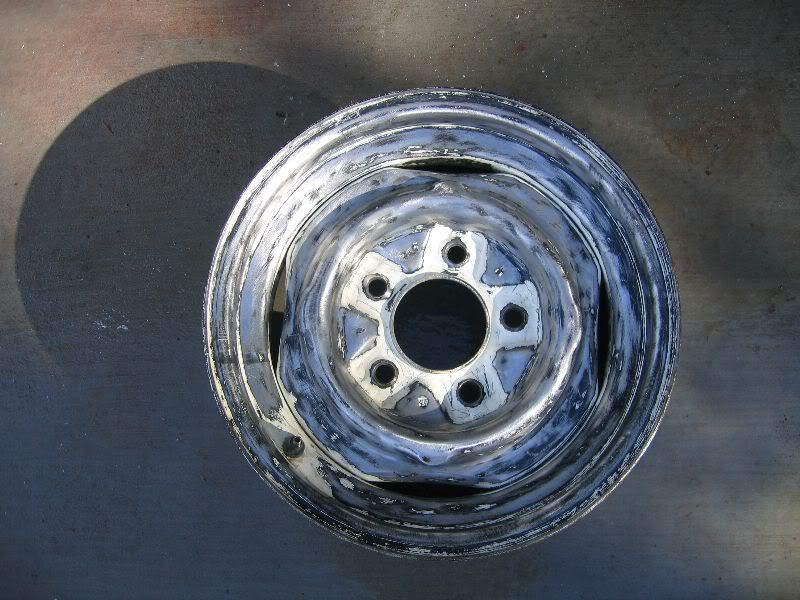
Lots of sanding with the paint and rust removing wheel:
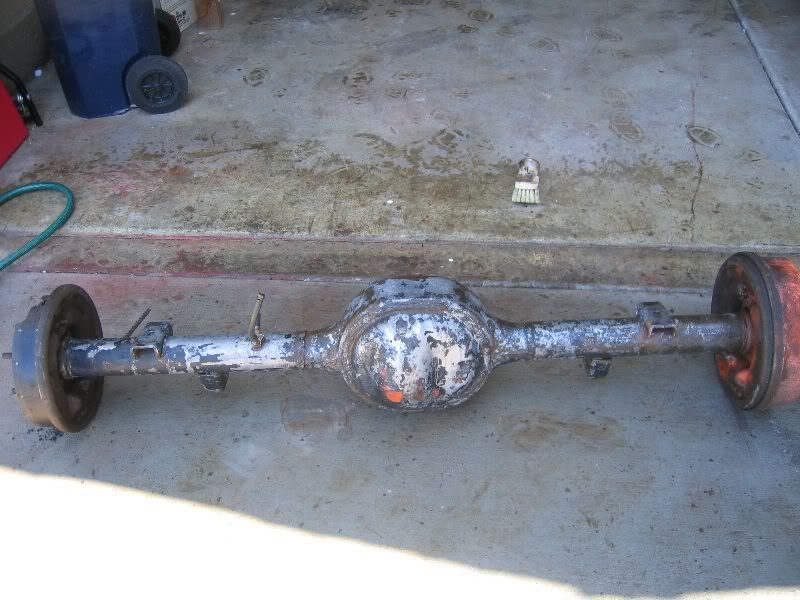
Done!
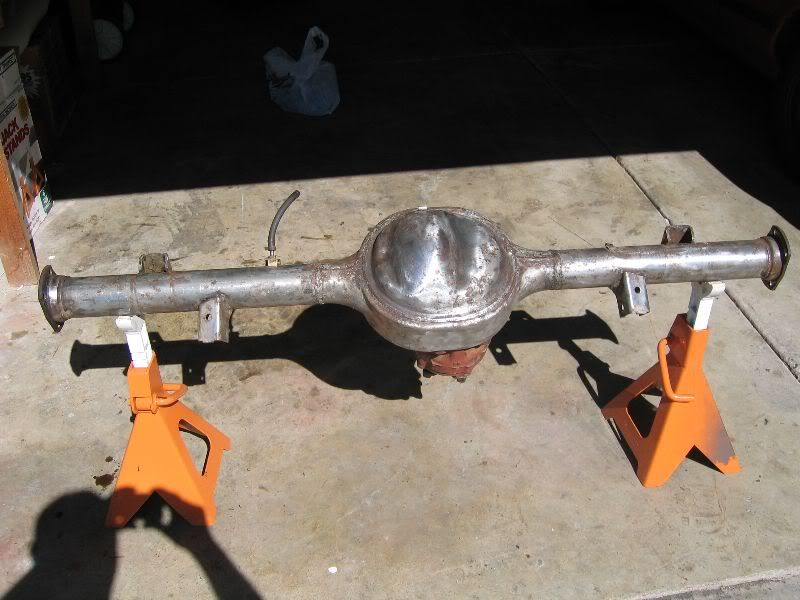
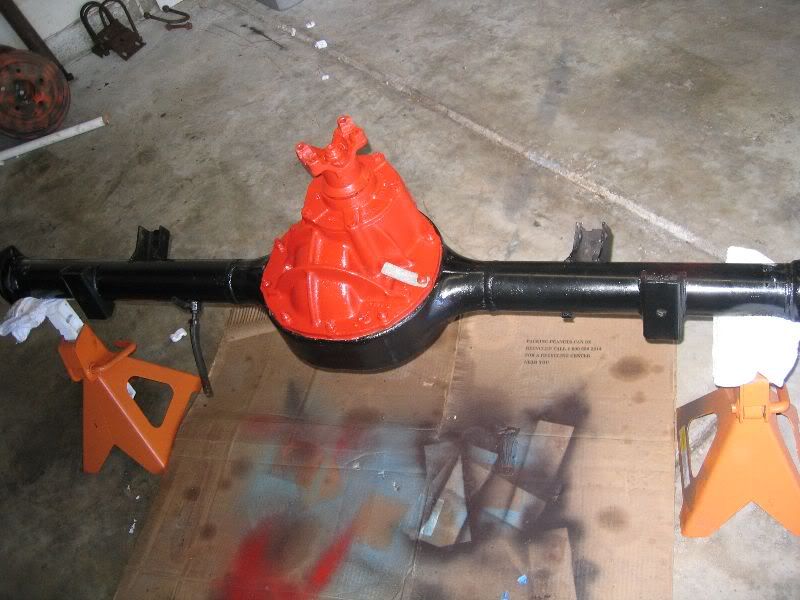
Painted
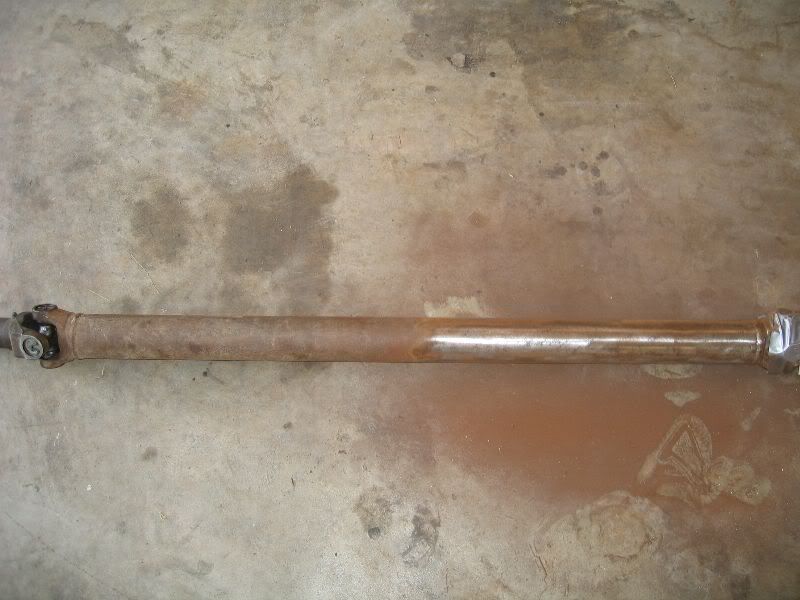
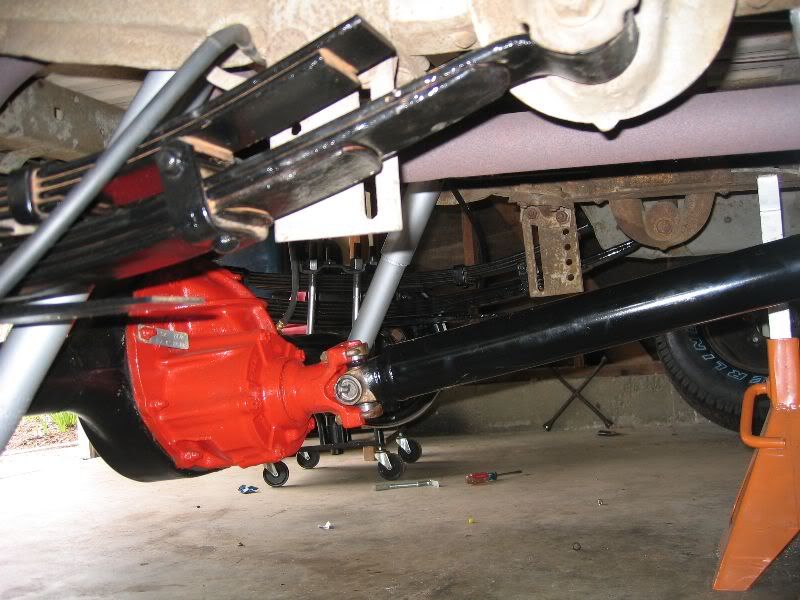
I learned that I would need a different driveshaft because the D60 driveshaft is shorter. I bought one of Keith's:
Stripped
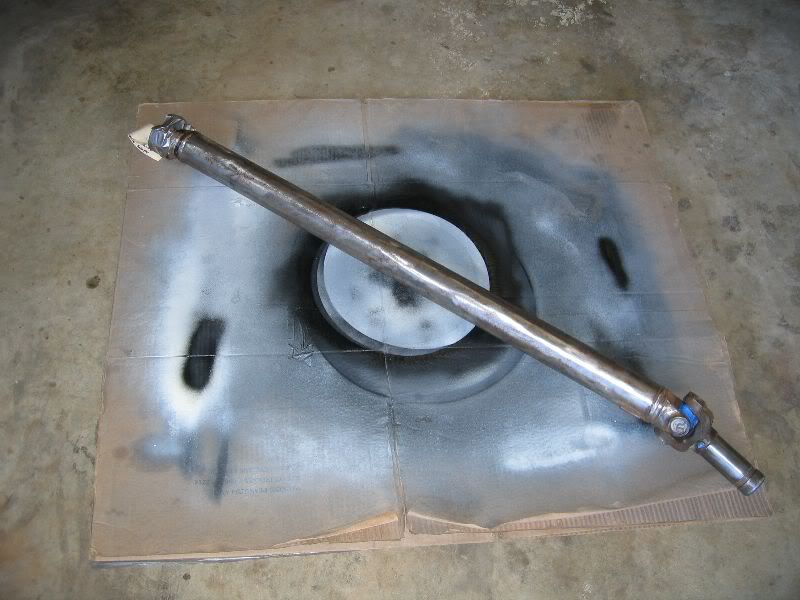
All painted up and shown next to the D60 driveshaft, for reference.

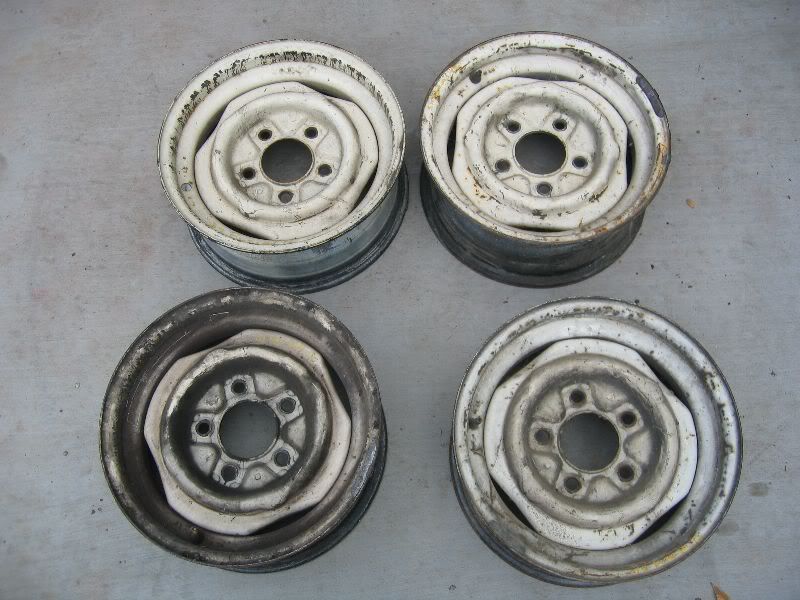
I also bought some wheels from a junkyard.
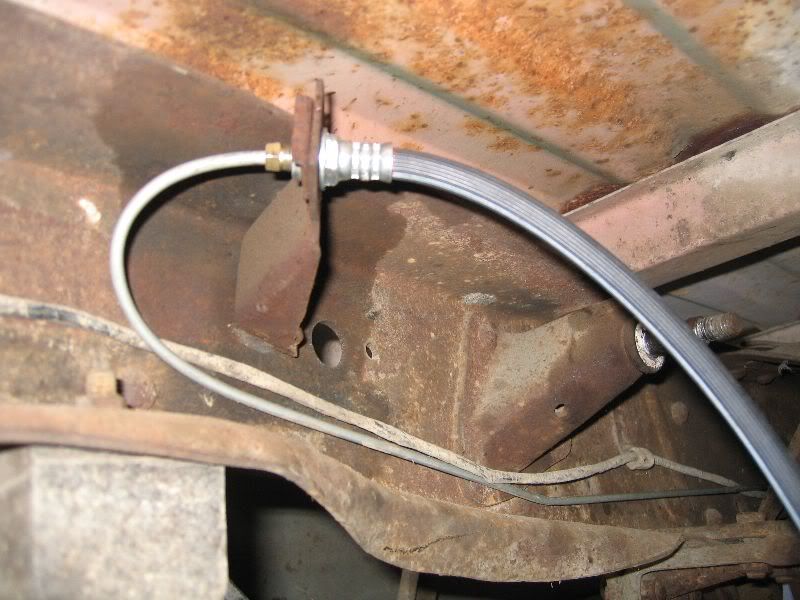
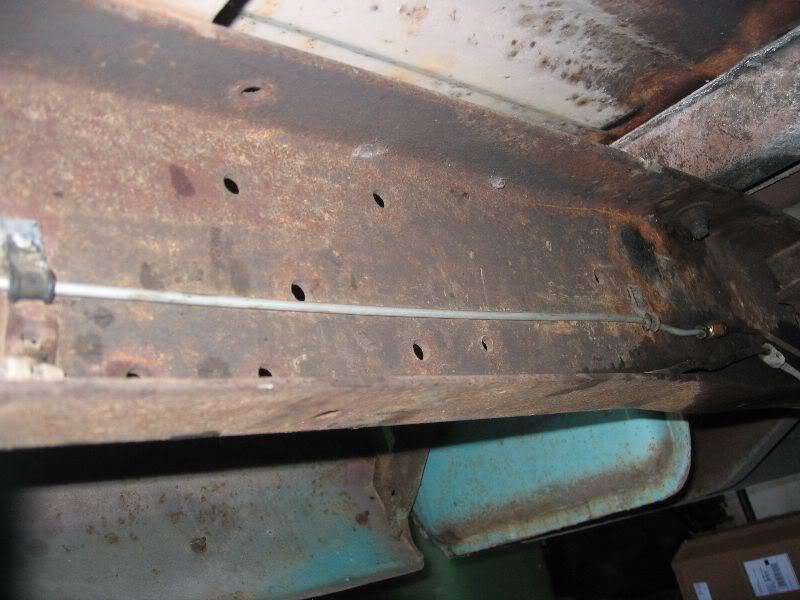
I could not remove the brake hose without stripping the fitting so I replaced the brake line back to the center connector. I think it looks pretty good.
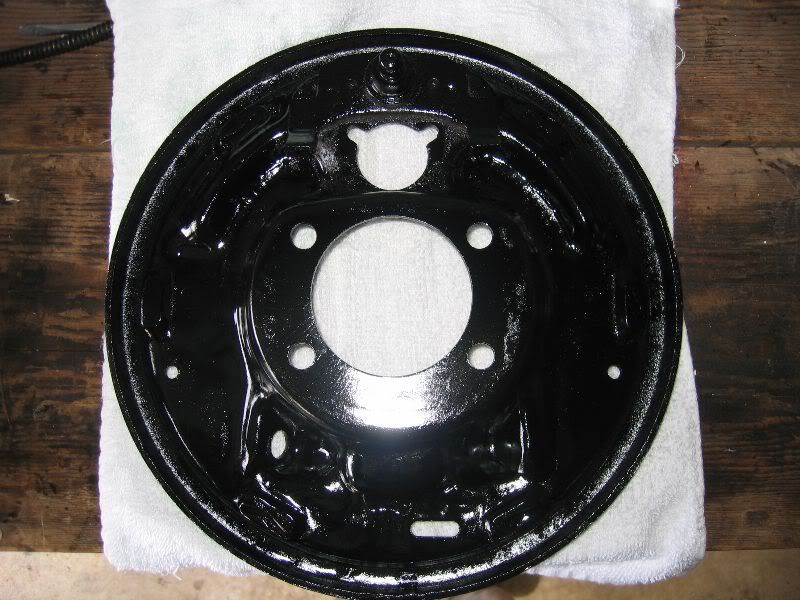
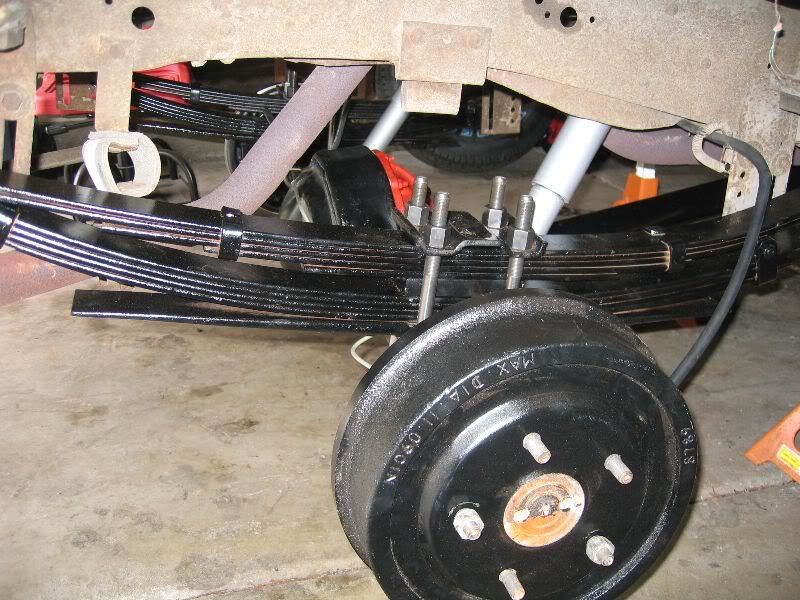
Here is the brake rebuild
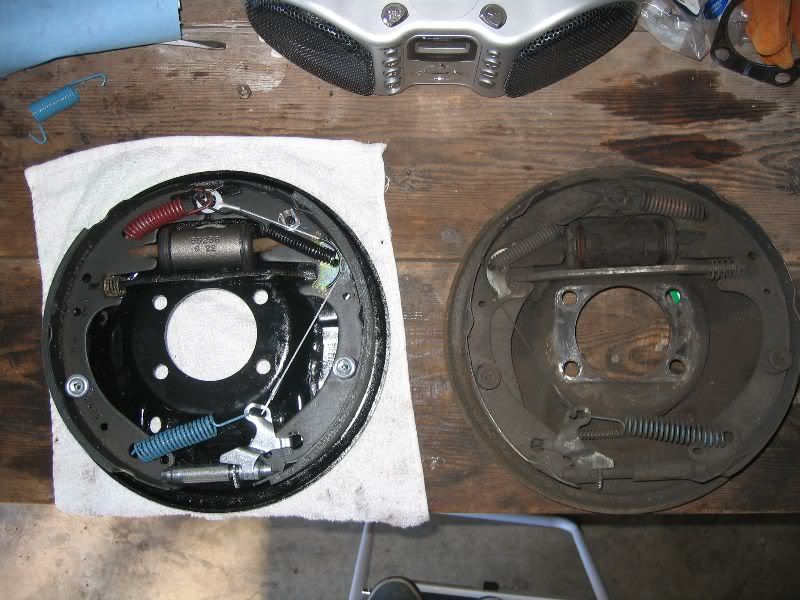
A "before and after" shot
Here is the finished product:
Before with the D60
And after with the F 9Inch.
After reviewing some of my reference photos, I realized that I have the parking brake cable routed incorrectly. I will fix that when I get the extensions.
Last but not least, here are the before and after shots of my truck:
BEFORE:
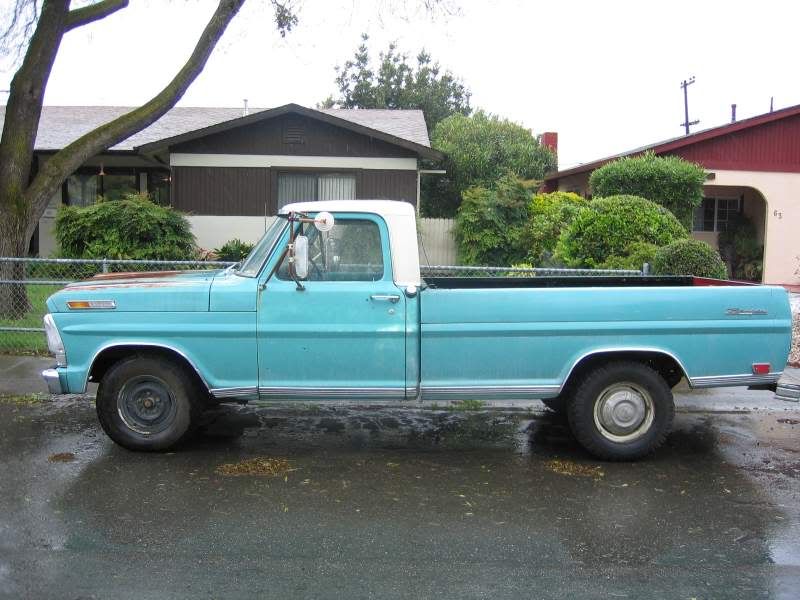
AFTER
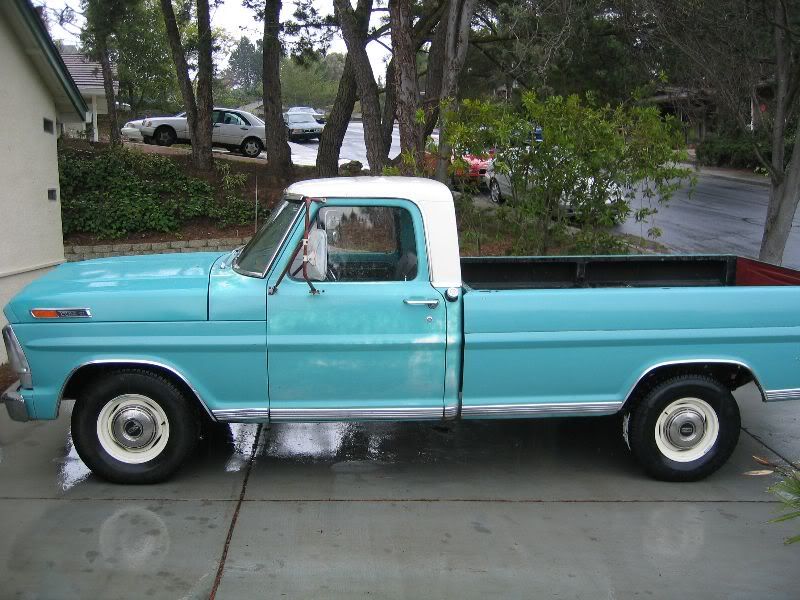
It might be hard to tell from the pictures but I really didn't like those big ol' tires that were on there before. I'm going for a very stock look and I'm really pleased with the results.
As you can tell, I'm not doing a frame off restoration, so I haven't touched the frame. I'm replacing all the deteriorated parts and just cleaning stuff up so it's no covered with 30 years of dirt. I hope to have a decent looking driver when I'm done.
Let me know what you think.
I found a 9 inch rear end at the local pic-n-pull during one of their 1/2 price weekends, so it only cost about $75. I also decided to replace all the bearings and bushings (axle and leaf spring) and rebuild the brakes while I was at it. I don't really have an overall budget for my truck, more a monthly budget. I'll tell you, all those bearing and bushings, brakes parts, new U-bolts and particularly the machine shop time (for pressing off and on the bearings and bushings) really adds up. I don't keep receipts, and I did this project over several months, but I estimate all in I'm up to $650 - $700. That is with new everything except the springs and the axle itself. New shocks, new drums, etc, etc. etc.
As far as the difficulty of the project, I would say it's not too hard. This was the first time I had done this and I ran into the following problems:
1. I couldn't separate the two driveshafts. After years and years of no lubrication, they had fused together at the splined shaft. I ended up taking them to a machine shop and they separated them for $35
2. My parking brake cables that I bought are not long enough. I still haven't resolved this but plan to use extensions that I'll either buy from someone here or get from inlinetube.
Other than that it was just a lot of work. Removing the ubolt nuts took a long time and a lot of strength.
I should add that many people here helped me over the last few months and this website was invaluable.
On to the pictures!
Here is the 9 Inch I got from the junkyard.
Lots of sanding with the paint and rust removing wheel:
Done!
Painted
I learned that I would need a different driveshaft because the D60 driveshaft is shorter. I bought one of Keith's:
Stripped
All painted up and shown next to the D60 driveshaft, for reference.
I also bought some wheels from a junkyard.
I could not remove the brake hose without stripping the fitting so I replaced the brake line back to the center connector. I think it looks pretty good.
Here is the brake rebuild
A "before and after" shot
Here is the finished product:
Before with the D60
And after with the F 9Inch.
After reviewing some of my reference photos, I realized that I have the parking brake cable routed incorrectly. I will fix that when I get the extensions.
Last but not least, here are the before and after shots of my truck:
BEFORE:
AFTER
It might be hard to tell from the pictures but I really didn't like those big ol' tires that were on there before. I'm going for a very stock look and I'm really pleased with the results.
As you can tell, I'm not doing a frame off restoration, so I haven't touched the frame. I'm replacing all the deteriorated parts and just cleaning stuff up so it's no covered with 30 years of dirt. I hope to have a decent looking driver when I'm done.
Let me know what you think.
Last edited by dcbullet on Sun Apr 02, 2006 9:41 pm, edited 1 time in total.

-
jhannahokla
- New Member
- Posts: 67
- Joined: Wed Dec 28, 2005 9:38 pm
- Location: Oklahoma, Henryetta
re: 1968 F-100 Ranger - Picture Heavy (4-2-2006 update)
the hole truck looks alot better good luck with your future projects
-
trukcrazy

- Blue Oval Fanatic

- Posts: 905
- Joined: Sat Apr 02, 2005 8:55 am
- Location: Gulf Breeze, Florida, USA
re: 1968 F-100 Ranger - Picture Heavy (4-2-2006 update)
Very nice dc, I think it is coming right along. The new paint and rims really make a difference. Good "mod"  .
.
John, #424
1967 F250 crewcab x 2.
2010 Dodge Ram 1500 Sport Quadcab
2008 Challenger SRT8
1967 F250 crewcab x 2.
2010 Dodge Ram 1500 Sport Quadcab
2008 Challenger SRT8
-
boots

- Preferred User

- Posts: 411
- Joined: Sat May 21, 2005 5:13 pm
- Location: Illinois
re: 1968 F-100 Ranger - Picture Heavy (4-2-2006 update)
nice work man!!! When I pull my 9" out to put locker and gears in it Im going to paint it just like you did. 
Ethan
67 f100 - 4"lift - cut fenders - 36 TSL's
390/3spd/9"
68 f250 - 390/np435
Raised d24
'79 dana 60 front
welded 60 rear
buildup in progress
http://www.fordification.com/forum/view ... 835#136835
69 f100- Parts truck
67 f100 - 4"lift - cut fenders - 36 TSL's
390/3spd/9"
68 f250 - 390/np435
Raised d24
'79 dana 60 front
welded 60 rear
buildup in progress
http://www.fordification.com/forum/view ... 835#136835
69 f100- Parts truck
-
dcbullet
- Blue Oval Fan
- Posts: 698
- Joined: Fri Apr 01, 2005 6:28 pm
- Location: Oceanside, CA
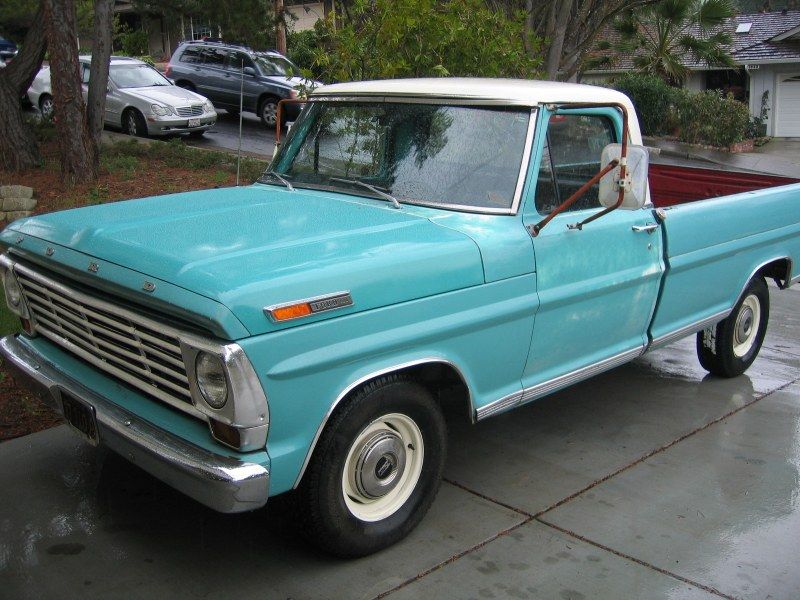
Just a quick update. I replaced my rusty old mirrors with a set of stainless steal mirrors I purchased off ebay. I had orginally wanted to put a set of the small car mirrors on, but I decided that since I had all the holes already for these I would just go ahead with the camper mirrors.
I think it makes a big improvement in the look of the truck.
You can see the "before" pics just a few posts up.
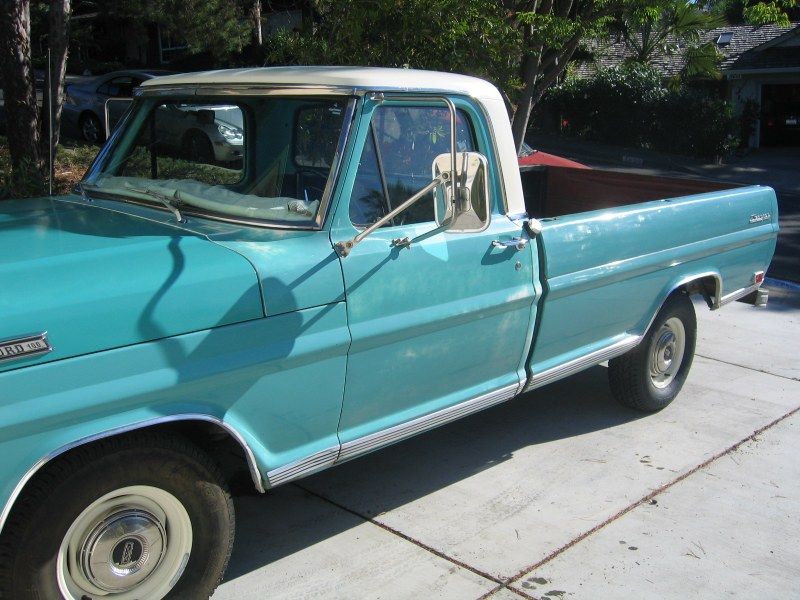
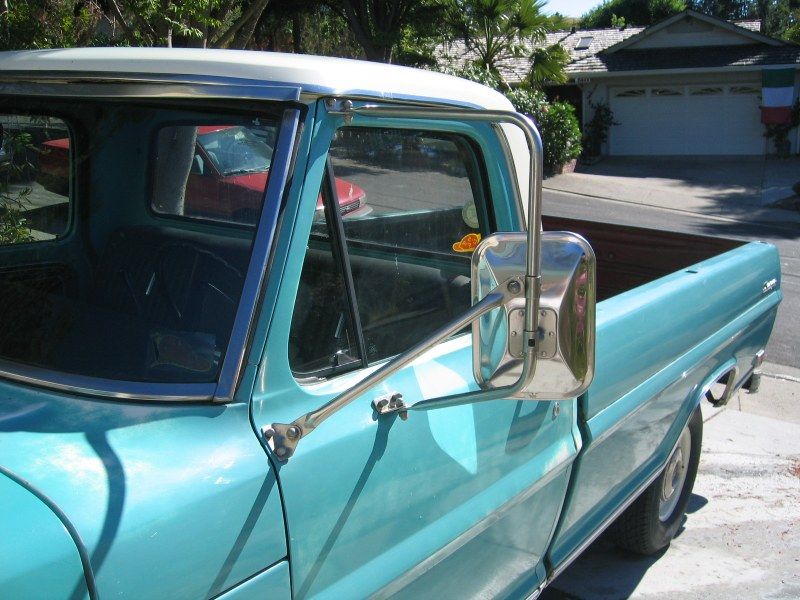
I think it makes a big improvement in the look of the truck.
You can see the "before" pics just a few posts up.
-
GT-Racer

- Preferred User
- Posts: 417
- Joined: Thu Jul 22, 2004 6:33 pm
- Location: West Virginia, Parkersburg
re: 1968 F-100 Ranger - Picture Heavy (7-1-2006 update)
Nice job. Quite an improvement.
'67 F100 2wd shortbed - Beginning restoration.
351w, 5-speed, 3:70 gears (someday)
Drivin' a Chevy is Kinda Like wipin' before you poop, it just don't make no sense....
351w, 5-speed, 3:70 gears (someday)
Drivin' a Chevy is Kinda Like wipin' before you poop, it just don't make no sense....
-
layedout72
- Blue Oval Guru

- Posts: 1280
- Joined: Fri Apr 21, 2006 5:11 pm
- Location: Mississippi, Hattiesburg
-
Sharkdance

- Preferred User
- Posts: 488
- Joined: Sun Jul 31, 2005 11:33 pm
- Location: Florida, Jacksonville
re: 1968 F-100 Ranger - Picture Heavy (7-1-2006 update)
That truck is looking Fantastic!
I realise the time and work you are putting into it and man I gotta tell ya. Your doin it right!
Great job dude. Keep it up
I realise the time and work you are putting into it and man I gotta tell ya. Your doin it right!
Great job dude. Keep it up
Sharkdance
70 F250 2WD 360/C6

70 F250 2WD 360/C6
-
trukcrazy
- Blue Oval Fanatic
- Posts: 905
- Joined: Sat Apr 02, 2005 8:55 am
- Location: Gulf Breeze, Florida, USA
re: 1968 F-100 Ranger - Picture Heavy (7-1-2006 update)
You guys are making it look soooooooo........ easy. I cannot get over the amount of work all of you are getting done on your trucks. 
John, #424
1967 F250 crewcab x 2.
2010 Dodge Ram 1500 Sport Quadcab
2008 Challenger SRT8
1967 F250 crewcab x 2.
2010 Dodge Ram 1500 Sport Quadcab
2008 Challenger SRT8
-
dablack00

- Blue Oval Fan
- Posts: 695
- Joined: Wed Jan 12, 2005 7:32 am
- Location: Texas, Lufkin
re: 1968 F-100 Ranger - Picture Heavy (7-1-2006 update)
Wow, the mirrors and wheels/tires make a huge difference. Truck is really starting to come together.
Austin
Austin
-
dcbullet
- Blue Oval Fan
- Posts: 698
- Joined: Fri Apr 01, 2005 6:28 pm
- Location: Oceanside, CA
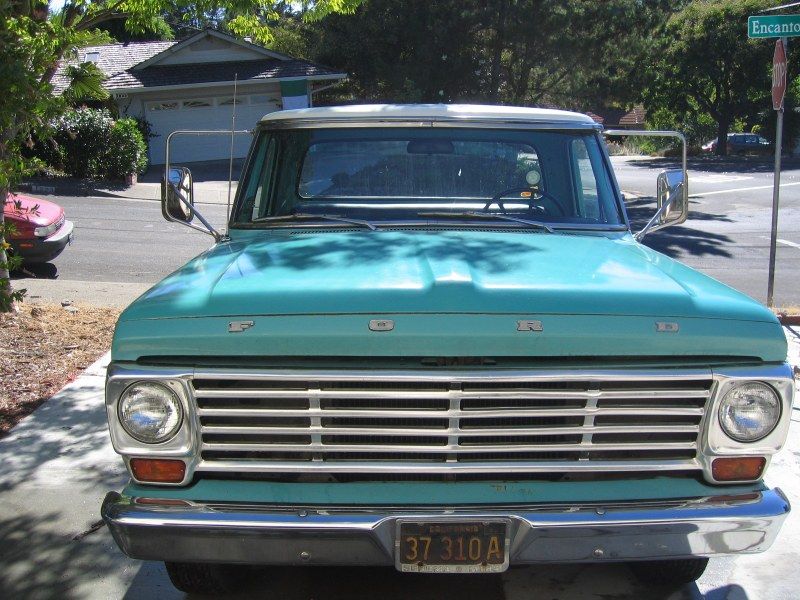
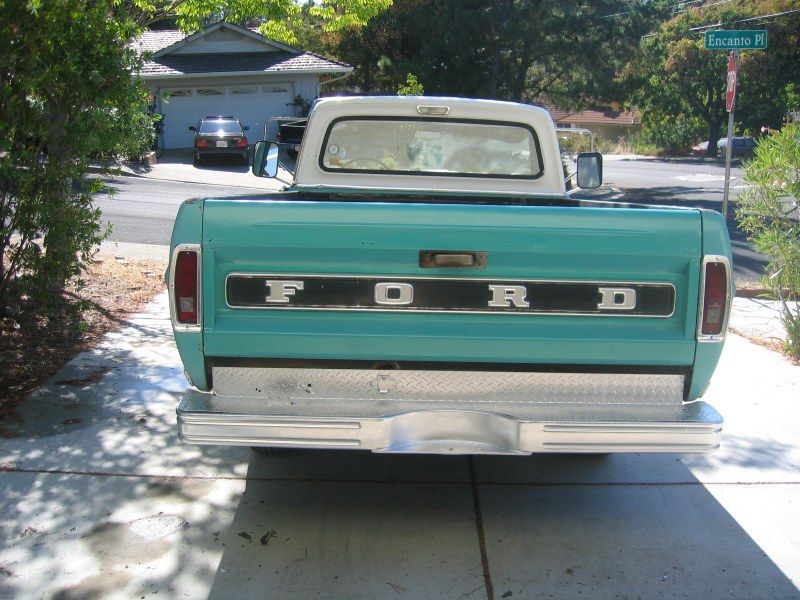
Just a quick update here. I haven't yet decided whether to replace the bumper with a step or sport bumper, so in the meantime I decided to improve the look of the existing bumper. I used a 3M paint and rust remover pad to remove any flaky rust and chrome. I used Krylon Rust Tough enamel in Aluminum color.
I think it turned out pretty good. I still want to get a chrome bumper at some point because this one is bent down, which is hard to see from this angle.
BEFORE:
AFTER:
I think it turned out pretty good. I still want to get a chrome bumper at some point because this one is bent down, which is hard to see from this angle.
BEFORE:
AFTER: