Good afternoon 70_F100, Jamie, Robert, and Fordnatic, thanks for your great replies!
70_F100 wrote:Robroy, it looks like you're coming along well!!!

Thanks for the encouraging words!
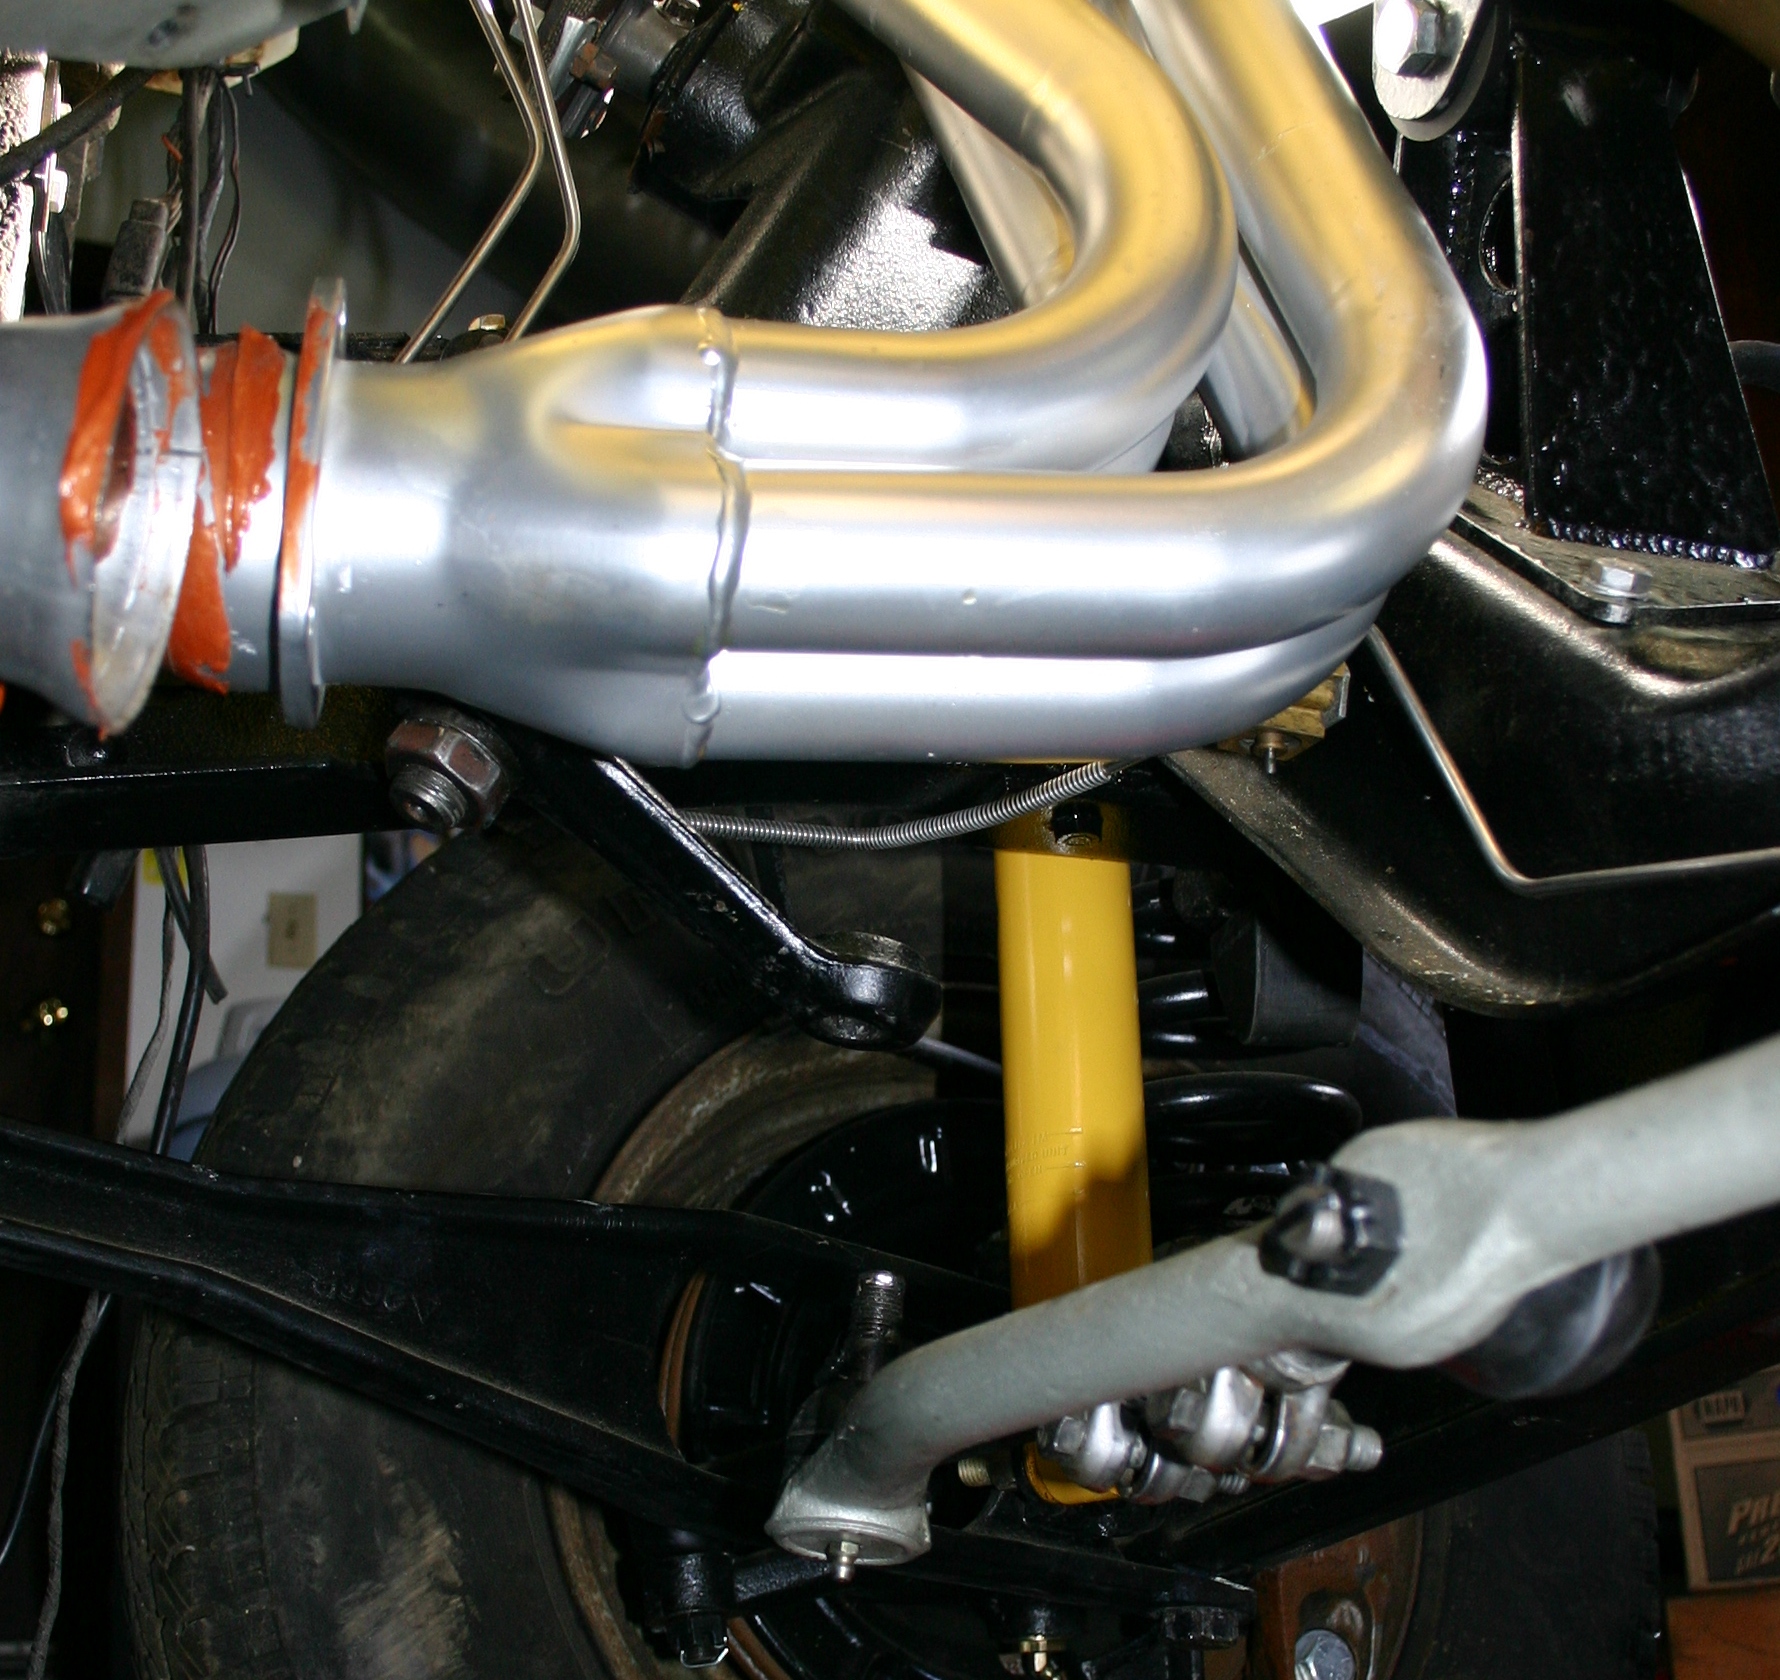
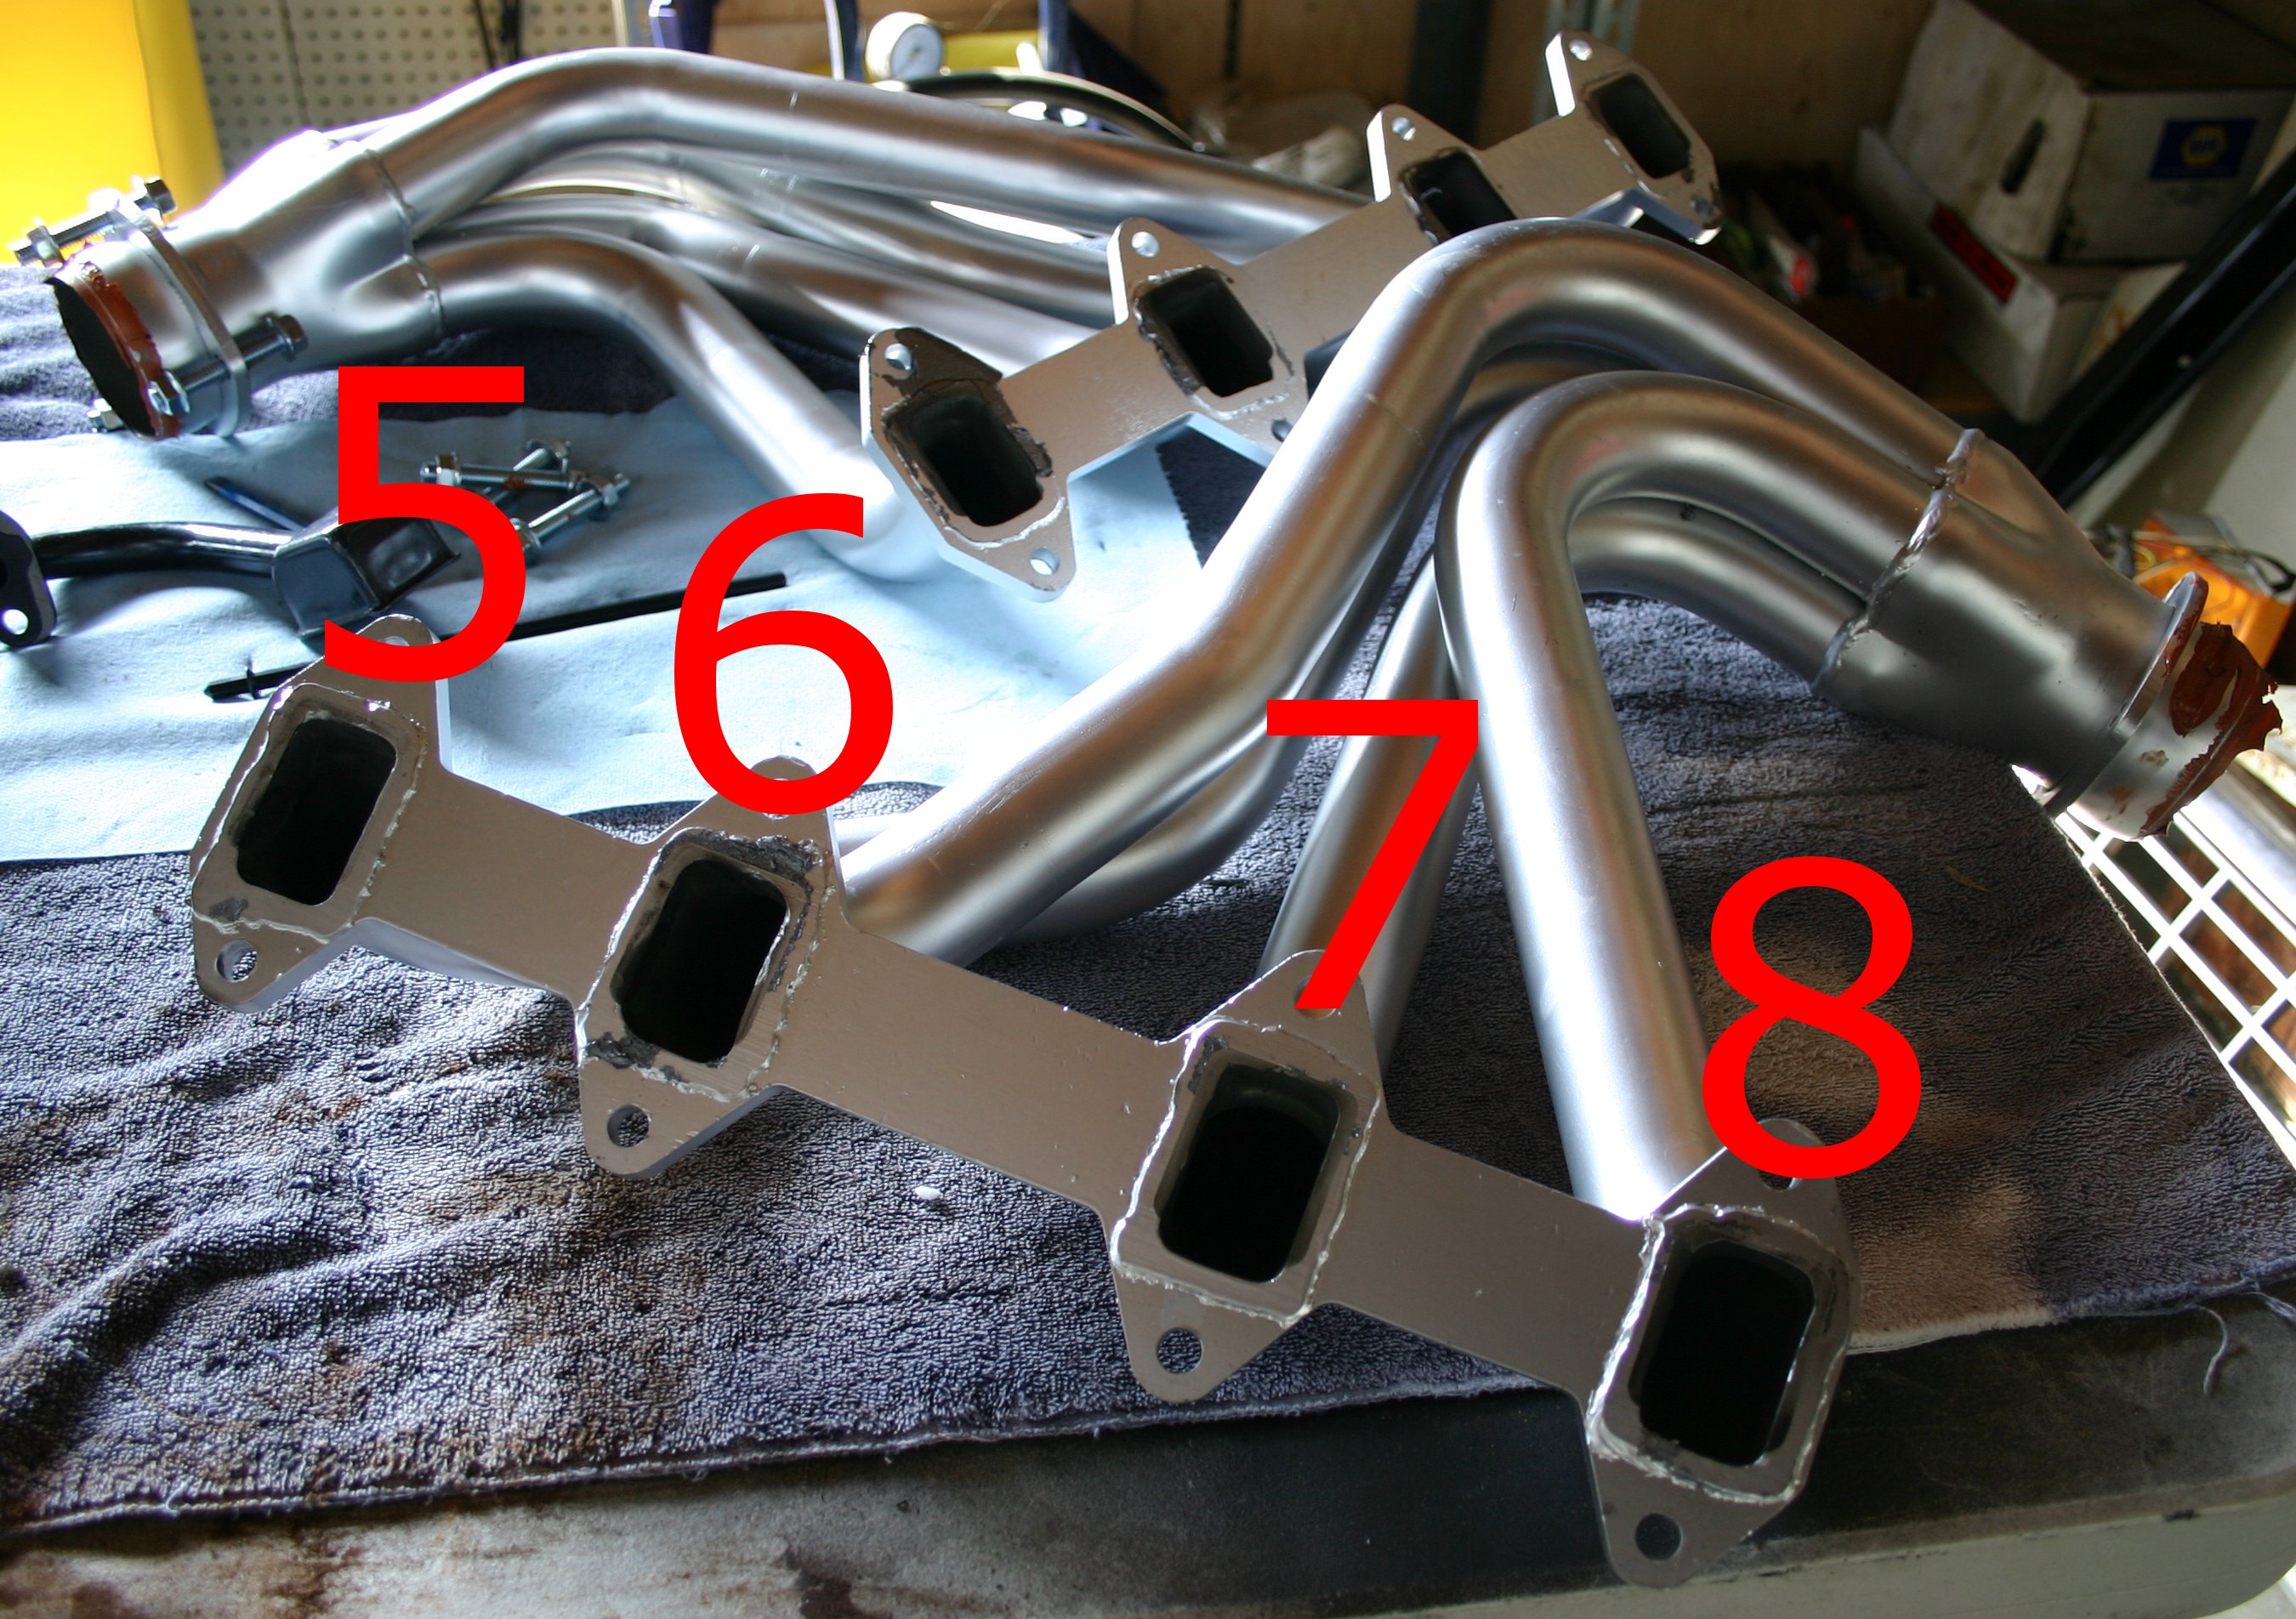
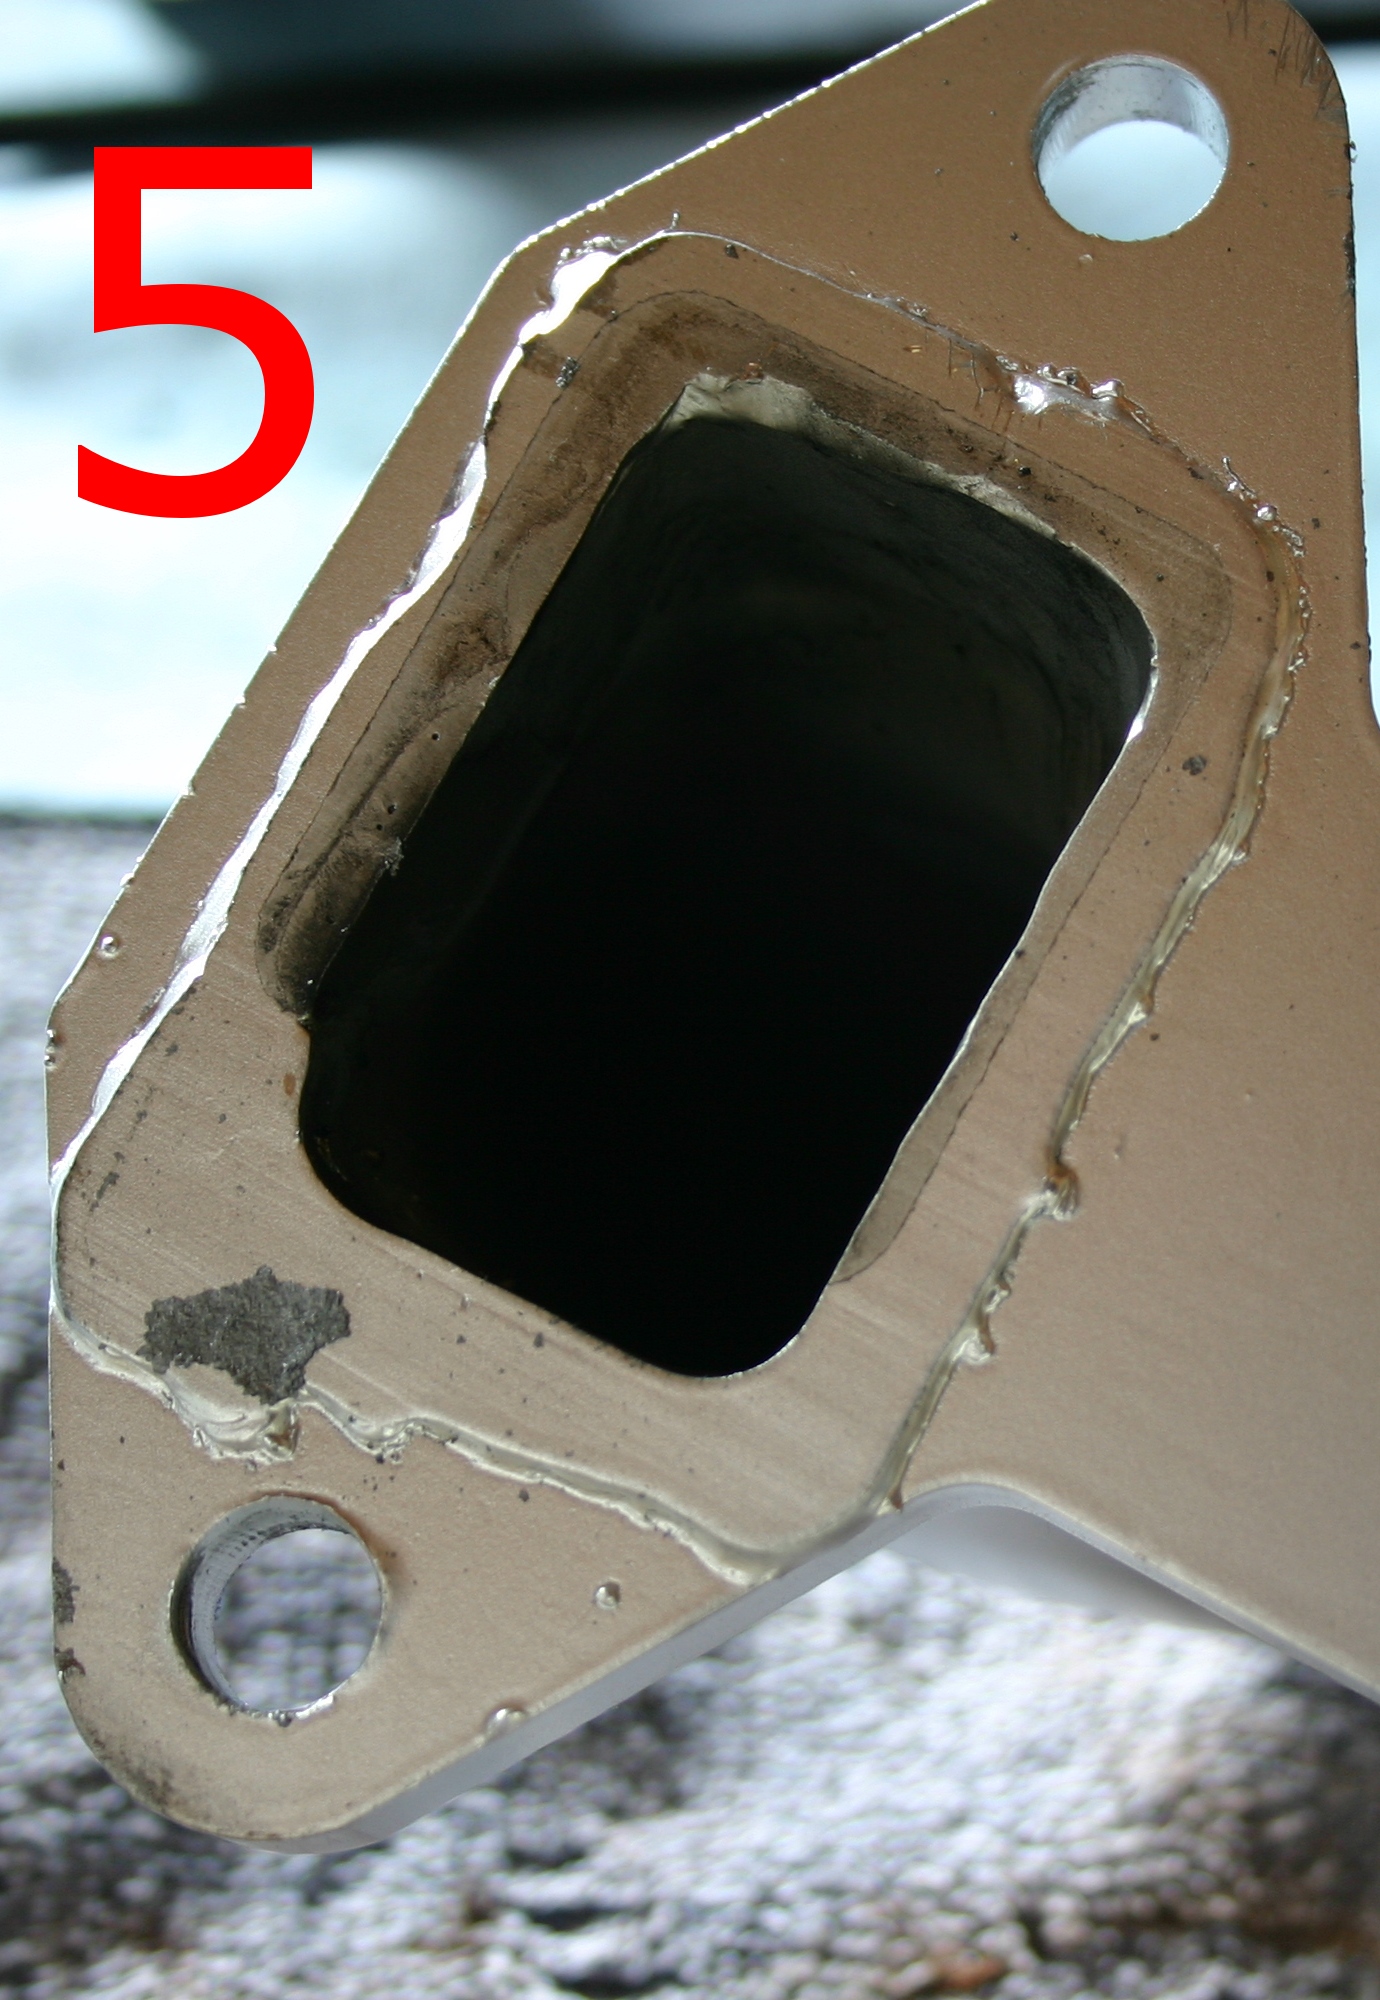
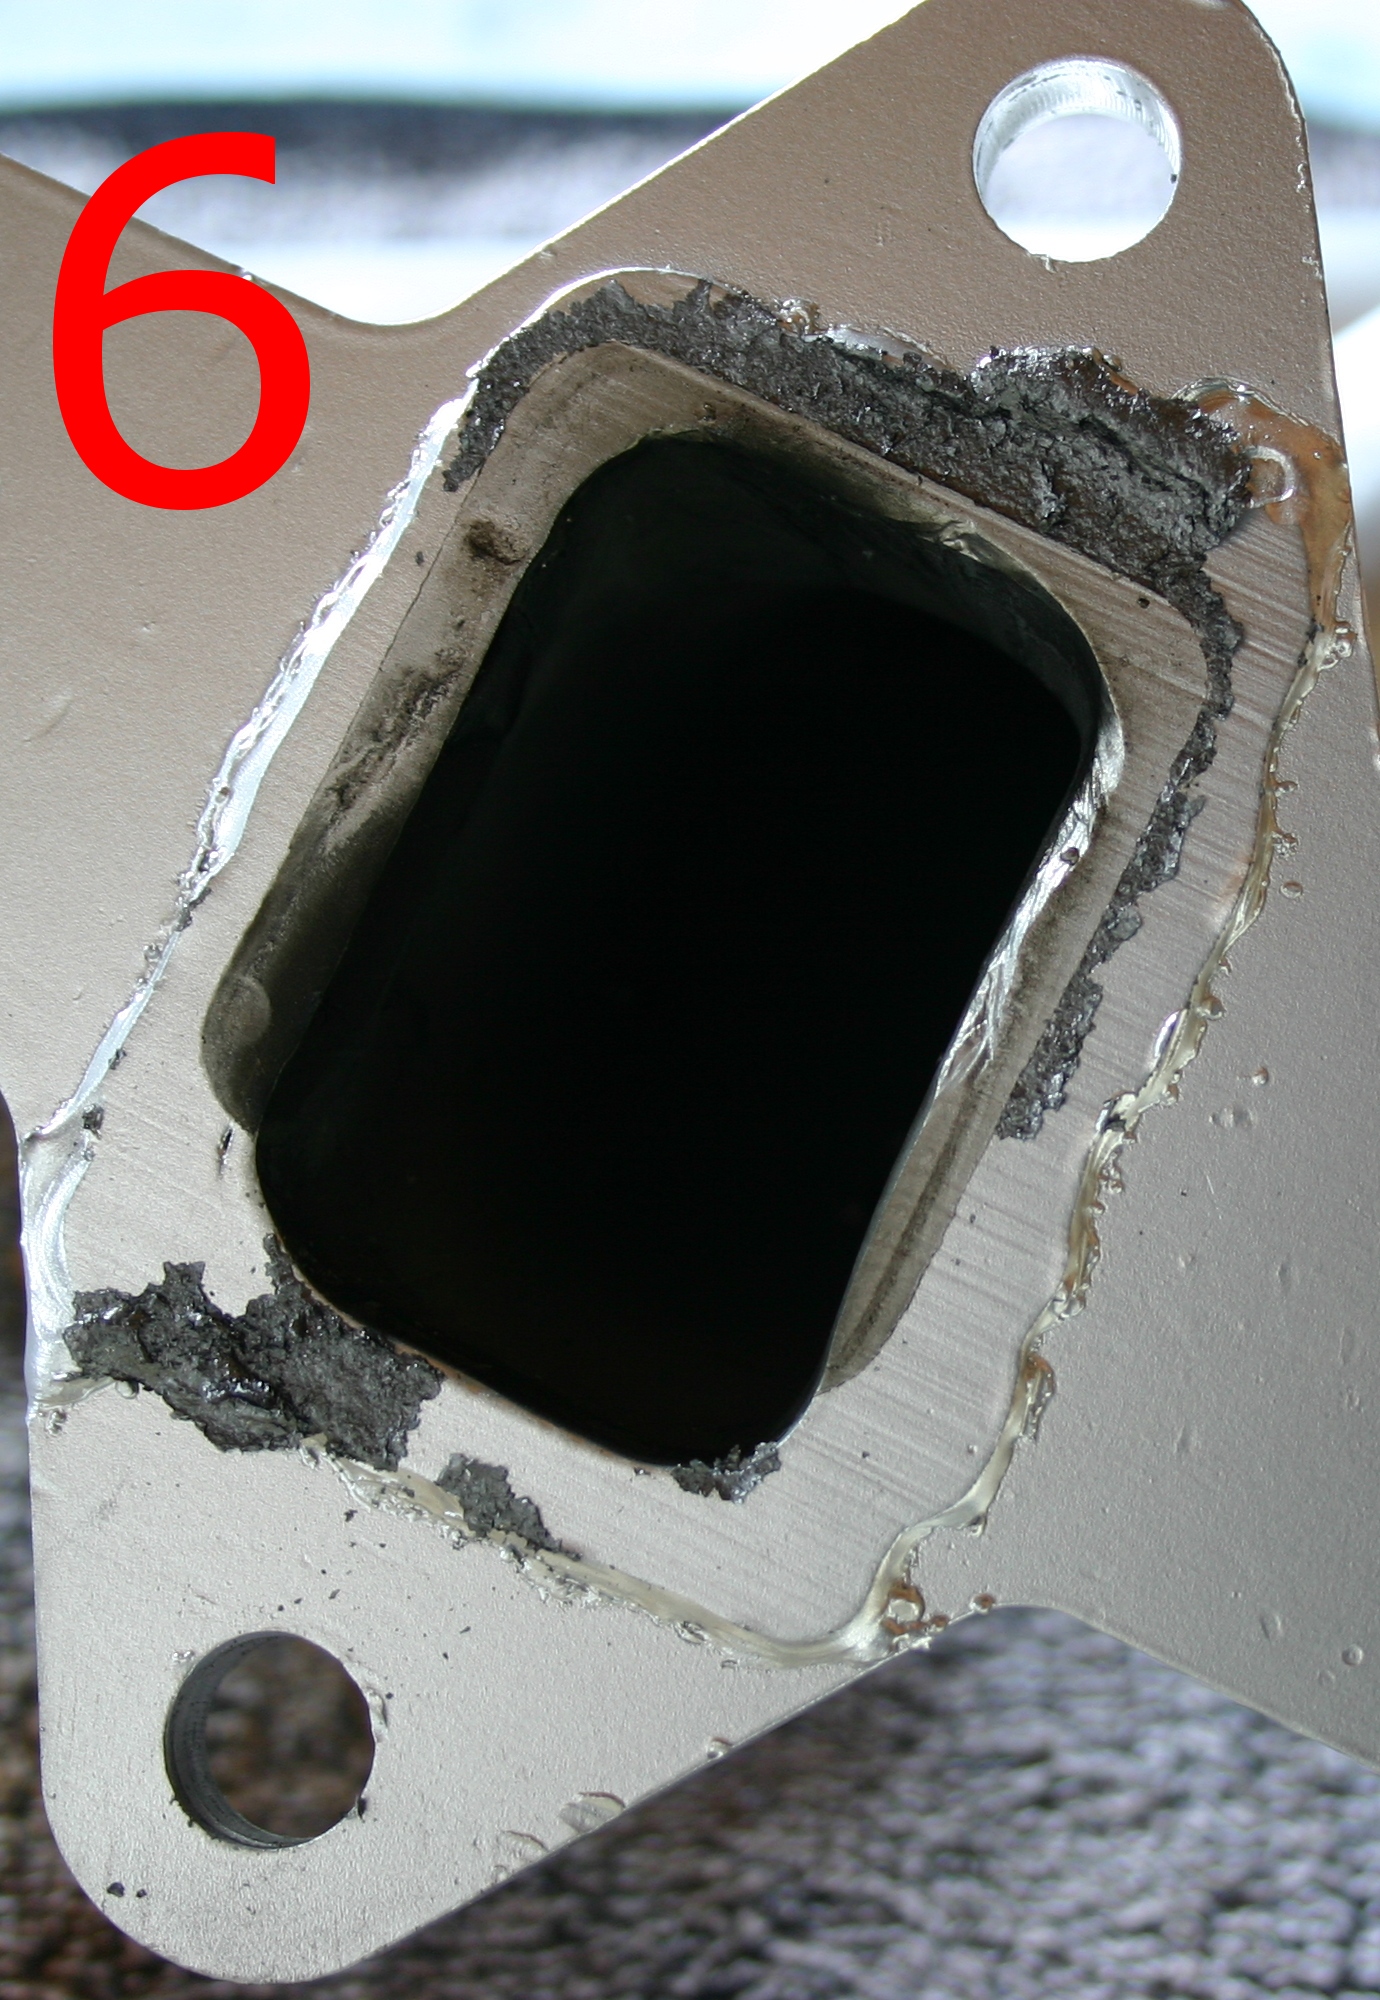
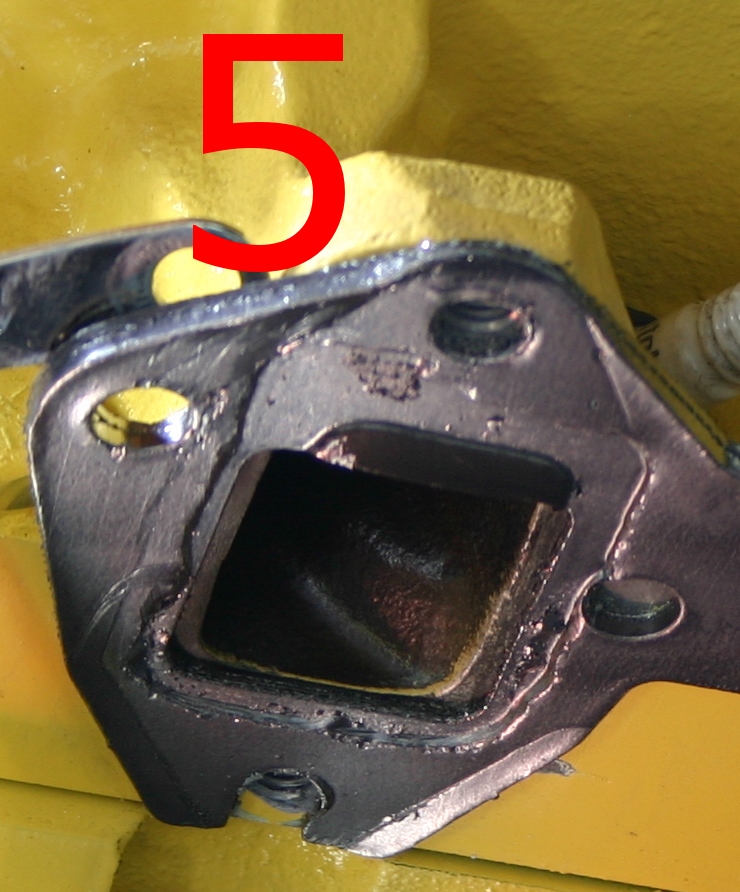
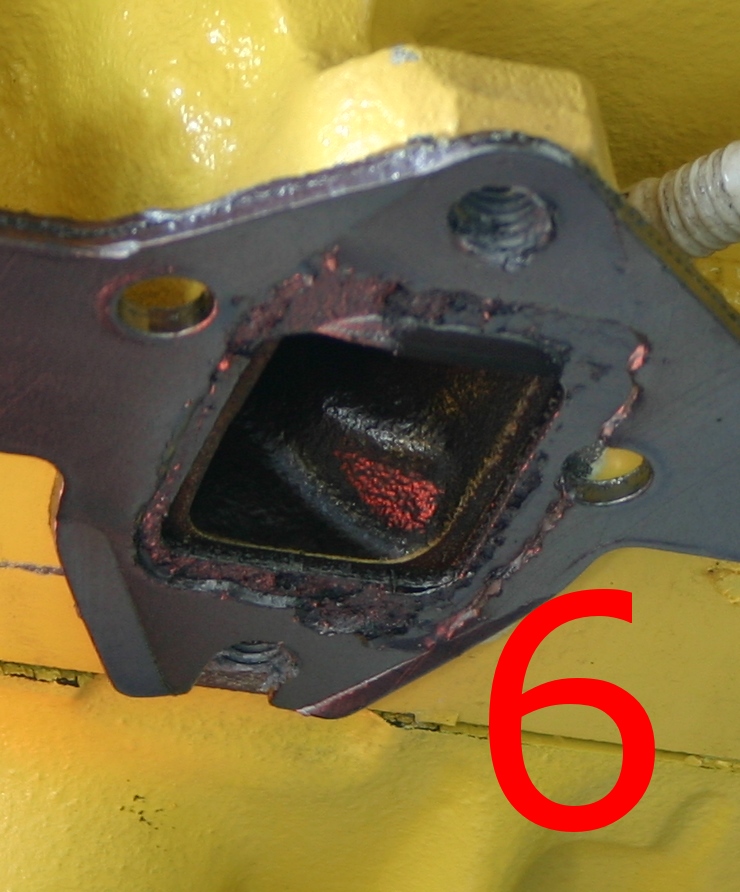
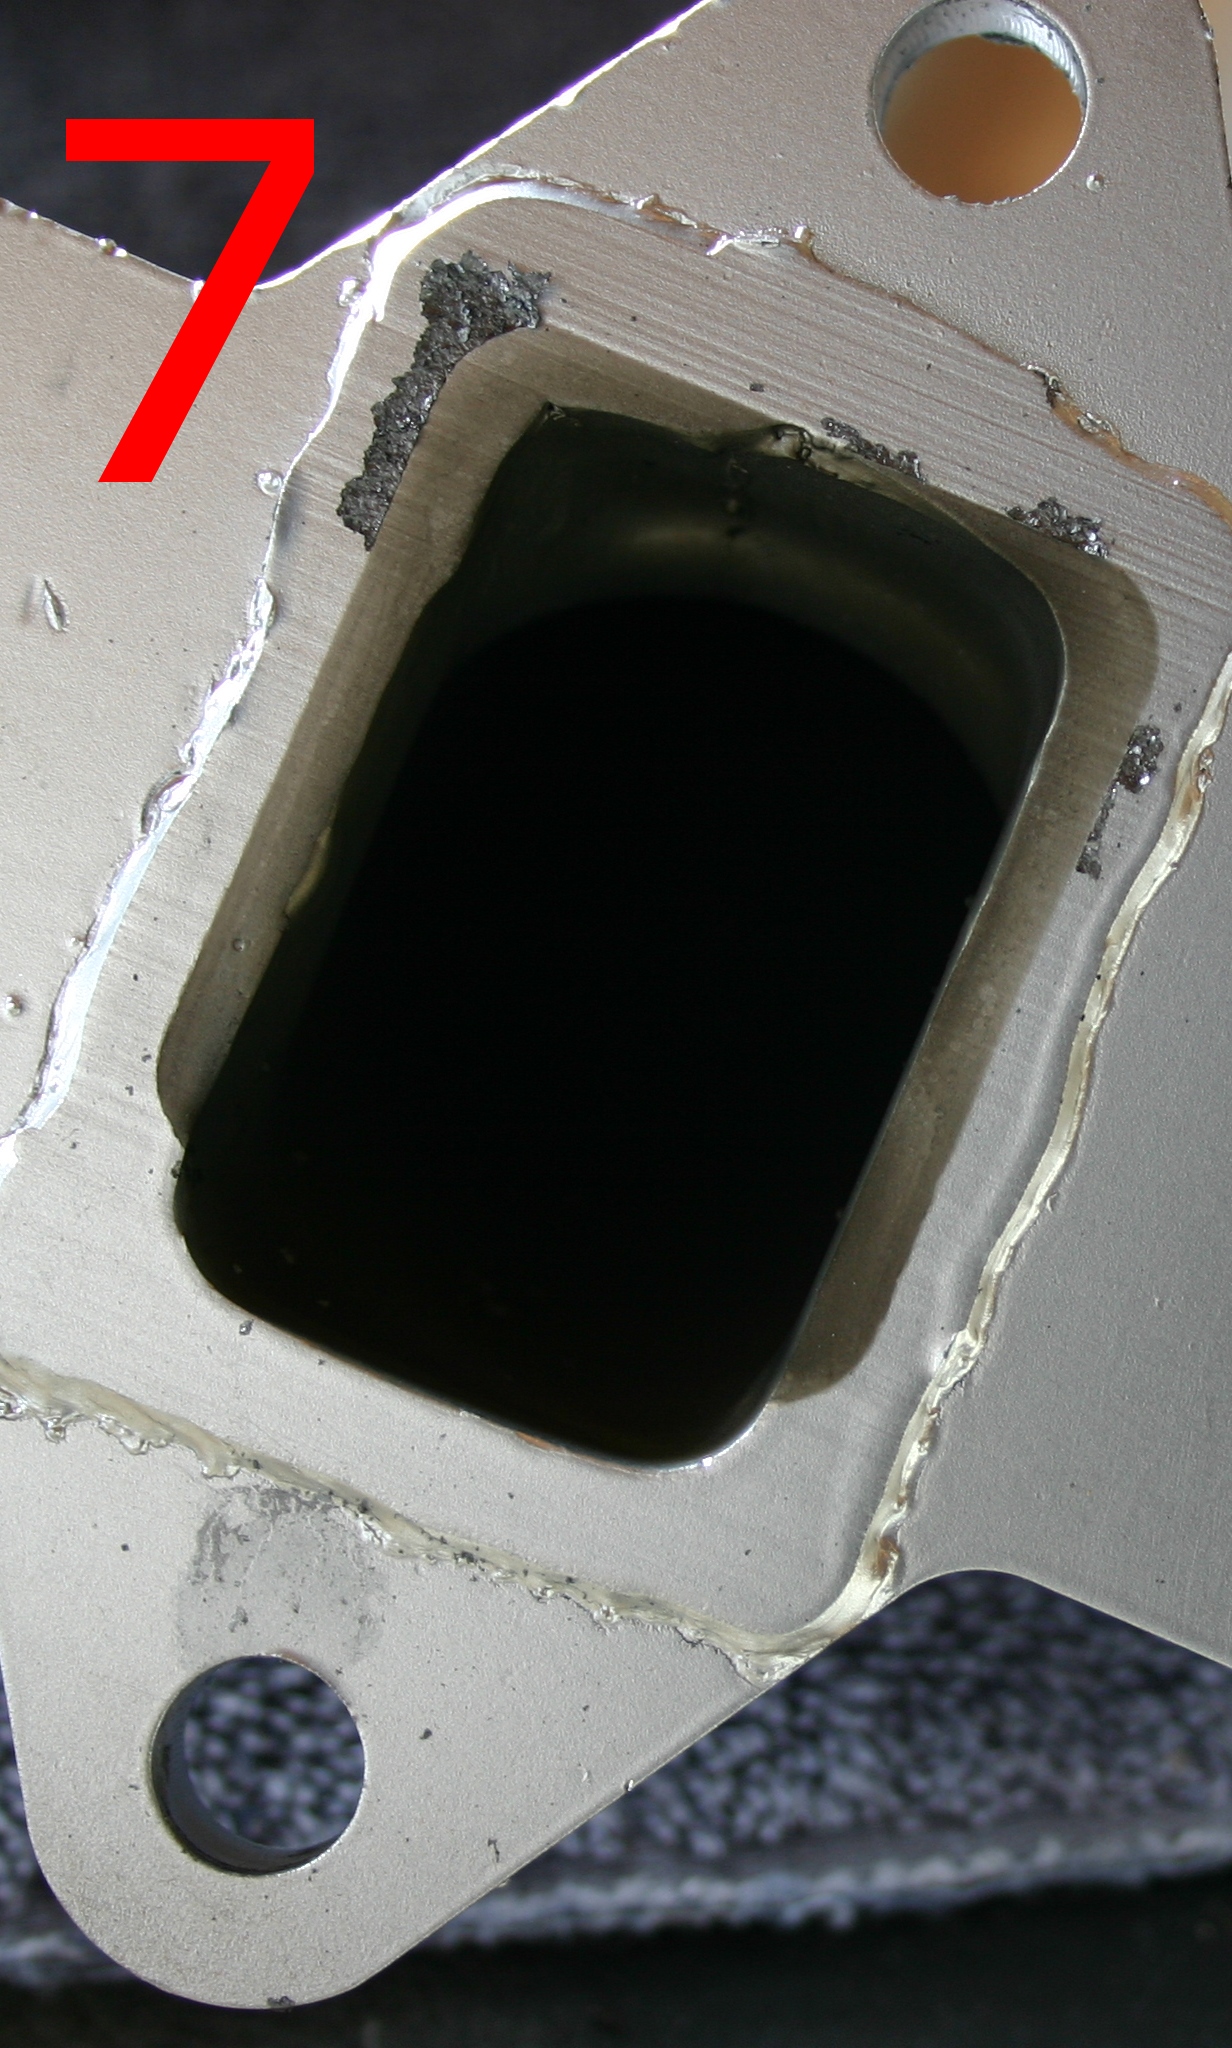
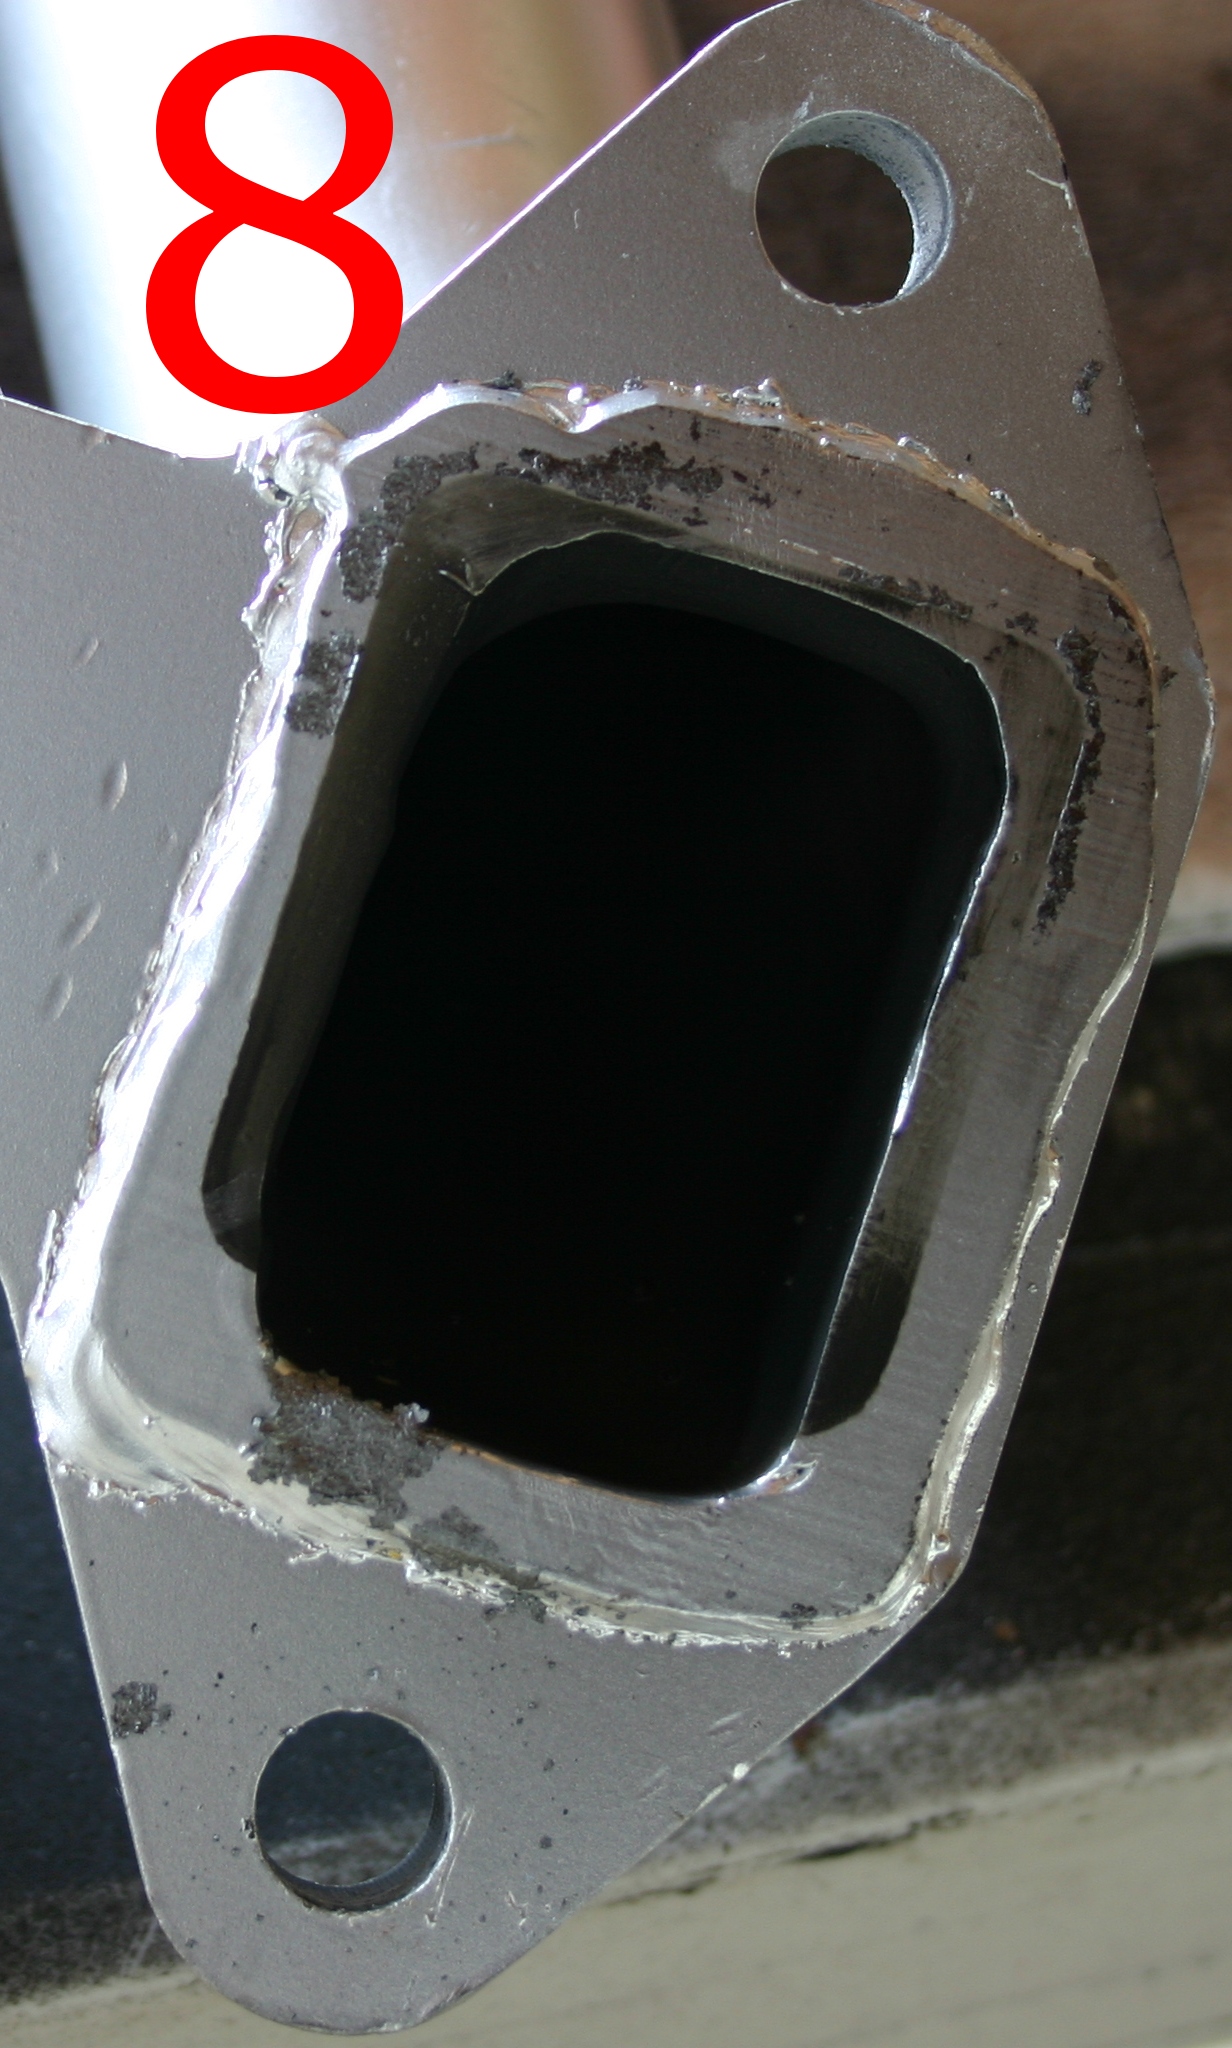
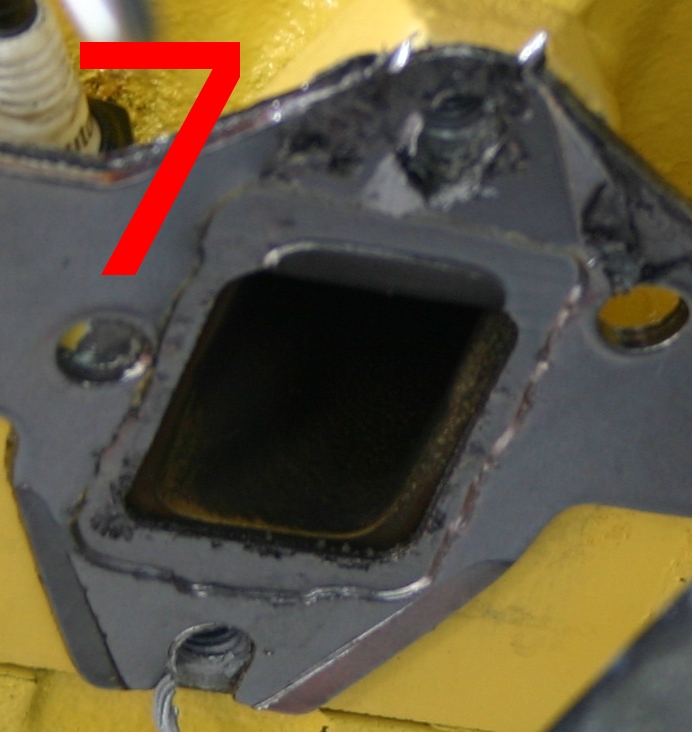
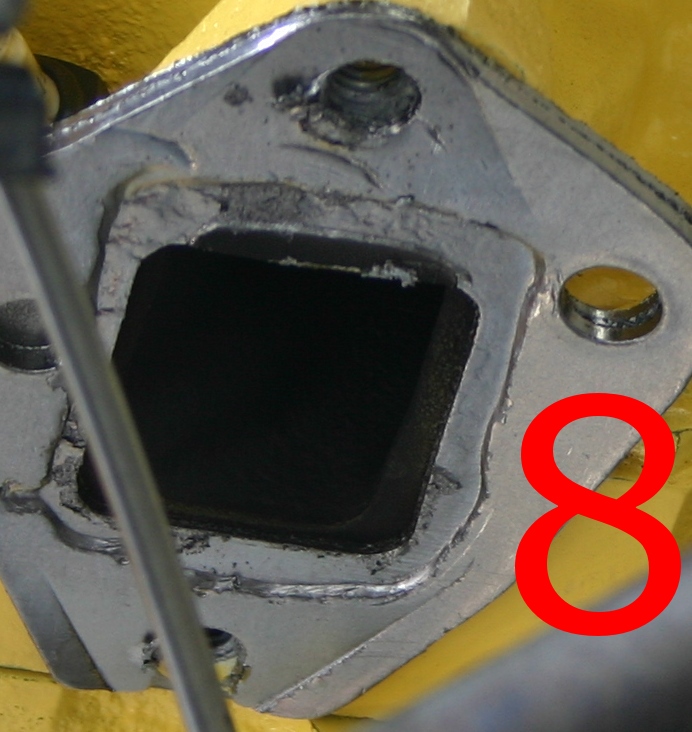
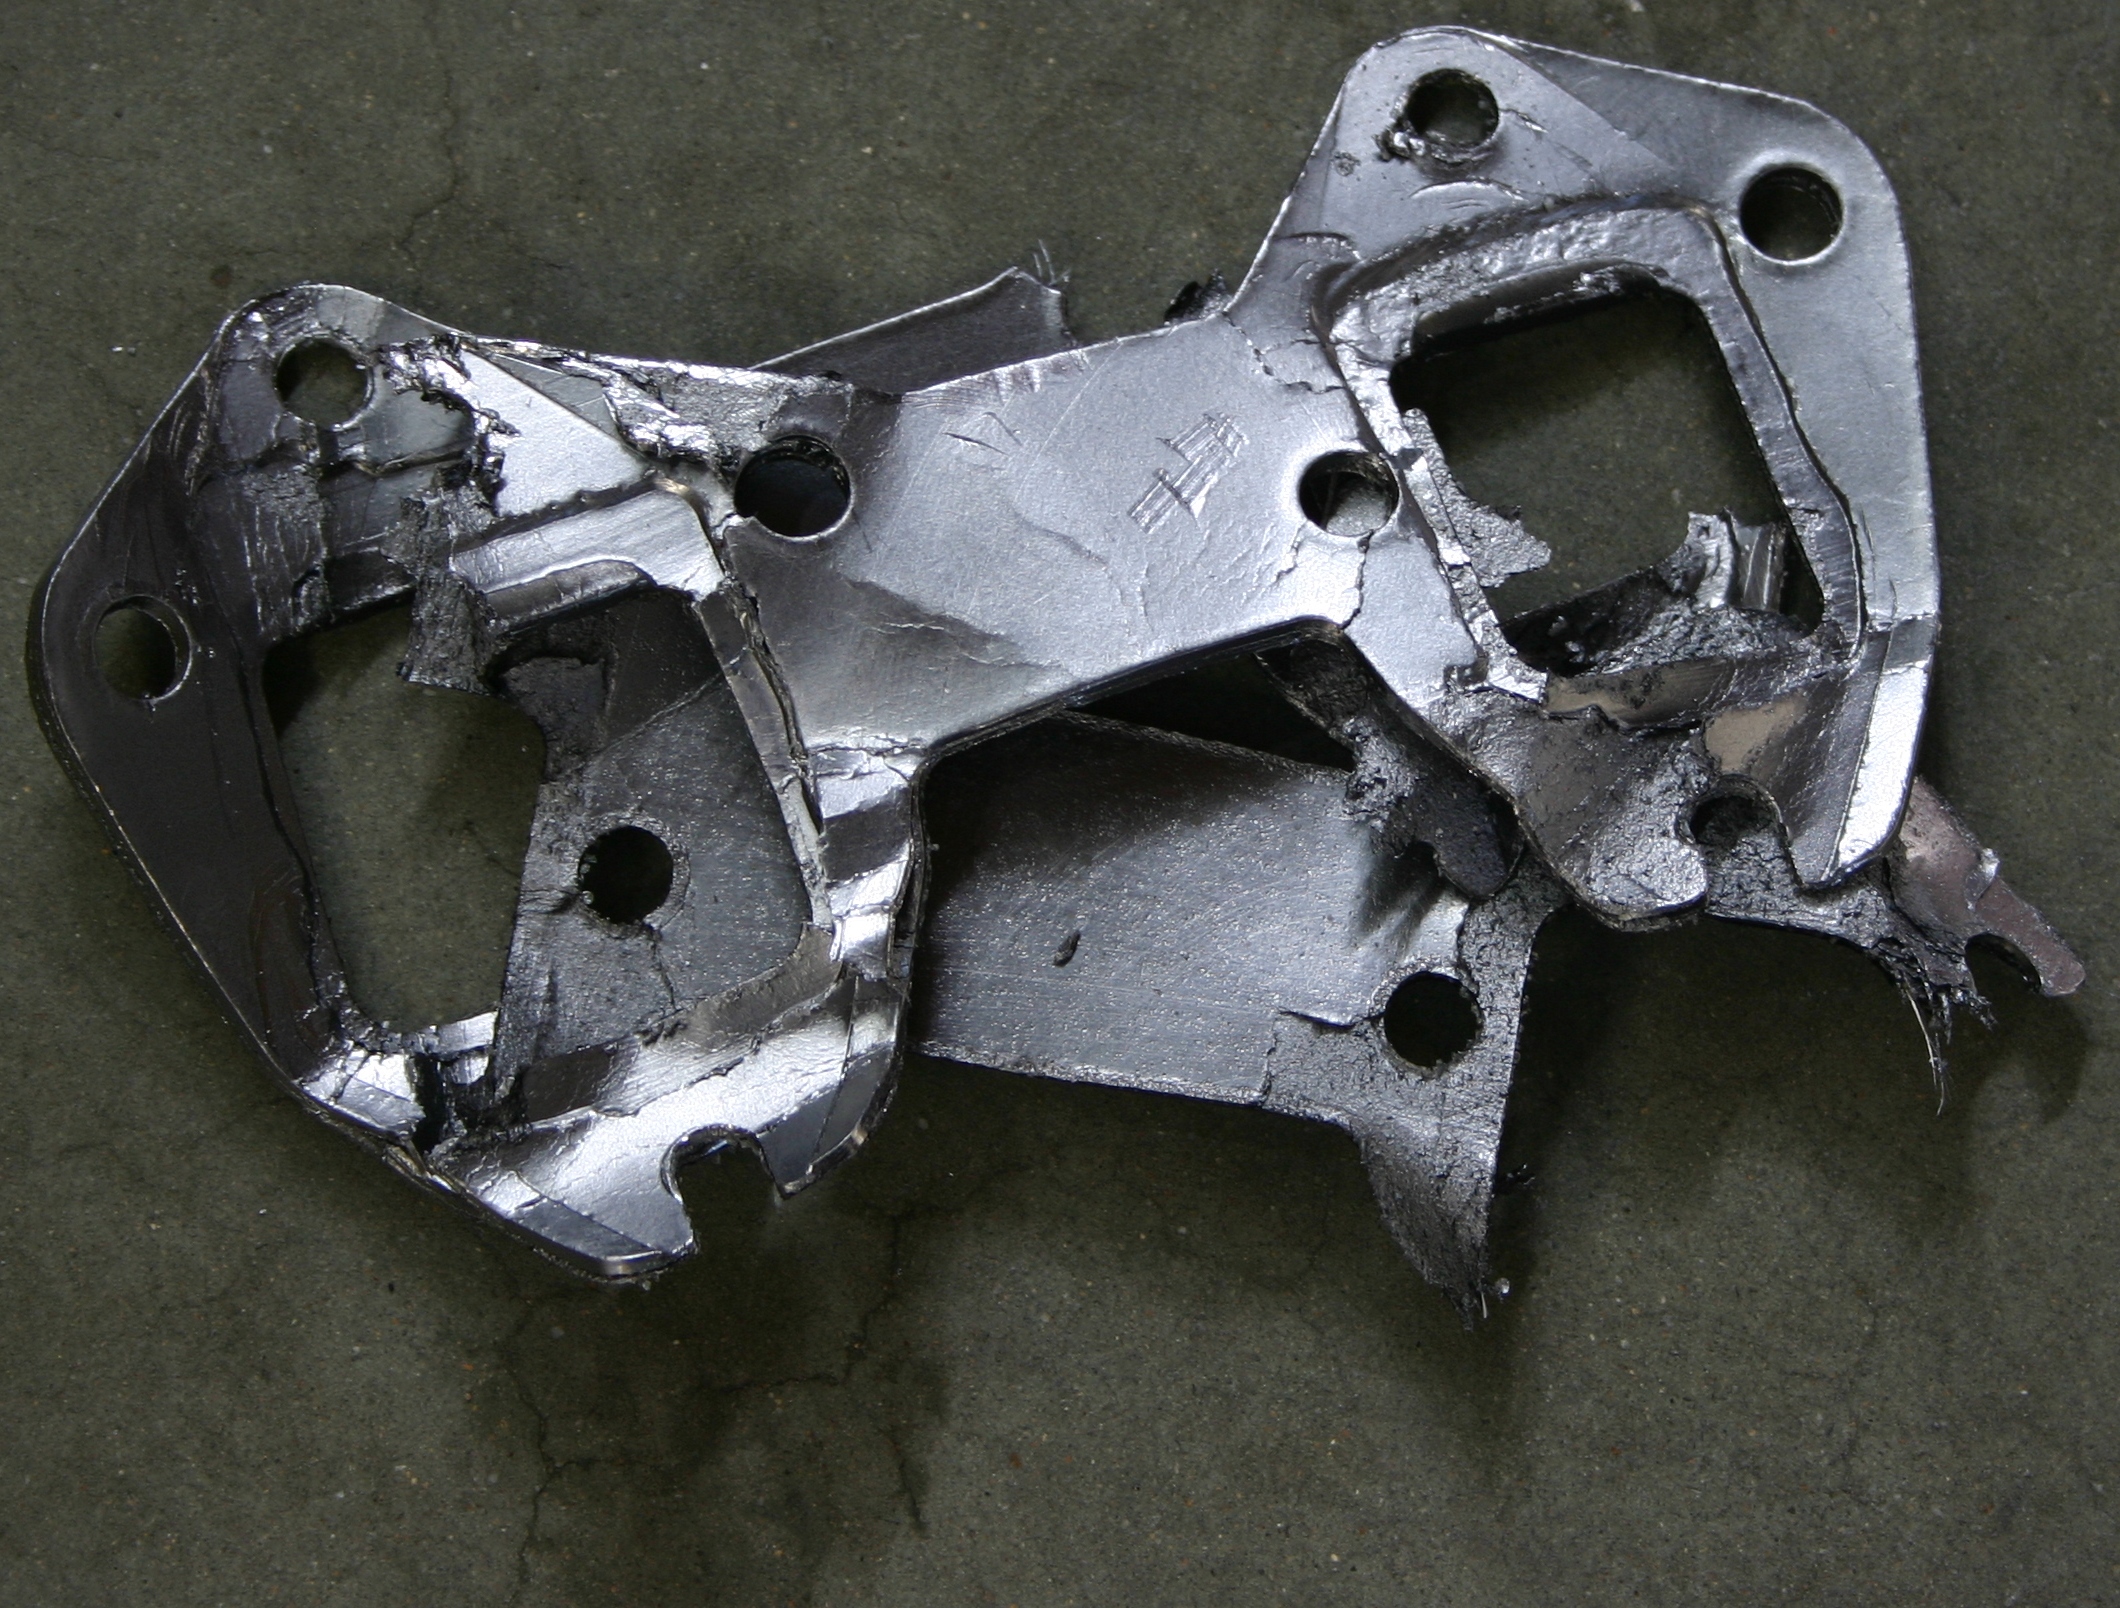
70_F100 wrote:One comment about your headers. The fit of the tubes to the flange looks really cheesy, not what I would expect from Hedman (I think that's what you said you have). You could take them to a good welding shop and have the "voids" filled in, and you would have a much better seal, and less chance of an exhaust leak. You may not even need the expensive gaskets if you take care of that while you have them off!!

Okay, I'll look in to this! I think that it's possible that they'll look different once the gasket material is fully removed, but I'll check that and post new photos if appropriate. Thanks for pointing this out! This is just the type of advice that I'd hoped for when I posted all those photos. Nothing beats an experienced eye!
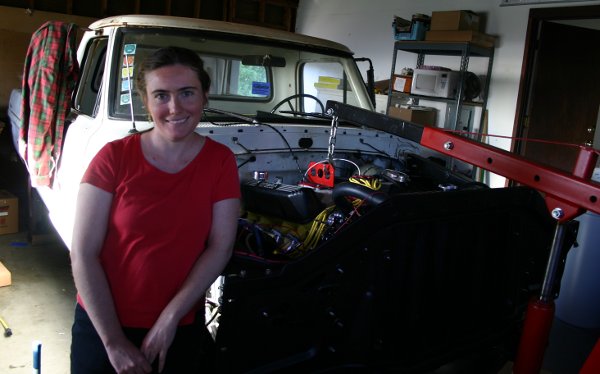
Ranchero50 wrote:Looks good. Robroy, have you considerred giving the firewall a rattle can paint job while the motor is out, at least below the cowl seam? It'll make painting the truck later much easier if that areas already done.
Yes, I think I'm going to go ahead and do this. 70_F100 also suggested this earlier on in the thread. It's a smart idea.
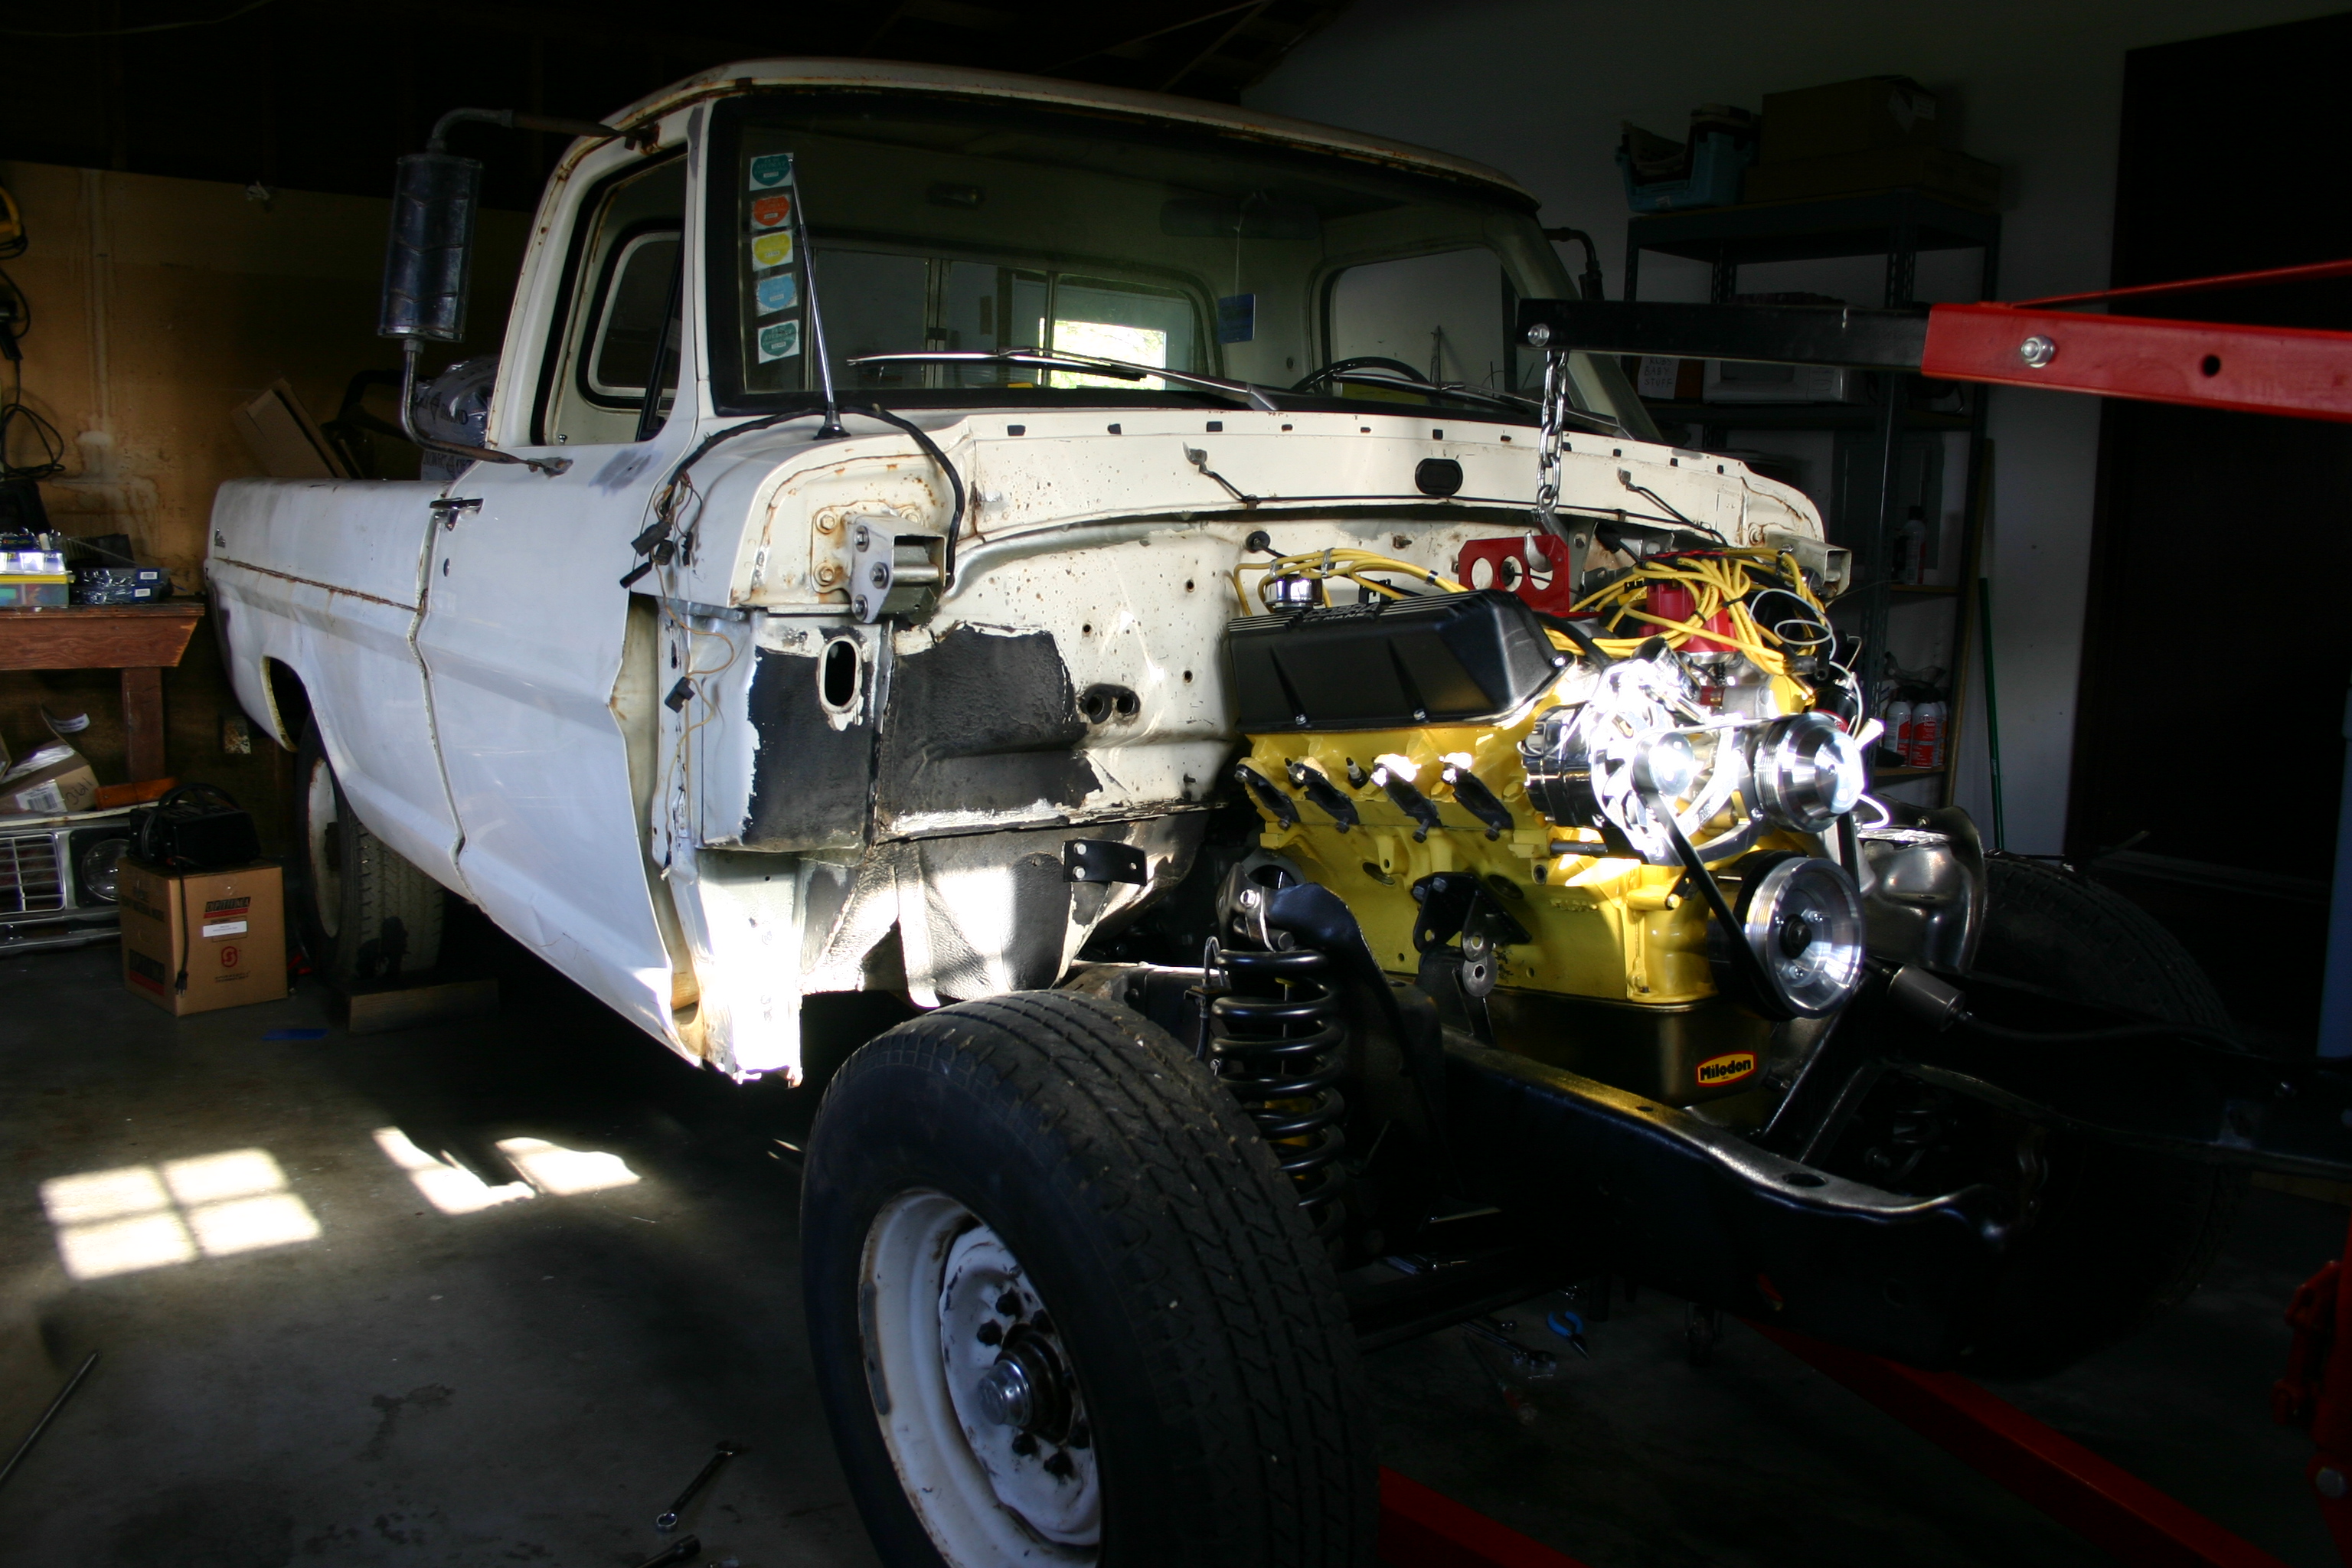
The reason I didn't do this in the first place was that I'd planned to remove the cab later, to fully re-do it while off the frame. But it won't take all that much time to go ahead and re-paint the firewall now, and it will make the fresh engine look even more photogenic!
Ranchero50 wrote:Oh yeah, Permatex Ultra RTV works well for header sealing.
Thanks! I may wind up using some of that. My reason for not using any last time was that the Remflex gaskets said to install 'em "dry." (That's also what I heard from Remflex over the phone).
DuckRyder wrote:Sorry guys I've been AWOL for a few days, I stumbled upon some interesting stories on the web, worth a read if you have some time.
Welcome back!!!
Those are indeed great stories with lots of excellent photos!
DuckRyder wrote:Oh to be 25 years younger with fewer obligations...
I can relate! In my case I'd be five years old again, wearing my Super Man cape in the front yard. Certainly less obligations!
DuckRyder wrote:Anyway, I see I missed a bunch, we even have Kasie
Even Kasie! She first got the "FordFriend" account without telling me and tried to go under cover, but I caught on pretty quickly.
DuckRyder wrote:This is the exact bike I had:

I'm guessing you like the yellow like I like the Lime, hey you could always do the purple wheels...

That's a very nice looking bike! And you're right about green and yellow. It's the same brain cells involved in both of our cases, just a slightly different light frequency.
DuckRyder wrote:It looks as if you are making good progress, that is is one can consider undoing what they just did "progress" I should take some tips from you on attitude, but that always leaves a bad taste in my mouth.

Thanks! Yeah I feel that way somewhat, but I have the satisfaction of knowing that I'll put it together better this next time. Small compromises made during the first assembly can be improved upon and so on.
DuckRyder wrote:I am definitely a proponent of the body color firewall, it is a good bit of work but worth it.
Agreed! It looks outstanding on your truck.
DuckRyder wrote:You can get Wimbledon White in duplicolors "truck and van" line. I used it on my wheels and it is actually holding up pretty well. Still as with any paint (including engine paint) it is all in the surface prep!!!. You can either do it up to the seam, or up to the cowl seal and it shouldn't be too hard to deal with for the exterior paint.
Good suggestion! I think I'll go this route, thanks!
DuckRyder wrote:This thread has sort of got my itch to get something done on my truck going, I was going to do my wheels blue too...!

Excellent!
DuckRyder wrote:
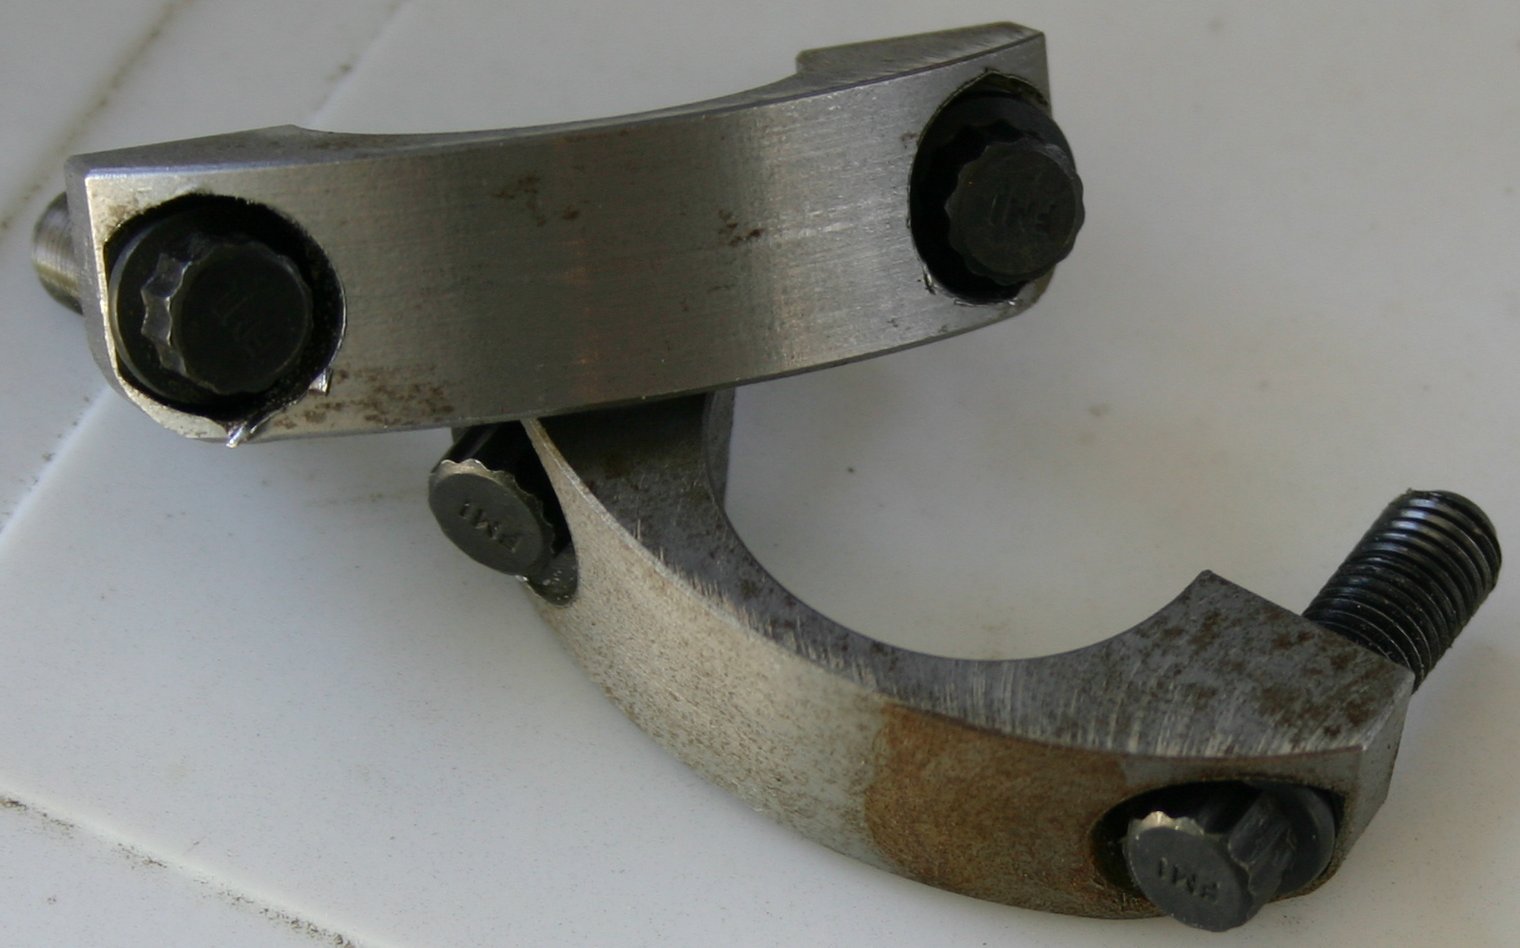
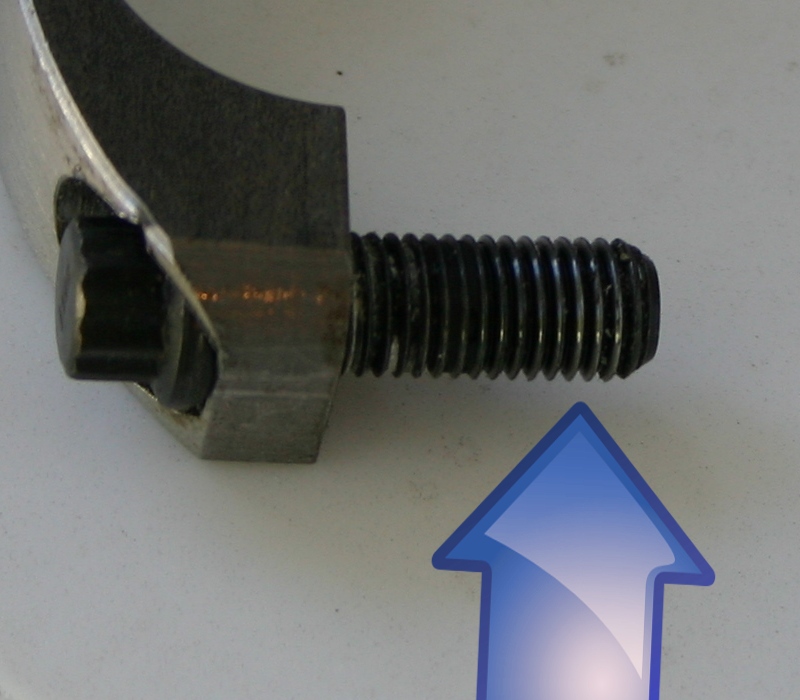
I think we should let the possible shortcoming of the previous build go, we don't really know yet and the past is the past, what's done is done and all that sort of stuff. I'm sure robroy will give us Tom's report so lets wait for that. The rocker bolts are the only thing that really bothers me, aside from the Moby and his friends and what that is is purely speculation at this point.
Agreed!
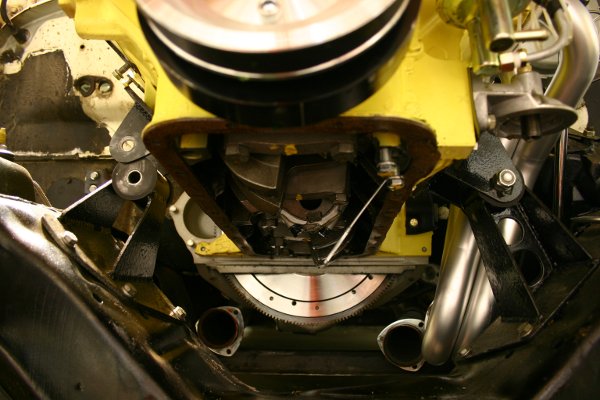
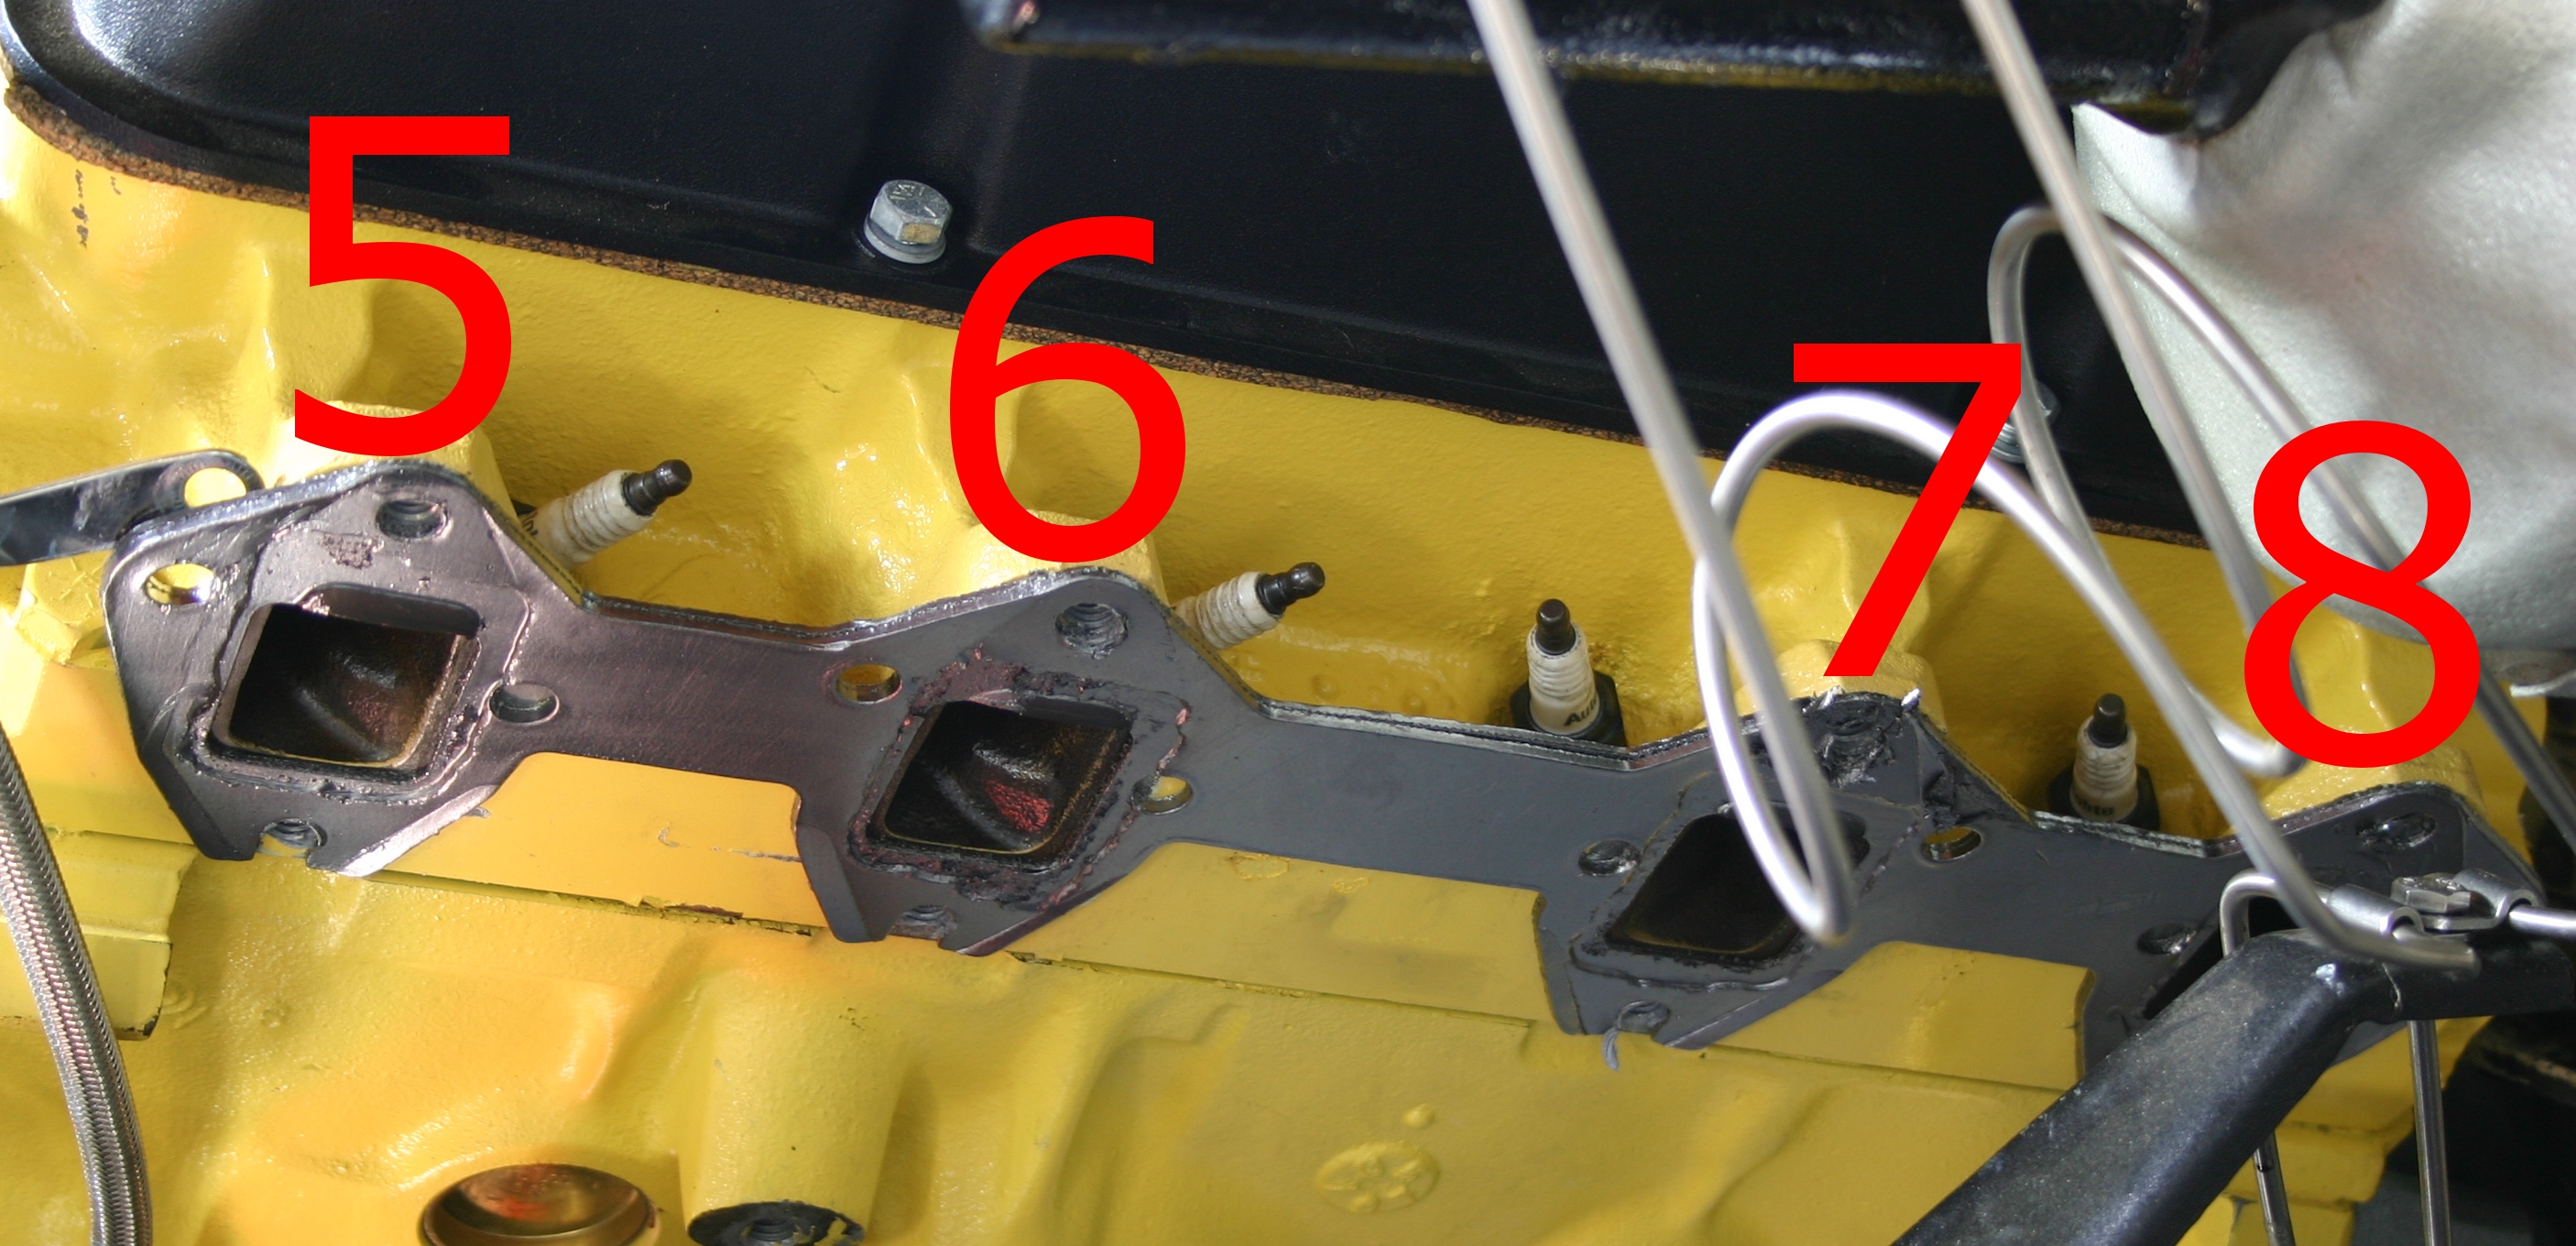
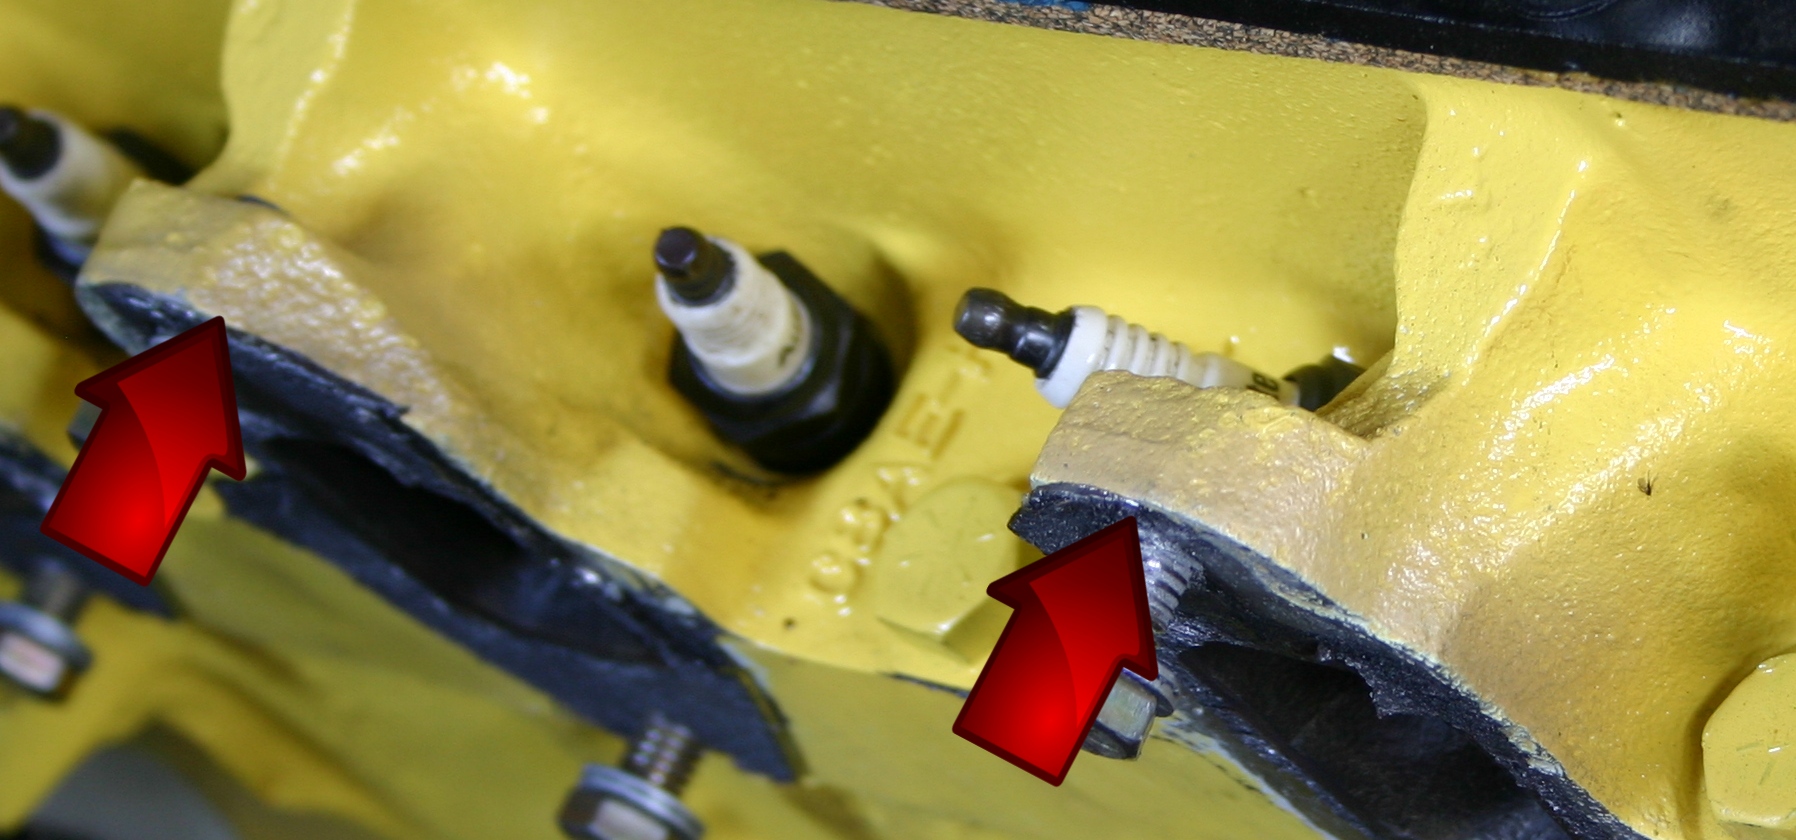
DuckRyder wrote:On the headers, those gaskets (as well as the header flange) look a bit different from what I'm used to but I'm 99.9% certain the gasket in 4580z is upside down. I've posted my header trials and tribulations in the past (and a lot of it is due to Hookers too good of job of matching the header to the actual port) but I've had the best luck with Hooker gaskets. My advice would be to try the ones included with the headers and see how they work. I've been advised that installing them wet (as in with water) helps too, but never tried it.
Perhaps I will use the ones that came with the headers! I was preventing from doing so before because of the poor head surfaces, but I'm sure those will be corrected at FE Specialties. I'll also take great care during re-assembly to make sure the gaskets are right-side-up, whichever way that turns out to be!
DuckRyder wrote:So, what is the plan with Tom so far?
I'll call Tom again on Monday to cover a lot of fine points, but I have a few updates:
Tom suggested that I do the engine paint myself, because he'd have to strip the whole engine by hand and he figured I wouldn't want to pay his substantial (and earned, I'm sure) hourly fee to do paint prep. The normal way he does paint is to have the whole engine block baked and blasted, then start from absolute scratch. But we're not planning on re-machining the block so that's probably not an option.
I'll be happy to paint it myself, since I have the HVLP setup and am ready to do it!
Another thing Tom mentioned was that I might want to hire him to test run the engine at his shop. That way he can find any leaks or problems with the engine before I go to all the trouble to re-install it. His charge for this is $350. I'm not sure exactly what he does in addition to just firing it up, but I'm guessing that it's an involved test (maybe a tuning). I'll be sure to ask him about this on Monday!
Of course I'm very curious to see the newly rebuilt engine perform on a dyno! But I'm sure that's not included in the $350 deal. I'll ask!
When I asked Proformance Unlimited how much they'd charge to actually dyno the engine before shipping it to me, they said (if I remember correctly) either $500 or $800, I'm not sure which. So I'm guessing that an engine can't really by dyno'ed for $350!
70_F100 wrote:
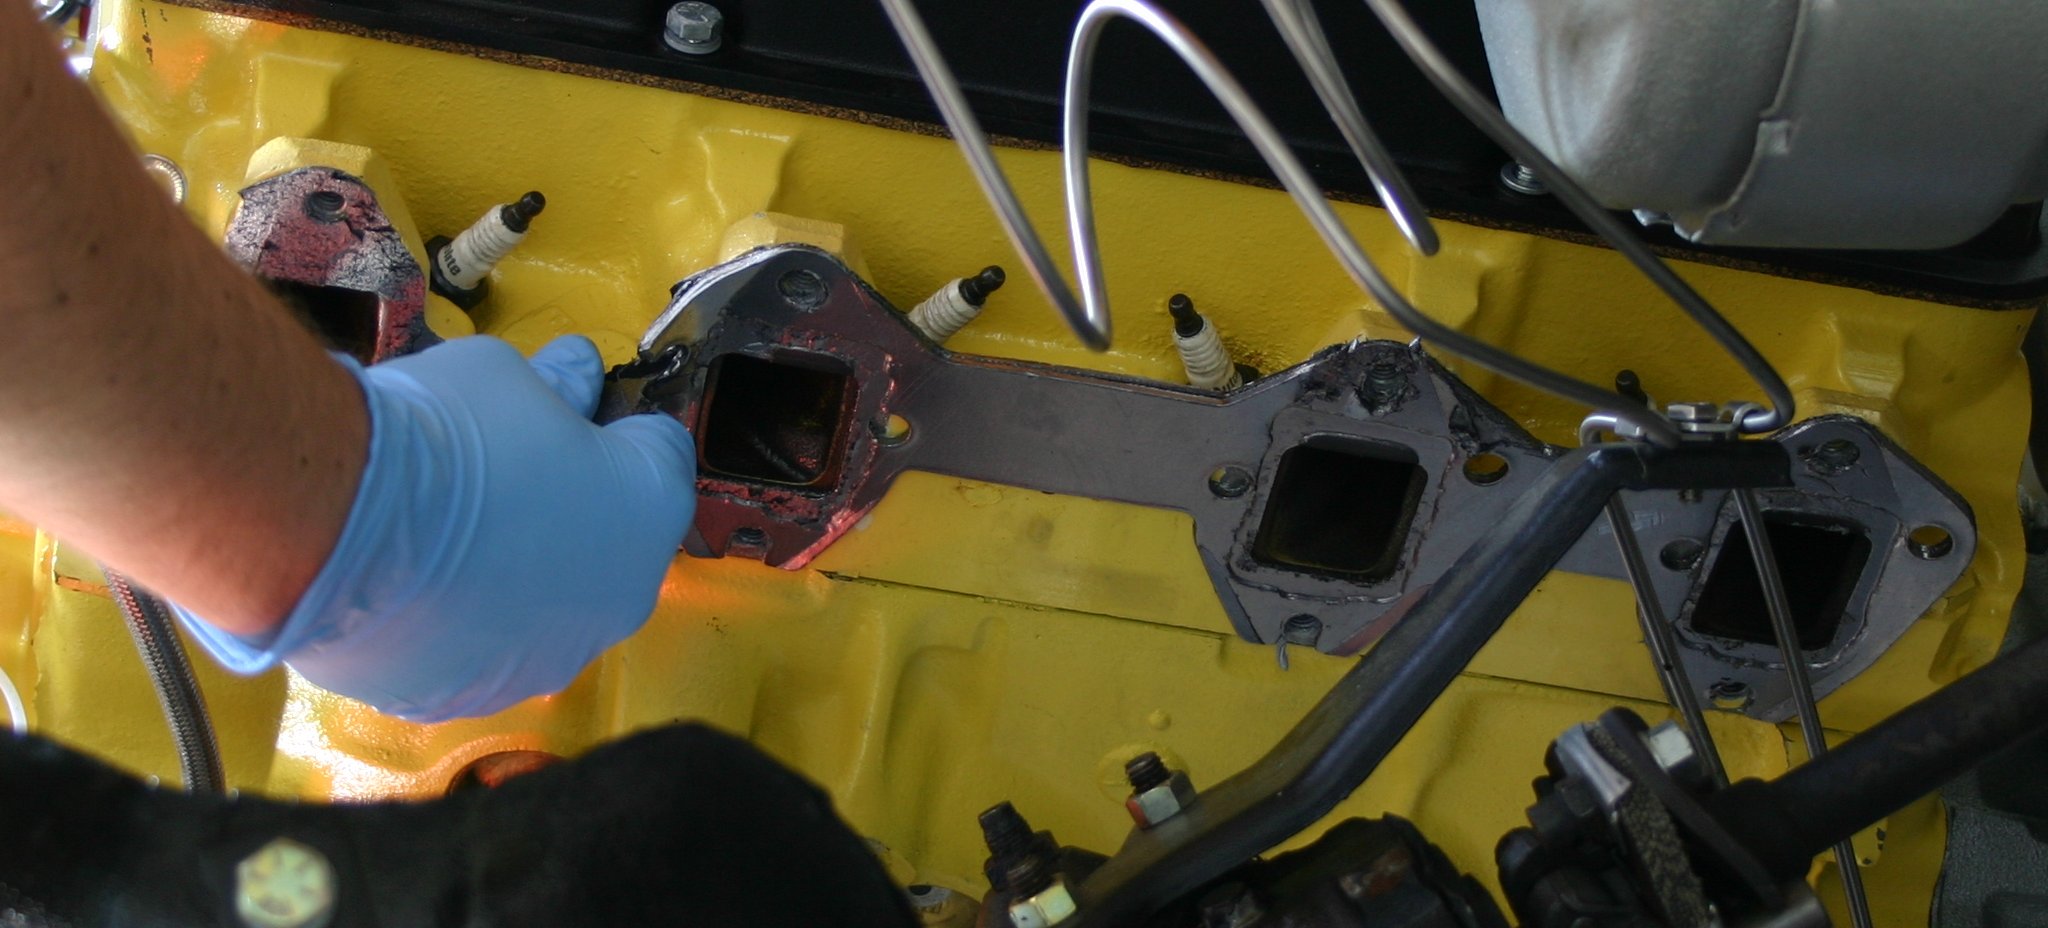
Most (if not all) header gaskets that I've seen that are slotted are installed with the slots toward the bottom, regardless of the engine type.
Yes, now that you mention it, I read that in the instructions for these gaskets too! That's why I put them on the way I did.
70_F100 wrote:This is done for ease of installation, so that the header can be loosely installed without having to install the gasket at the same time. This allows the gasket to be slipped into place after the header is installed. (keyword: loosely)

Now
that's the technique I needed to read! If I remember correctly my install method was a lot more clunky.
70_F100 wrote:On these particular gaskets, the webbing between the ports also provides
some shielding of the plugs and plug wires from the heat radiating from the headers.
Interesting! I hadn't thought of the extra gasket material in that light, but I think you're right!
Fordnatic wrote:
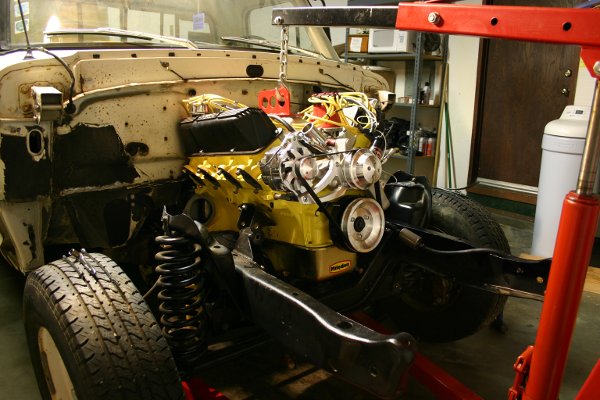
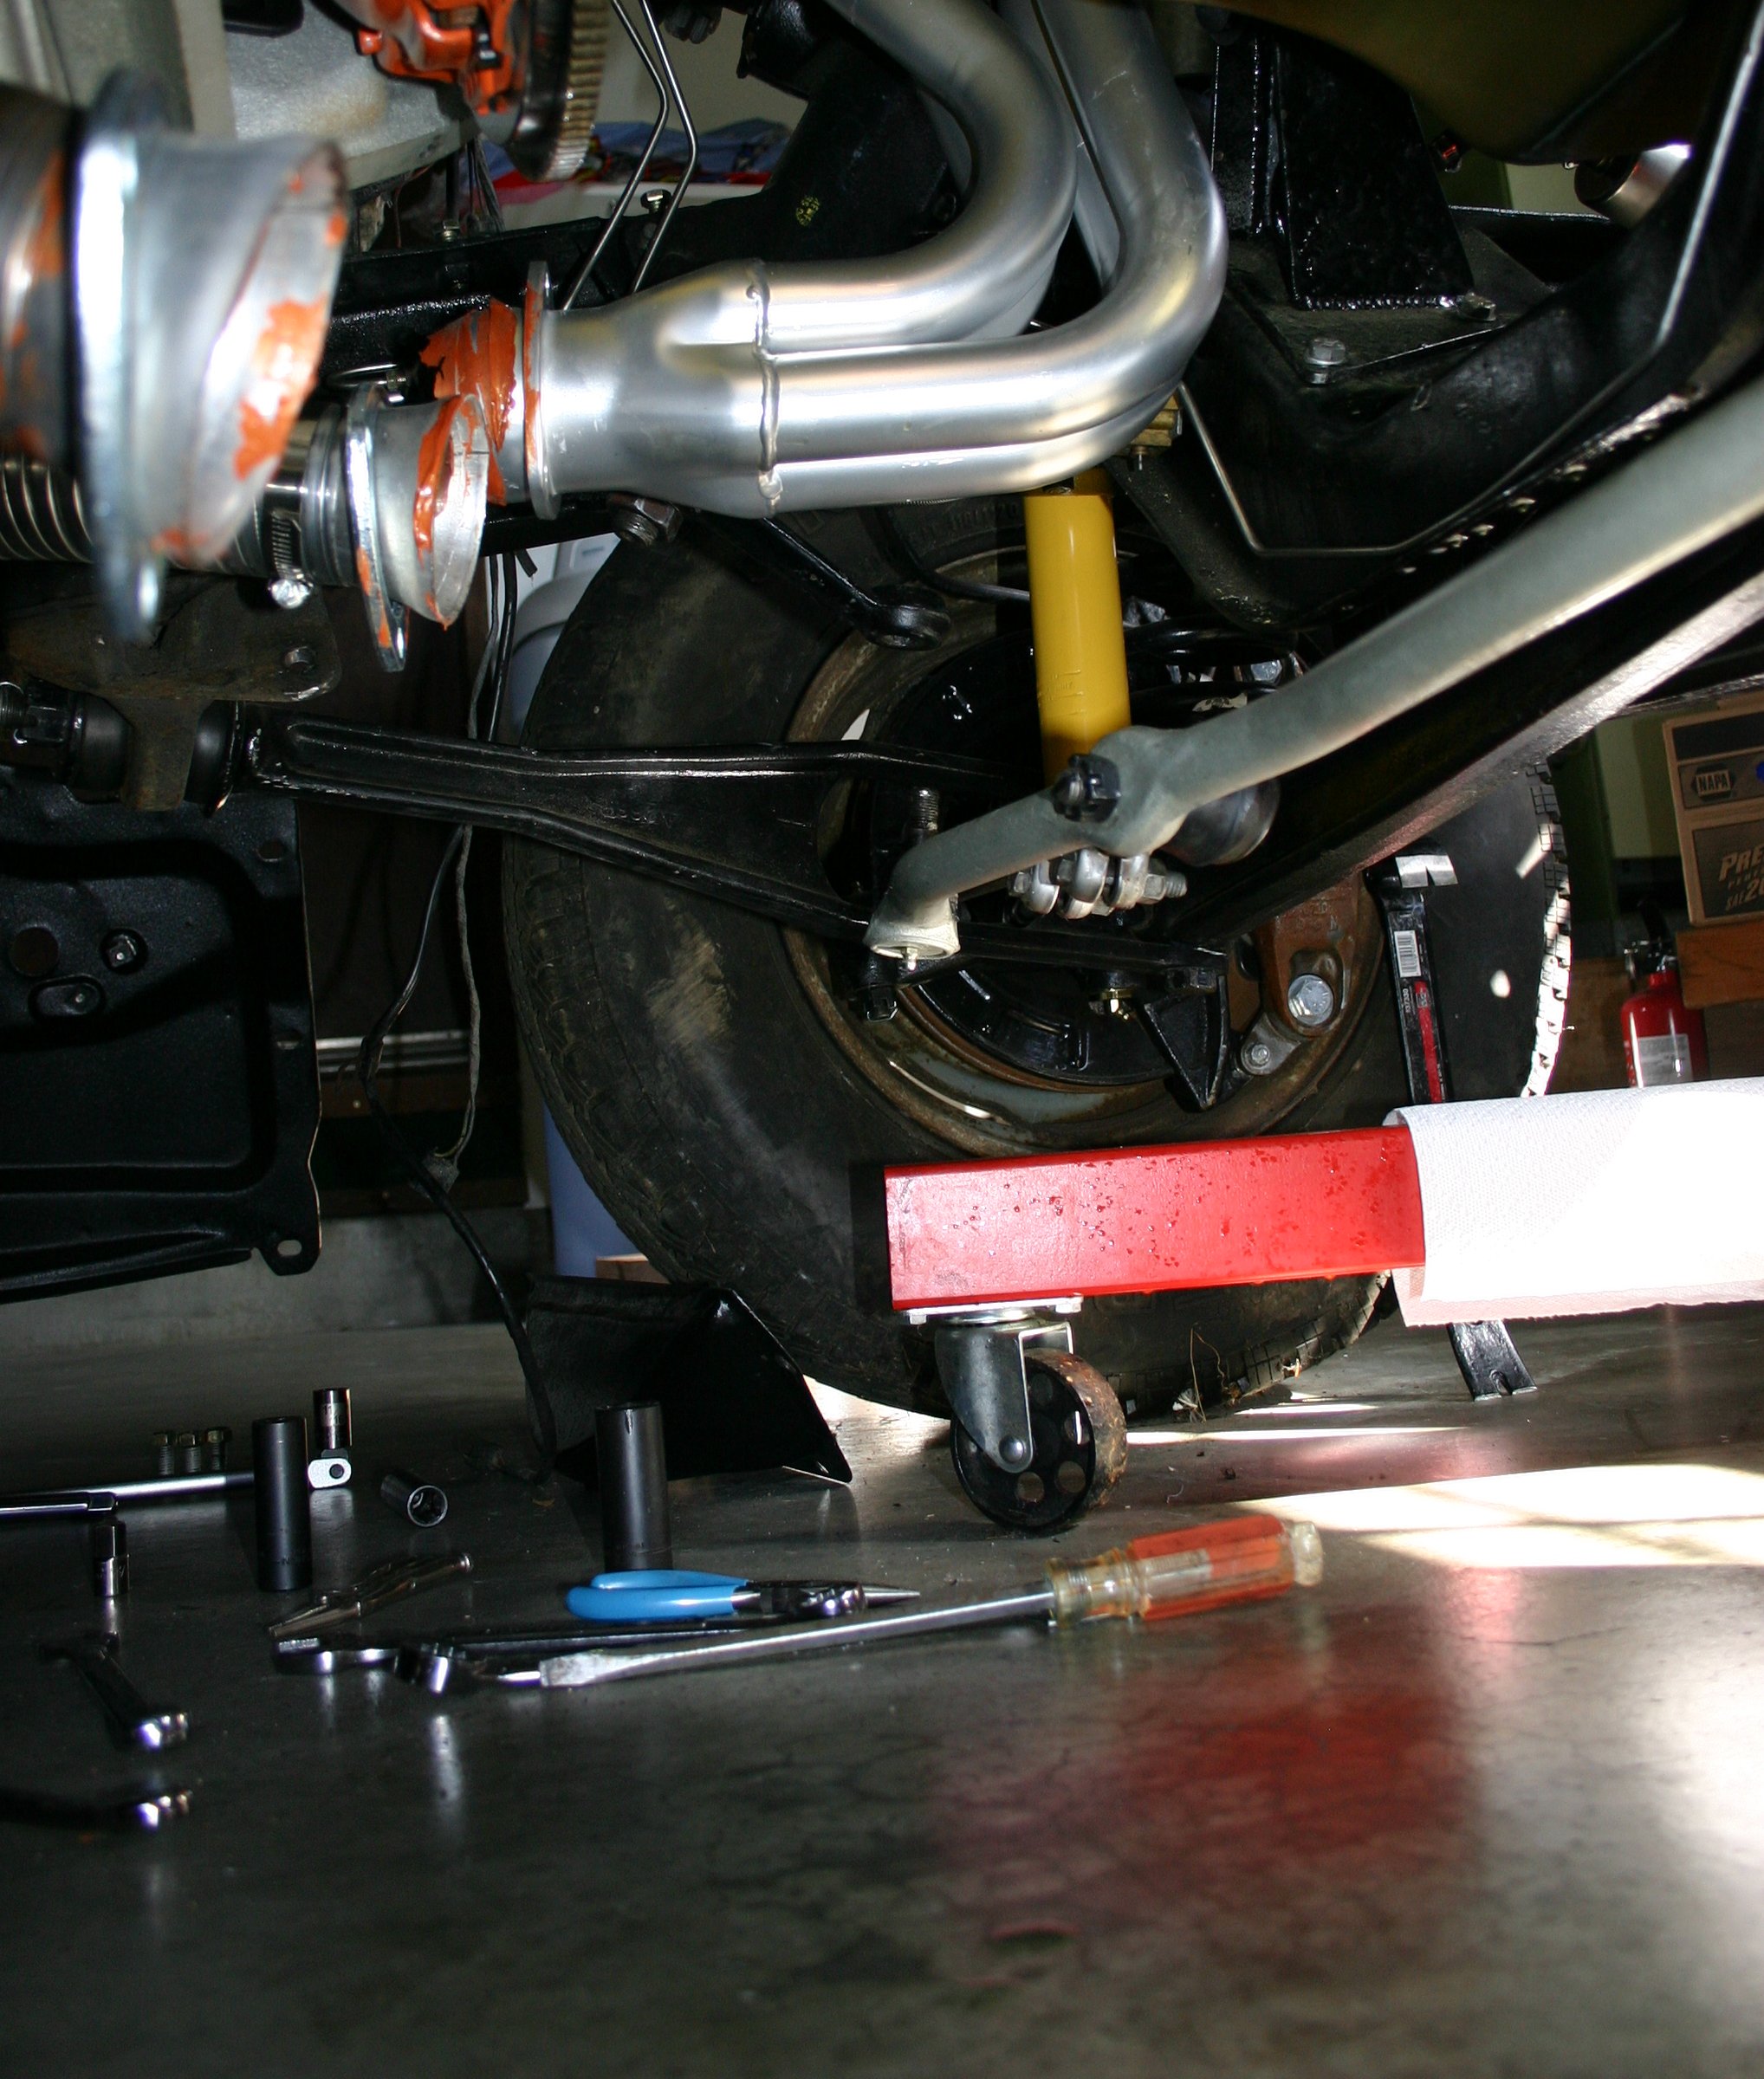
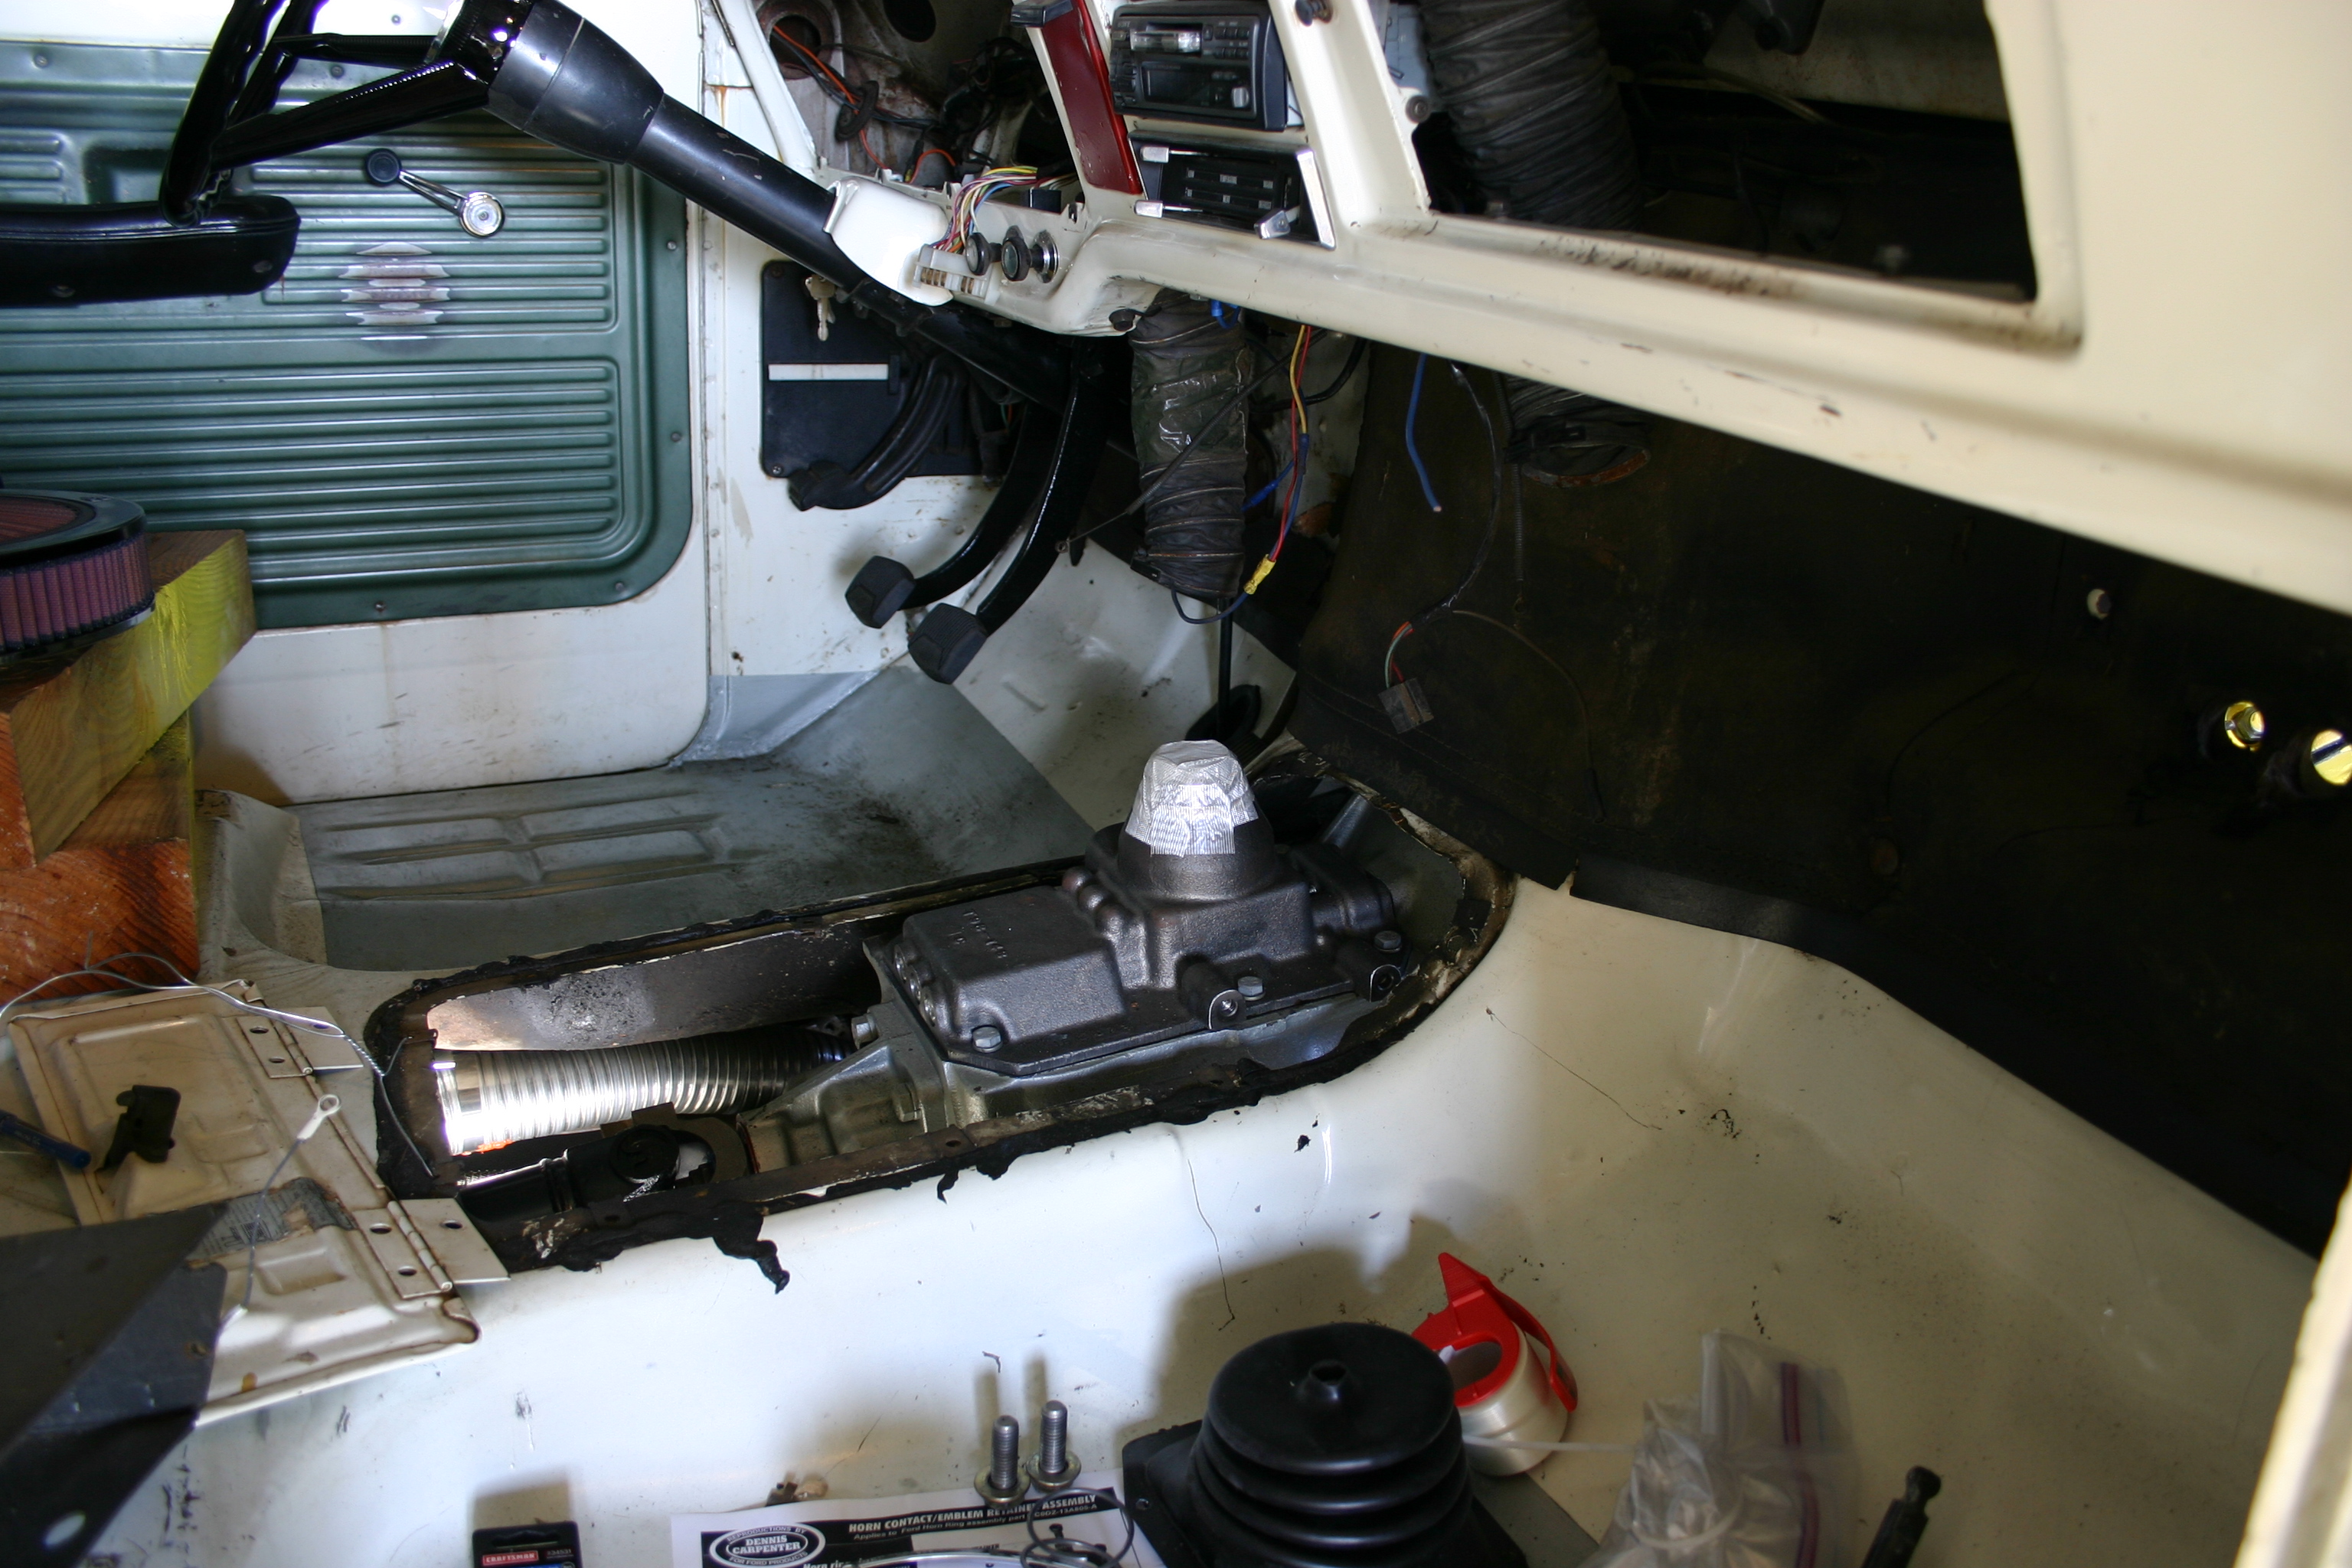
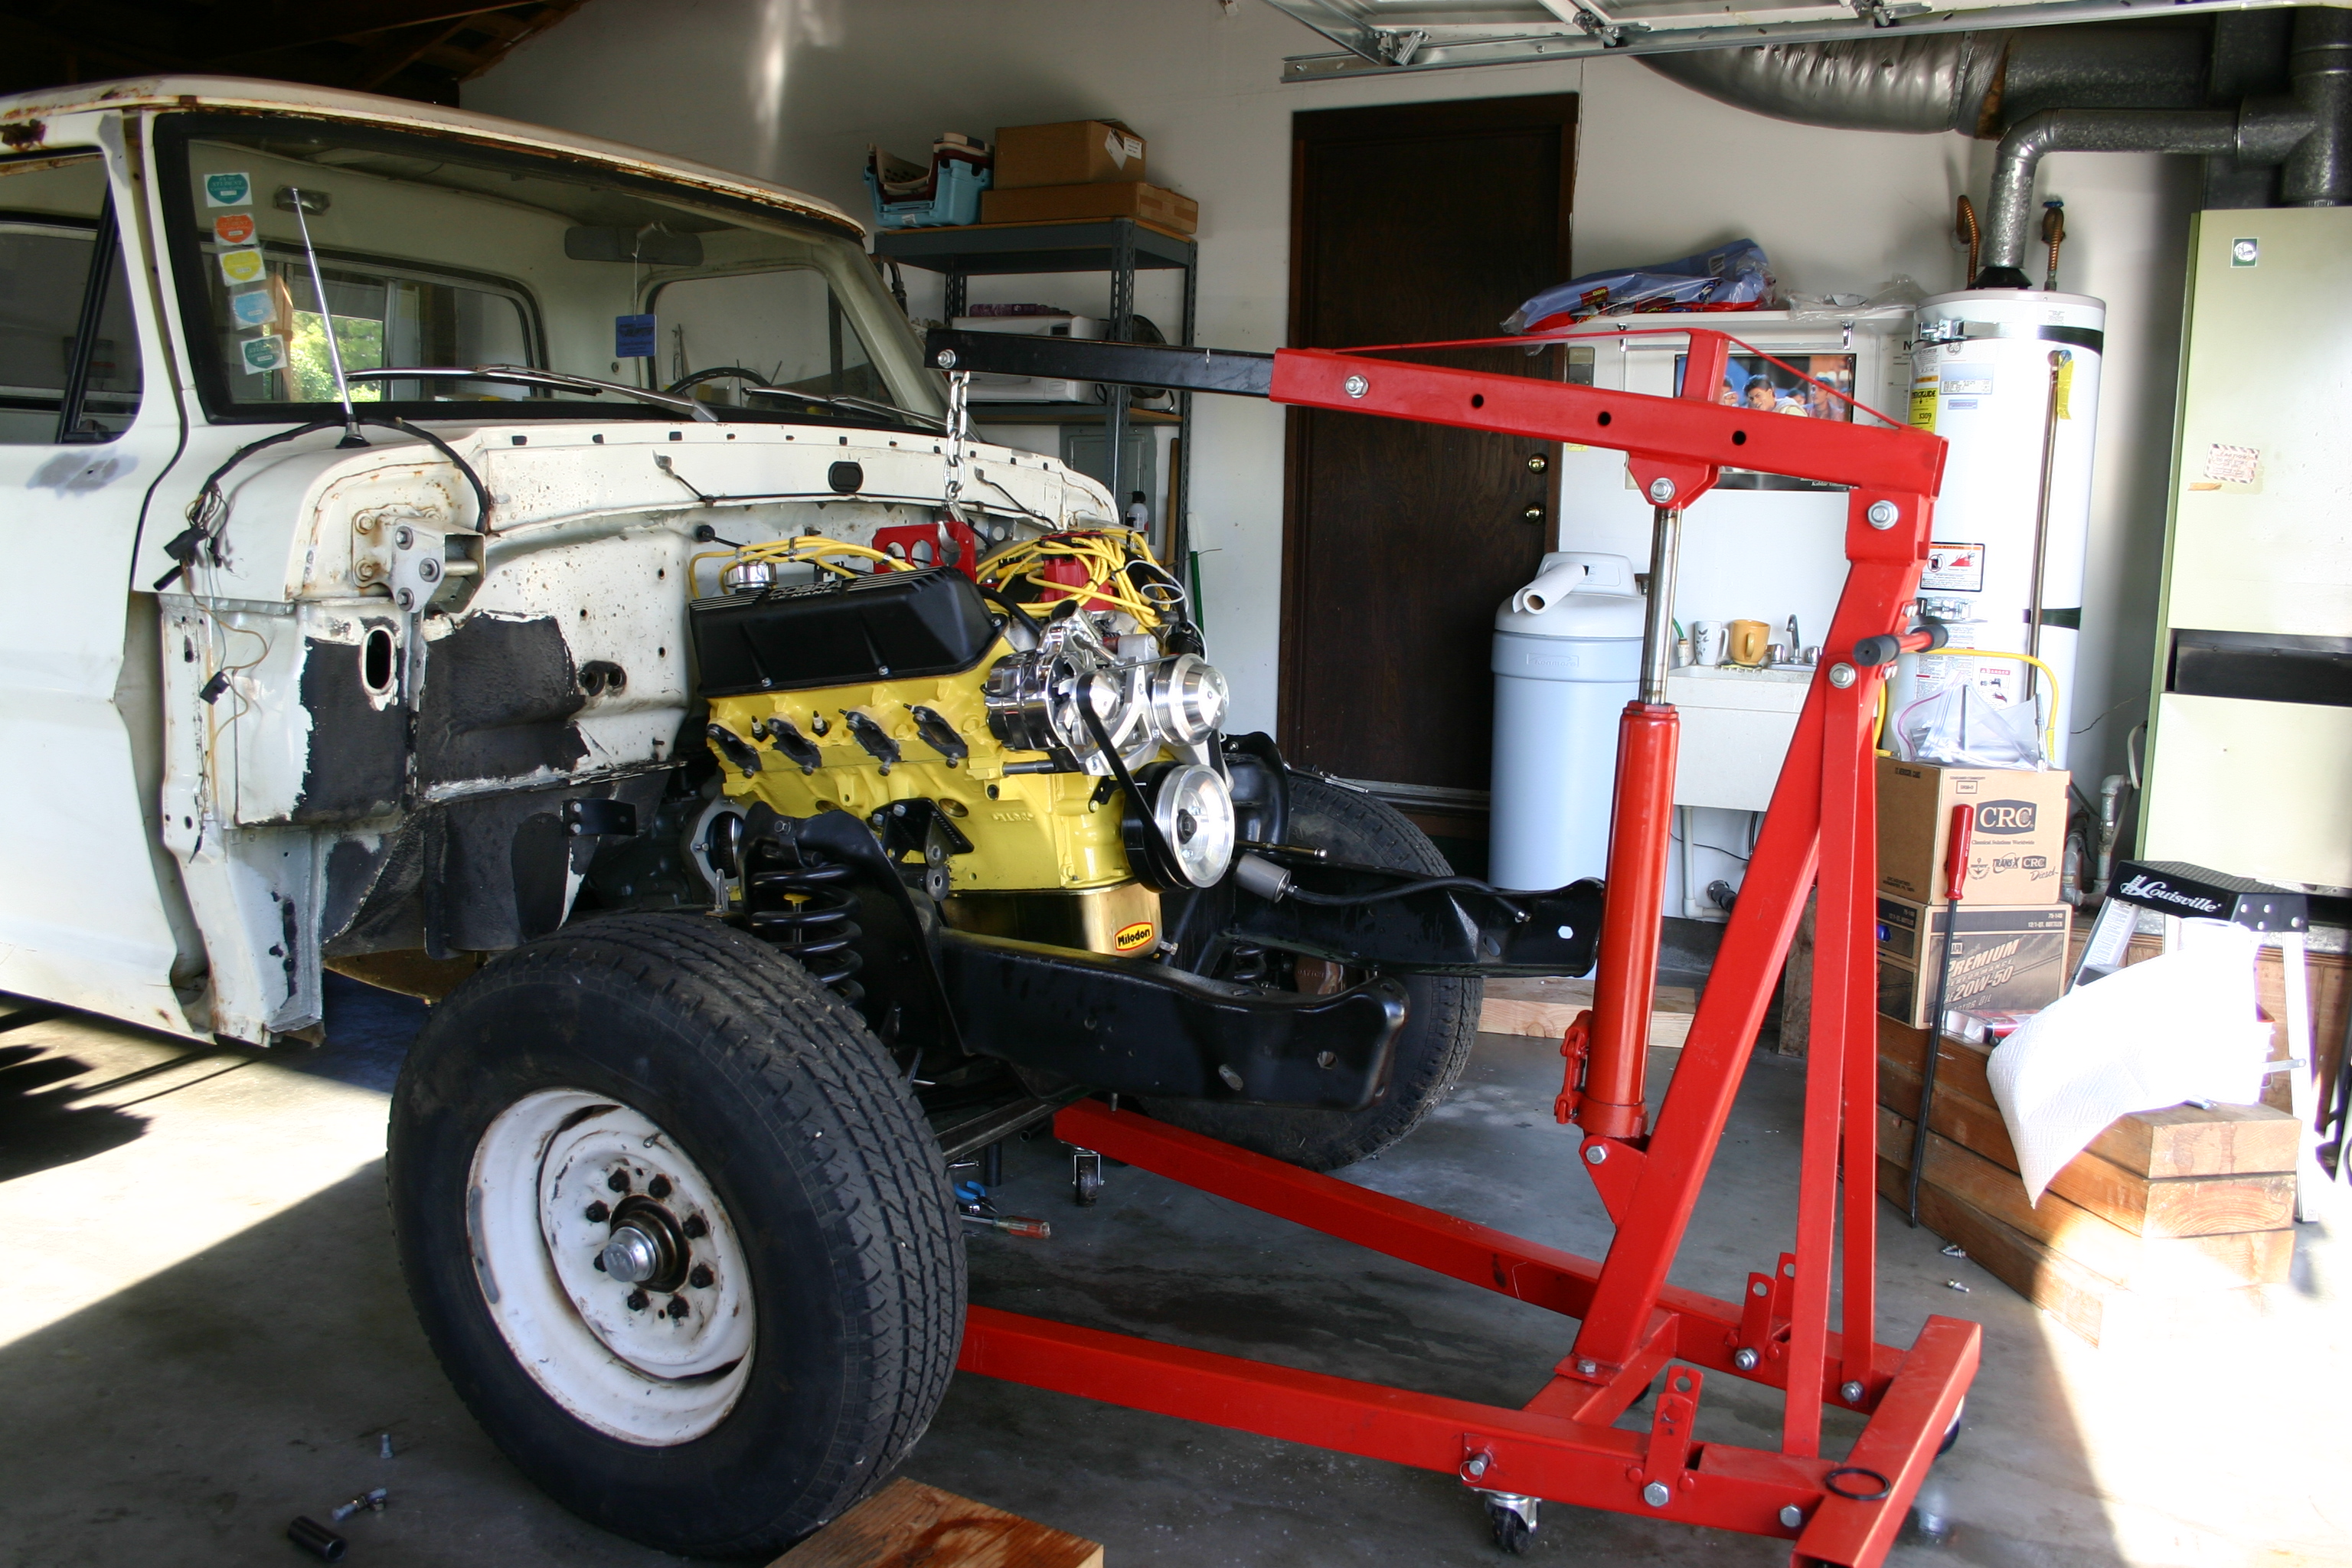
You can simply leave the header in place and lift the engine away from it. Might save you a little trouble, if you are not already beyond that point.
Hey Fordnatic, I think you're right about this! Last night, I thought of that for a moment but didn't want to risk smashing up the header, should the engine sway against it suddenly during the pull. And I needed a pickle fork anyhow! But thanks for this idea!!!
Here's my new fork. It's a USA made KD (2288), which I was very glad to find, after seeing junk tools at all the auto parts stores I'd tried before. They had this on the shelf at Elmer's in Salinas, California. With tax it was $32.68.
 http://www.robroygregg.com/Number50/IMG_4597z.JPG
Thanks for the excellent advice! I'll post another update tonight!
Robroy


