'71 F-250 Diesel conversion and more 01/10 starting back in
Moderator: FORDification
-
rjewkes

- 100% FORDified!

- Posts: 3711
- Joined: Sun Apr 17, 2005 1:09 am
- Location: Missouri, Webb City
- Contact:
"It is better to keep your mouth shut and appear stupid than to open it and remove all doubt." - Mark Twain
'70 f250 4x4 Crew cab 460/C6 '72 F100 390/C6 9.8 MPG AVG. '89 Mercury Cougar LS Dual Exh. V6 . 18.9 MPG AVG. In Town.

I don't want to give em a heart-attack. That is what would happen if I answered the door in the buff. Heck it almost scares me to death when I step out of the shower and look in the mirror.~Mancar1~
fuelly.com
'70 f250 4x4 Crew cab 460/C6 '72 F100 390/C6 9.8 MPG AVG. '89 Mercury Cougar LS Dual Exh. V6 . 18.9 MPG AVG. In Town.
I don't want to give em a heart-attack. That is what would happen if I answered the door in the buff. Heck it almost scares me to death when I step out of the shower and look in the mirror.~Mancar1~
fuelly.com
-
Ranchero50

- Moderator

- Posts: 5799
- Joined: Wed Nov 08, 2006 7:02 pm
- Location: Maryland, Hagerstown
- Contact:
Found the camera... BUNCH of pics from the last couple days
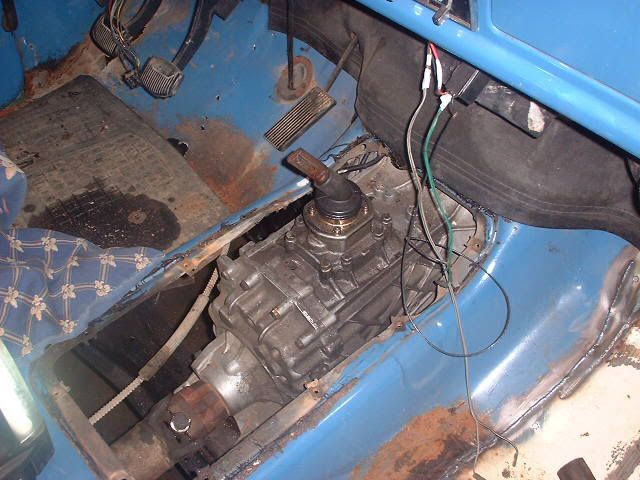
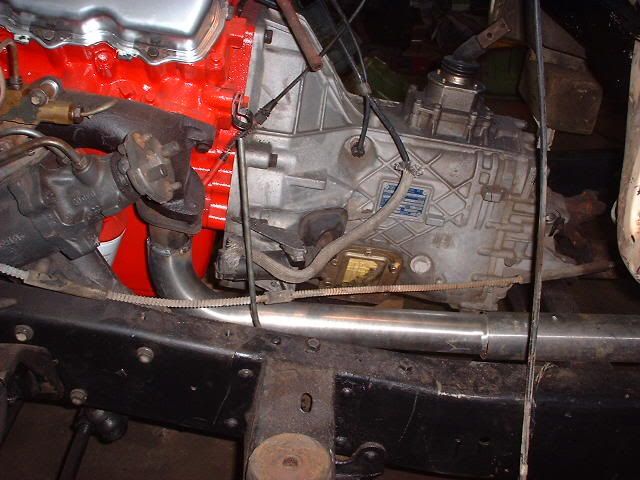
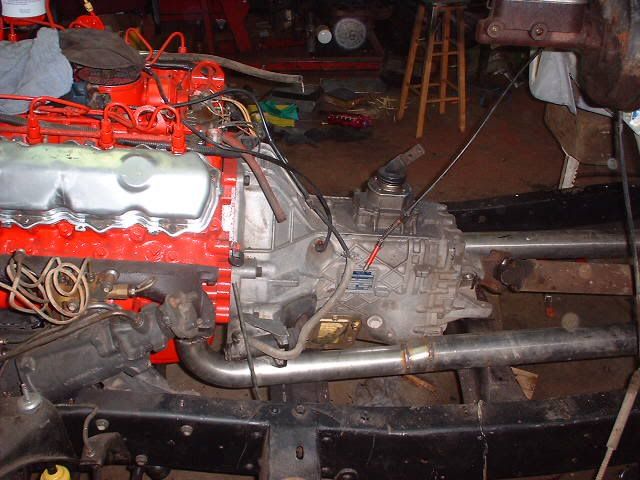
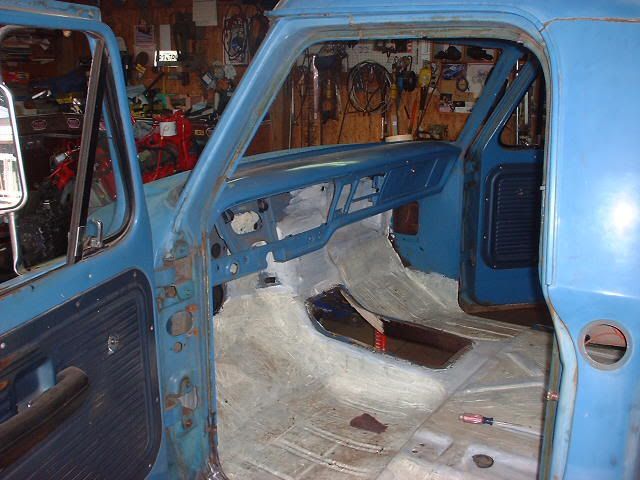
Tranny in tunnel
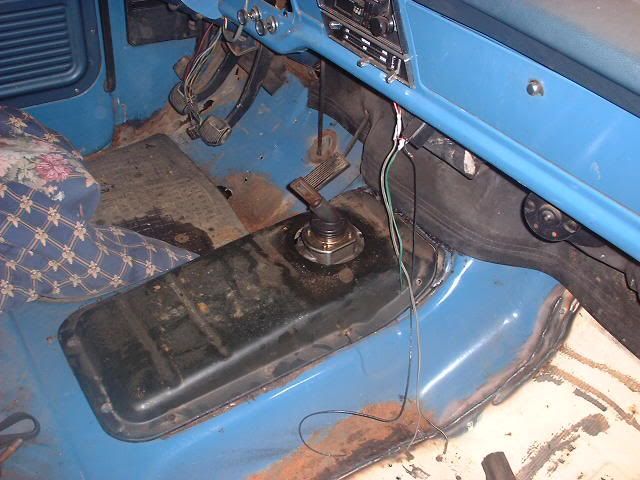
Tranny cover not lined up
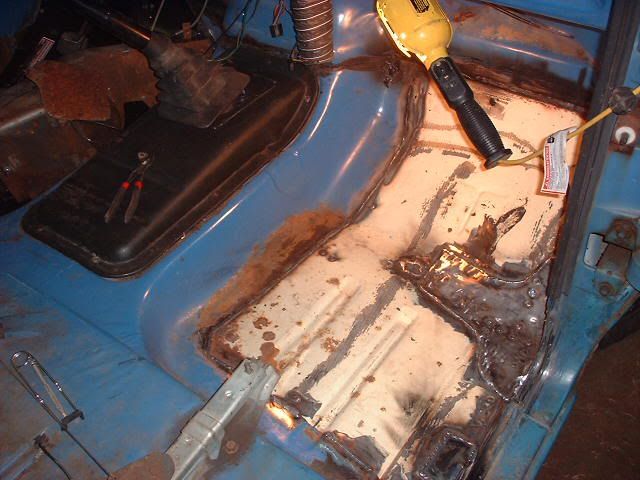
Repair panel repair... Shoulda got a better cab.
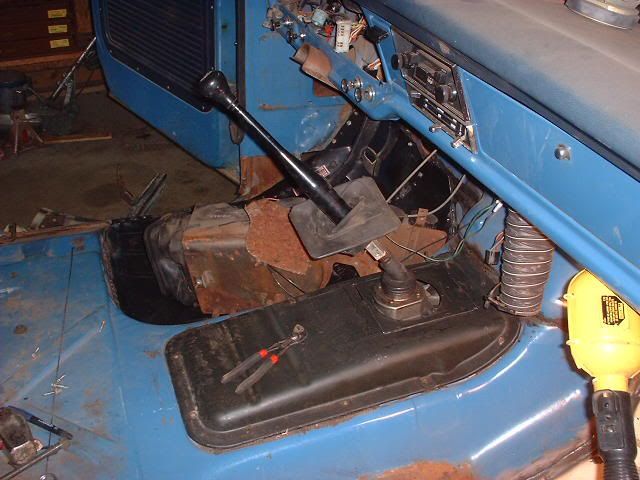
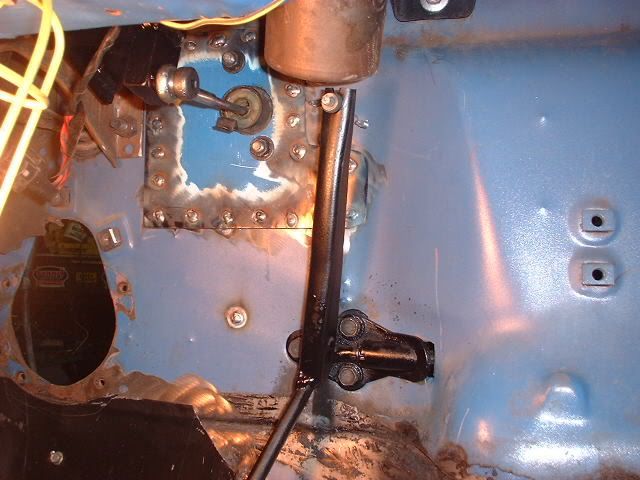
Shifter hole cutout and turned around so it fits correctly
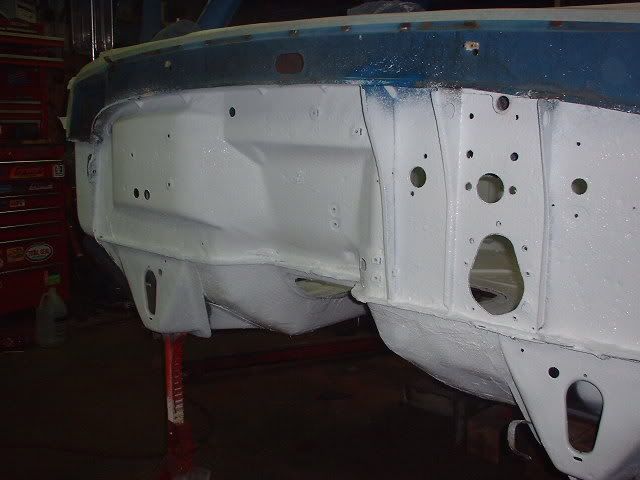
Clutch pedal extension and the inside reinforcing panel for the master cylinder.
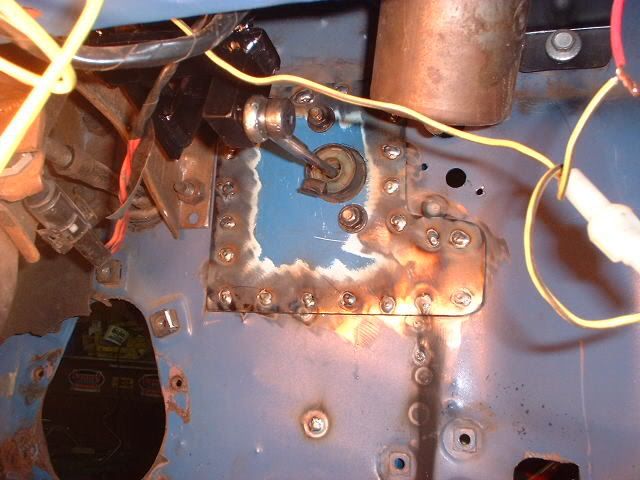
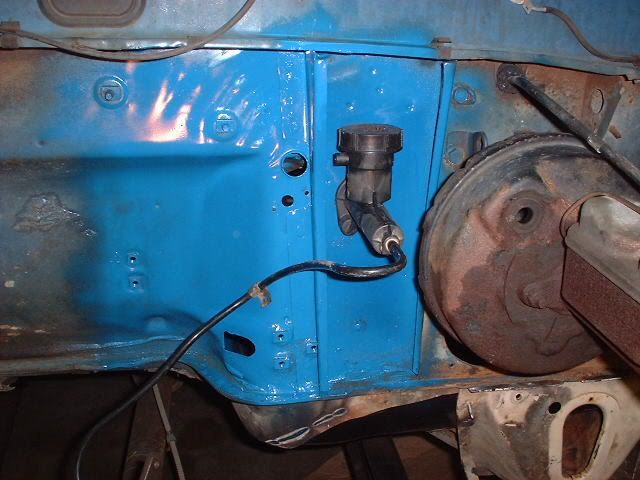
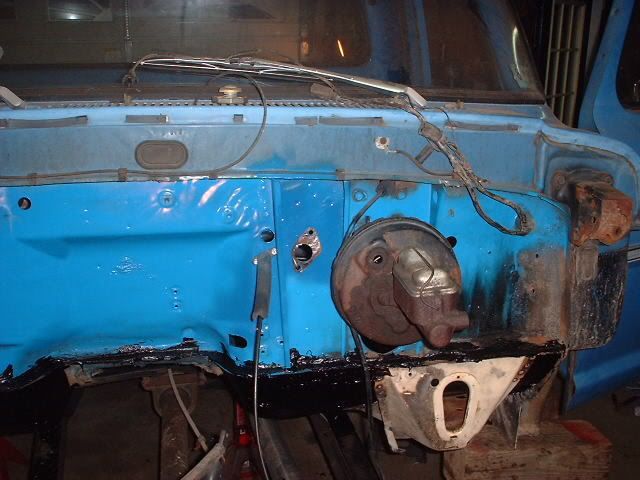
Master cylinder mounted and the new reinforcing rib on the outside. Big hole is for the wiring loom that I'll probably run inside the cab to the new diesel wiring.
Accelerator cable mounted
Modified gas pedal mounted. Had to trim some to clear the wiper motor.
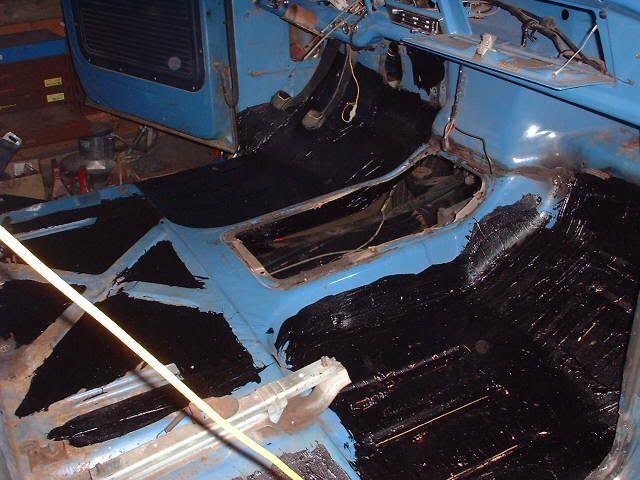
Floors finished and sealed
Exhaust started. 2 1/4 into 2 1/2 stainless into 3" stainless, may even put mufflers on if it needs them.
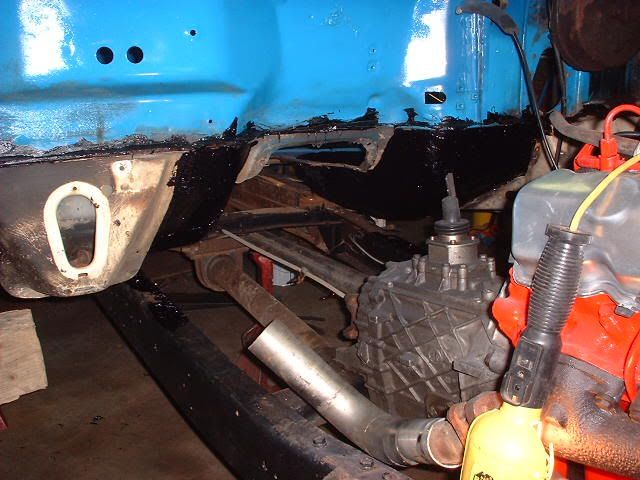
Other side, the band saw blade broke before I got the 90 cut completely...
Bottom of the cab sealed up.
I figure in a couple days I can start reassembly. Decided to put carpet in the cab to cover up the tar and to quiet it down some. Still thinking about the glass balls for sound deadener. Otherwise things are progressing well. I've also been thinking about making a new heater box to put the AC condensor in with the heater. I hate the factory monster box and the underdash ones are a pain.
Jamie
Tranny in tunnel
Tranny cover not lined up
Repair panel repair... Shoulda got a better cab.
Shifter hole cutout and turned around so it fits correctly
Clutch pedal extension and the inside reinforcing panel for the master cylinder.
Master cylinder mounted and the new reinforcing rib on the outside. Big hole is for the wiring loom that I'll probably run inside the cab to the new diesel wiring.
Accelerator cable mounted
Modified gas pedal mounted. Had to trim some to clear the wiper motor.
Floors finished and sealed
Exhaust started. 2 1/4 into 2 1/2 stainless into 3" stainless, may even put mufflers on if it needs them.
Other side, the band saw blade broke before I got the 90 cut completely...
Bottom of the cab sealed up.
I figure in a couple days I can start reassembly. Decided to put carpet in the cab to cover up the tar and to quiet it down some. Still thinking about the glass balls for sound deadener. Otherwise things are progressing well. I've also been thinking about making a new heater box to put the AC condensor in with the heater. I hate the factory monster box and the underdash ones are a pain.
Jamie
-
Mooosman
- New Member

- Posts: 145
- Joined: Thu Jul 20, 2006 10:17 pm
- Location: Las Vegas, NV
re: '71 F-250 Diesel conversion and more
Looks good. I wish I could get my projects moving like that. I'm into week #2 of a disc brake swap and brake overhaul! 
I want to see video when you get that thing running!
Nick
I want to see video when you get that thing running!
Nick
1972 F-100 Custom SWB
-
Ranchero50
- Moderator
- Posts: 5799
- Joined: Wed Nov 08, 2006 7:02 pm
- Location: Maryland, Hagerstown
- Contact:
Last night I out the first coat of sealant on the tar stuff and it worked well. It's the cool coat acrylic roof sealent. Basicly white acrylic paint that dries flat. It's similiar to the lizard skin base. I'm going to order some microscopic glass balls to add as filler and coat it again. Going to do the cab corners this weekend while waiting on the materials to show up.
Jamie
Jamie
'70 F-350 CS Cummins 6BT 10klb truck 64k mile Bahama Blue
Contact me for CNC Dome Lamp Bezels and Ash Tray pulls.
Contact me for CNC Dome Lamp Bezels and Ash Tray pulls.
-
Ranchero50
- Moderator
- Posts: 5799
- Joined: Wed Nov 08, 2006 7:02 pm
- Location: Maryland, Hagerstown
- Contact:
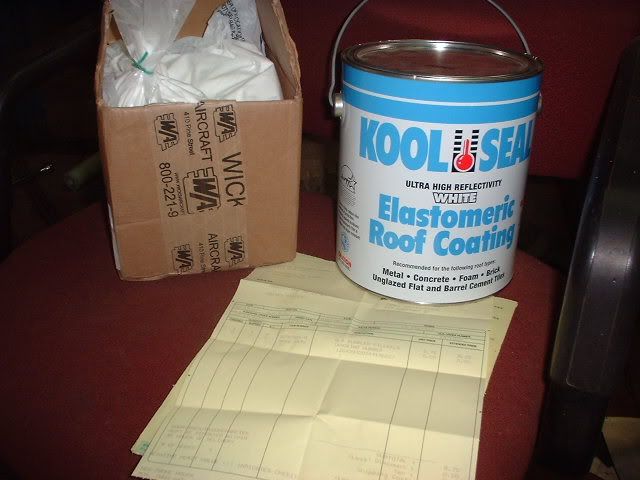
Some pics from the last couple days. Yesterday I got the glass bubbles from Wicks aircraft supply and my paint is in at Lowes so I need to stop there on the way home. Maybe it'll be in paint by Wednesday. I have a 12 on coming up over next weekend and need to get this thing running.
Driver side exhaust started as a 2.5" 90 and extension. I fitted a 2.5 - 3" adaptor on and ran out the rest of a stick of 3" to the back of the cab. Not sure where it's going from there until it runs.
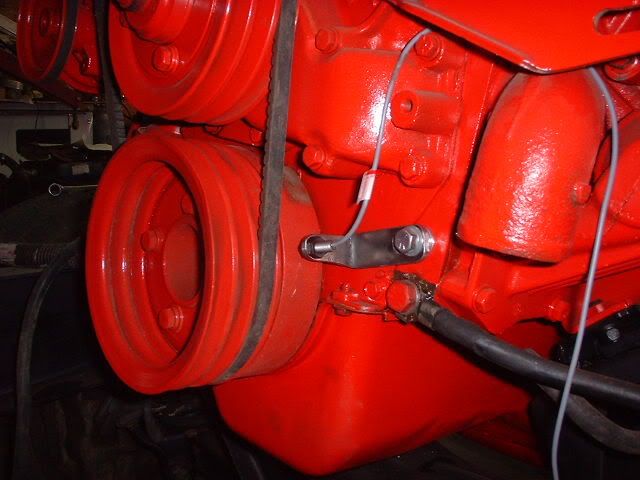
This is the tachometer prox and the little bracket I fabbed up. I milled the slots to make it adjustable. I still need to drill and tap the balancer and put the 1/4-20 allen bolts in that will work as pickups for the prox.
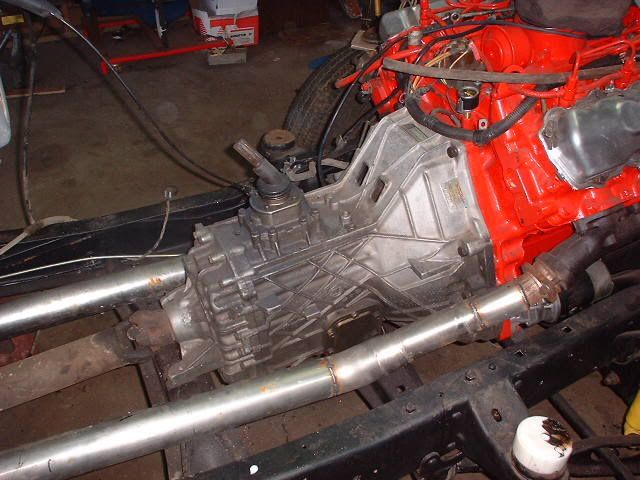
The passenger side exhaust with a couple kicks of 2.5" going into 3". I'll probably fab in a crossover once it's running and everything clears. Just wanted to leave an allowance to shift stuff around at this point.
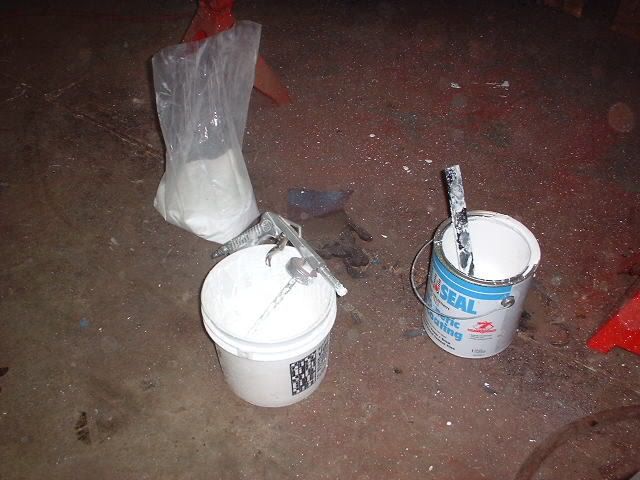
Finally a pic of the microscopic glass balls and the elestrometric acrylic paint that they are going to get suspended in to make some homemade lizard skin. The paint stays flexible. The balls have no weight and won't hold heat at all. The 6x6x6 box felt empty. The paint was $9 at Lowes and the balls were $18 for a gallon shipped to me.
Driver side exhaust started as a 2.5" 90 and extension. I fitted a 2.5 - 3" adaptor on and ran out the rest of a stick of 3" to the back of the cab. Not sure where it's going from there until it runs.
This is the tachometer prox and the little bracket I fabbed up. I milled the slots to make it adjustable. I still need to drill and tap the balancer and put the 1/4-20 allen bolts in that will work as pickups for the prox.
The passenger side exhaust with a couple kicks of 2.5" going into 3". I'll probably fab in a crossover once it's running and everything clears. Just wanted to leave an allowance to shift stuff around at this point.
Finally a pic of the microscopic glass balls and the elestrometric acrylic paint that they are going to get suspended in to make some homemade lizard skin. The paint stays flexible. The balls have no weight and won't hold heat at all. The 6x6x6 box felt empty. The paint was $9 at Lowes and the balls were $18 for a gallon shipped to me.
-
dablack00

- Blue Oval Fan

- Posts: 695
- Joined: Wed Jan 12, 2005 7:32 am
- Location: Texas, Lufkin
re: '71 F-250 Diesel conversion and more
Looks good. I really like to see something different. I'm not sure I would have gone the same way, but I don't know anything about diesels....so I'm looking forward to hearing about the results.
Austin
Austin
-
Zeke71250

- New Member
- Posts: 67
- Joined: Tue Feb 20, 2007 9:20 pm
- Location: Ohio
re: '71 F-250 Diesel conversion and more
I try real hard not to be a dummy, but I ain't getting the concept of the roof coating and glass combo - where is that gonna be applied and what's the purpose of mixing the two??
"Oscar the Grouch IS Boxwood Green!" - flyboy2610
-
Ranchero50
- Moderator
- Posts: 5799
- Joined: Wed Nov 08, 2006 7:02 pm
- Location: Maryland, Hagerstown
- Contact:
Do a google search on lizard skin and search in the 'interior' section of this site for a link to a thread about making homebrewed lizard skin. Summit sells two gallons for $170 or so and I have $24 in one so far. Microscopic glass balls or bubbles are excellent insulators and since they are microscopic they mix with paint. The elastrometric paint allows them to flex. Accoding to the claims a credit card thickness of this mixture knocks 3-6db of interior noise down and 20-30 degrees of temperature. My goal is to spray the interior roof, floors, firewall, door interiors and spray the engine bay floor and firewall to eliminate as much heat and diesel noise as I can. From the testamonials from the hotrod site it seems to work so we'll see. As you know, these trucks heat up and stay hot in the summer and get really cold really quickly in the winter. The gallon of glass bubbles felt like an empty box, but when I held my hand against the bag they didn't heat up at all.
I just need to find a undercoating gun to spray them on and then get some color on it so I can set the cab and get this thing finished.
Jamie
I just need to find a undercoating gun to spray them on and then get some color on it so I can set the cab and get this thing finished.
Jamie
-
Ranchero50
- Moderator
- Posts: 5799
- Joined: Wed Nov 08, 2006 7:02 pm
- Location: Maryland, Hagerstown
- Contact:
Here we go again... Todays work...
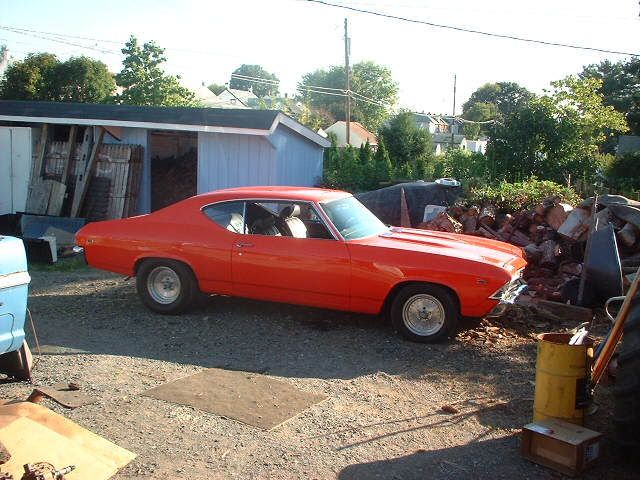
Yep, it's a Chevy, '69 Chevelle, mild 454 doesn't run right, Carb all screwed up and the ignition sucks too. Going to figure it out in the morning.
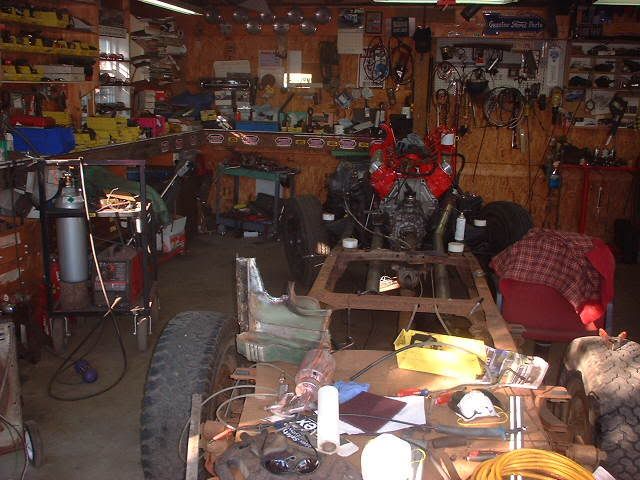
First thing I did today was use the engine crane to pick the cab off of the frame using two peices of chain going to the crane hook. Front set was to the lower door hinge bolt and the rear chain went to the rear seat mount bolts. Picked it up clean. The glass is missing because when I was digging out the old sealer it cracked so I went a head and cut it out. The rear cut right out. Luckily the guy with the Chevelle has a windshield down at the farm.
The frame somewhat cleaned up. I filled a trash can with dirt and junk off of the floor. What a mess.
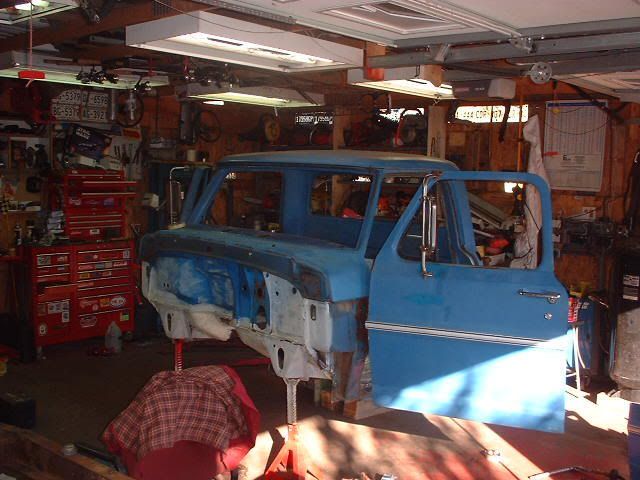
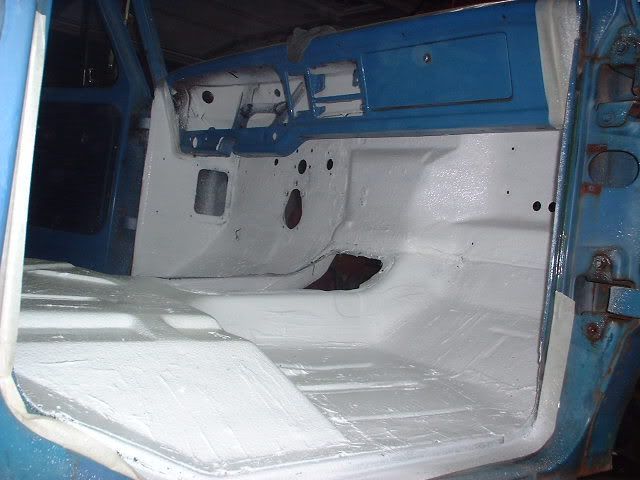
Cab interior with one coat of roofing sealer to act as a primer and keep the tar stuff from getting messy. I strpped the cab down before lunch, should have done that long ago.
OK, lizard skin time. My neighbor stopped by with the gun section for his undercoating gun, it's the same thing Eastwood sells for undercoating. He uses it at work for the rock guard Ford puts on rockers. To make it work I had to mix the paint and balls about 50-50. Any thicker and it wouldn't draw. I also found when the pressure dropped it didn't spray very well.
Firewall time. It was kind of a pain to get going because I had to hold the gallon tub of mix up with the gun so it could draw. The stuff shot out just like undercoating and I understand why they call it lizard skin, it has the texture of lizard skin. The overpsray wiped right off.
Interior. One cool thing about using the roof paint is it's water clean up so I just kept a wet shop rag handy for when the compressor fell behind to clean up the overspray or splatter.
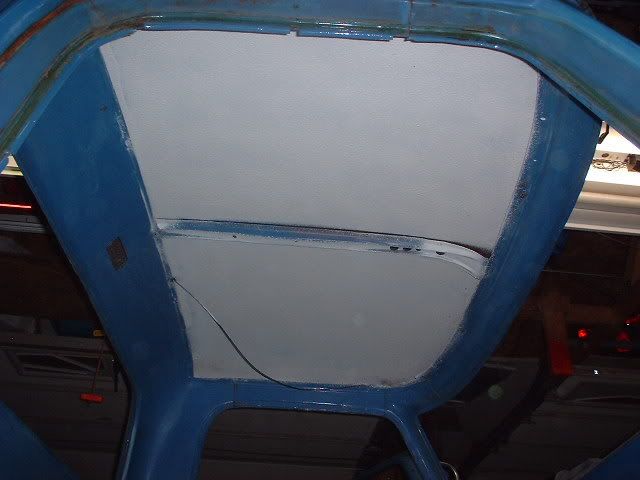
Roof, sprayed on really nice and didn't drip or make much of a mess. Once again, wipe off the splatter and it was done.
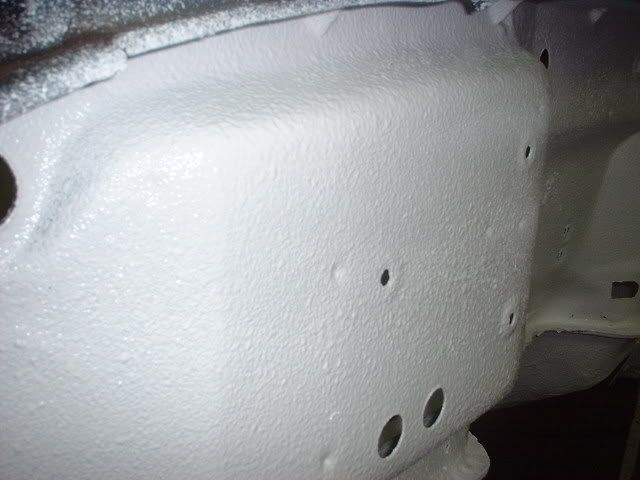
Close up of the lizard texture. We'll see how it looks in the morning.
Tomorow I hope to get the cab corners welded in while this stuff cures and maybe get another coat on. Plus I have to prep the outside for paint and try to get the kid to scrape and paint the rest of the frame. I plan on putting on a second coat hitting inside the cowl area and doing the fuel tank etc. I almost did the back wall posts, but I want to see how this stuff looks when it dries to see if I want it showing that much or if I can actually sand it smooth where it shows.
Jamie
Yep, it's a Chevy, '69 Chevelle, mild 454 doesn't run right, Carb all screwed up and the ignition sucks too. Going to figure it out in the morning.
First thing I did today was use the engine crane to pick the cab off of the frame using two peices of chain going to the crane hook. Front set was to the lower door hinge bolt and the rear chain went to the rear seat mount bolts. Picked it up clean. The glass is missing because when I was digging out the old sealer it cracked so I went a head and cut it out. The rear cut right out. Luckily the guy with the Chevelle has a windshield down at the farm.
The frame somewhat cleaned up. I filled a trash can with dirt and junk off of the floor. What a mess.
Cab interior with one coat of roofing sealer to act as a primer and keep the tar stuff from getting messy. I strpped the cab down before lunch, should have done that long ago.
OK, lizard skin time. My neighbor stopped by with the gun section for his undercoating gun, it's the same thing Eastwood sells for undercoating. He uses it at work for the rock guard Ford puts on rockers. To make it work I had to mix the paint and balls about 50-50. Any thicker and it wouldn't draw. I also found when the pressure dropped it didn't spray very well.
Firewall time. It was kind of a pain to get going because I had to hold the gallon tub of mix up with the gun so it could draw. The stuff shot out just like undercoating and I understand why they call it lizard skin, it has the texture of lizard skin. The overpsray wiped right off.
Interior. One cool thing about using the roof paint is it's water clean up so I just kept a wet shop rag handy for when the compressor fell behind to clean up the overspray or splatter.
Roof, sprayed on really nice and didn't drip or make much of a mess. Once again, wipe off the splatter and it was done.
Close up of the lizard texture. We'll see how it looks in the morning.
Tomorow I hope to get the cab corners welded in while this stuff cures and maybe get another coat on. Plus I have to prep the outside for paint and try to get the kid to scrape and paint the rest of the frame. I plan on putting on a second coat hitting inside the cowl area and doing the fuel tank etc. I almost did the back wall posts, but I want to see how this stuff looks when it dries to see if I want it showing that much or if I can actually sand it smooth where it shows.
Jamie
-
layedout72
- Blue Oval Guru

- Posts: 1280
- Joined: Fri Apr 21, 2006 5:11 pm
- Location: Mississippi, Hattiesburg
re: '71 F-250 Diesel conversion and more
That looks interesting, and it may be what I do to the truck for the winter. I bet it holds heat just like it does cooling off the truck...
-
Ranchero50
- Moderator
- Posts: 5799
- Joined: Wed Nov 08, 2006 7:02 pm
- Location: Maryland, Hagerstown
- Contact:
It actually works too... Did the drop light test this evening on the firewall and door shell. After four minutes of hanging on the firewall the inside was 'warm' to the touch, but not nearly hot. After a minute of hanging on the door I nearly burned my hand on the sheetmetal. The firewall has skin on the inside and out, the door nothing. I'm stoked!!!
On the Chevelle, it suffered from bad gas and $20 of fresh 87 octane made a world of difference. I put another 750 on it and it didn't make much difference except run worse. Since it was about out of gas I put some in and it started running better. The interior did get pretty hot after running it around for an hour flusing out the gas tank the old fashioned way. The old 454 really moved out when the secondaries opened up.
I also did a junk yard trip this morning and got a near perfect firewall insulation pad and some other bits and peices for $30. Sadly a bunch of the bumps are gone. He's cleaning out the stuff thats missing engines and sheetmetal. The truck the pad came out of was last registered in 1990...
I don't know what I'm going to get into tomorow, possibly the cab corners so I can get thisthing back together...
Jamie
-
69CSF250
- New Member
- Posts: 84
- Joined: Wed Aug 09, 2006 11:40 am
- Location: Virginia
re: '71 F-250 Diesel conversion and more
looking good! what part of maryland are you in?
-
69CSF250
- New Member
- Posts: 84
- Joined: Wed Aug 09, 2006 11:40 am
- Location: Virginia
re: '71 F-250 Diesel conversion and more
DUH never mind i just saw it hagerstown...
-
Ranchero50
- Moderator
- Posts: 5799
- Joined: Wed Nov 08, 2006 7:02 pm
- Location: Maryland, Hagerstown
- Contact:
Yep, Hagerstown, thirty minutes from three other states... Today I fitted one of the cab corners and finished prepping and painting the door panels and steering column. They went down into the shed to cure.
Didn't do much else except got my 4yo from school in the Chevelle and spent the afternoon with him.
Jamie
Didn't do much else except got my 4yo from school in the Chevelle and spent the afternoon with him.
Jamie
-
rjewkes
- 100% FORDified!
- Posts: 3711
- Joined: Sun Apr 17, 2005 1:09 am
- Location: Missouri, Webb City
- Contact:
wow with your floor paintd i can't tell you welded in new patches.
"It is better to keep your mouth shut and appear stupid than to open it and remove all doubt." - Mark Twain
'70 f250 4x4 Crew cab 460/C6 '72 F100 390/C6 9.8 MPG AVG. '89 Mercury Cougar LS Dual Exh. V6 . 18.9 MPG AVG. In Town.
I don't want to give em a heart-attack. That is what would happen if I answered the door in the buff. Heck it almost scares me to death when I step out of the shower and look in the mirror.~Mancar1~
fuelly.com